Leopard 2 MBT 135th Model By Lee Step By Step Full Build

Leopard 2 135th Scale Model

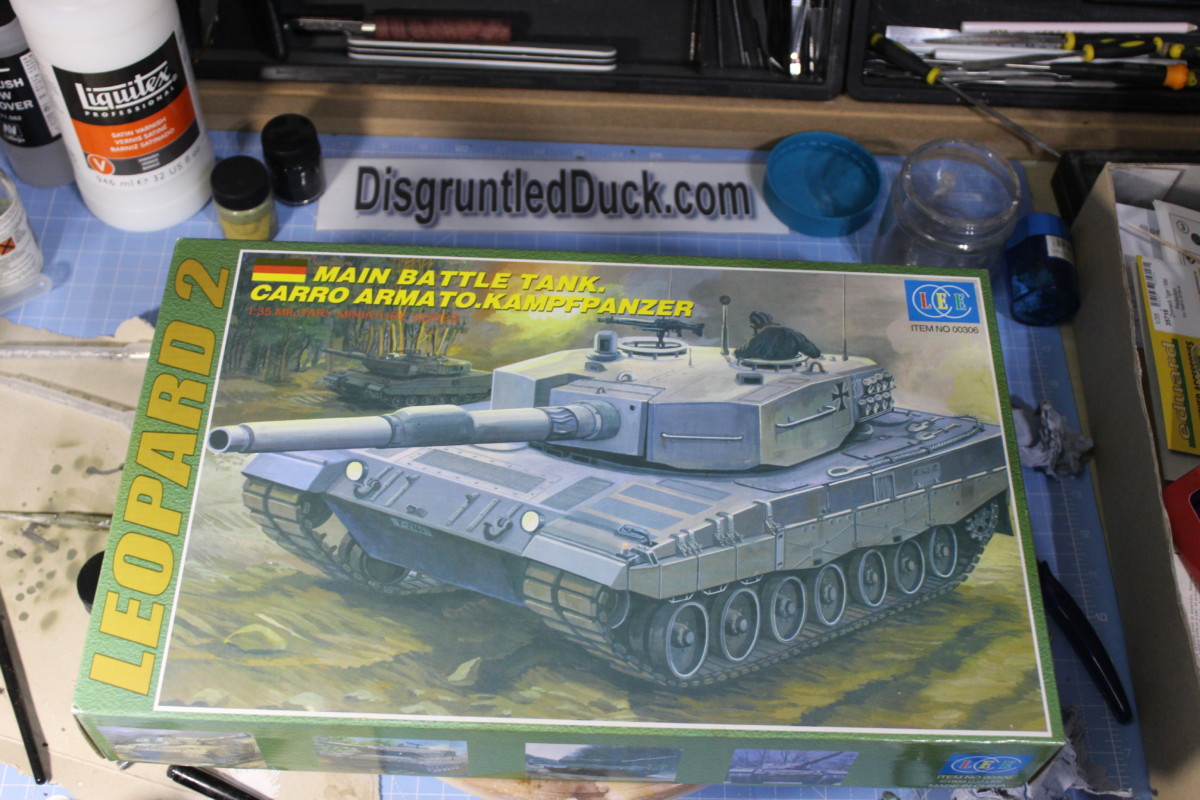
More Model Tanks! I picked this little guy up on eBay. It is a Leopard 2 Scale Model made by Lee. I have never heard of this company before but the model looks good out of the box.

Lee 1/35th Scale Model Main Battle Tank Leopard 2

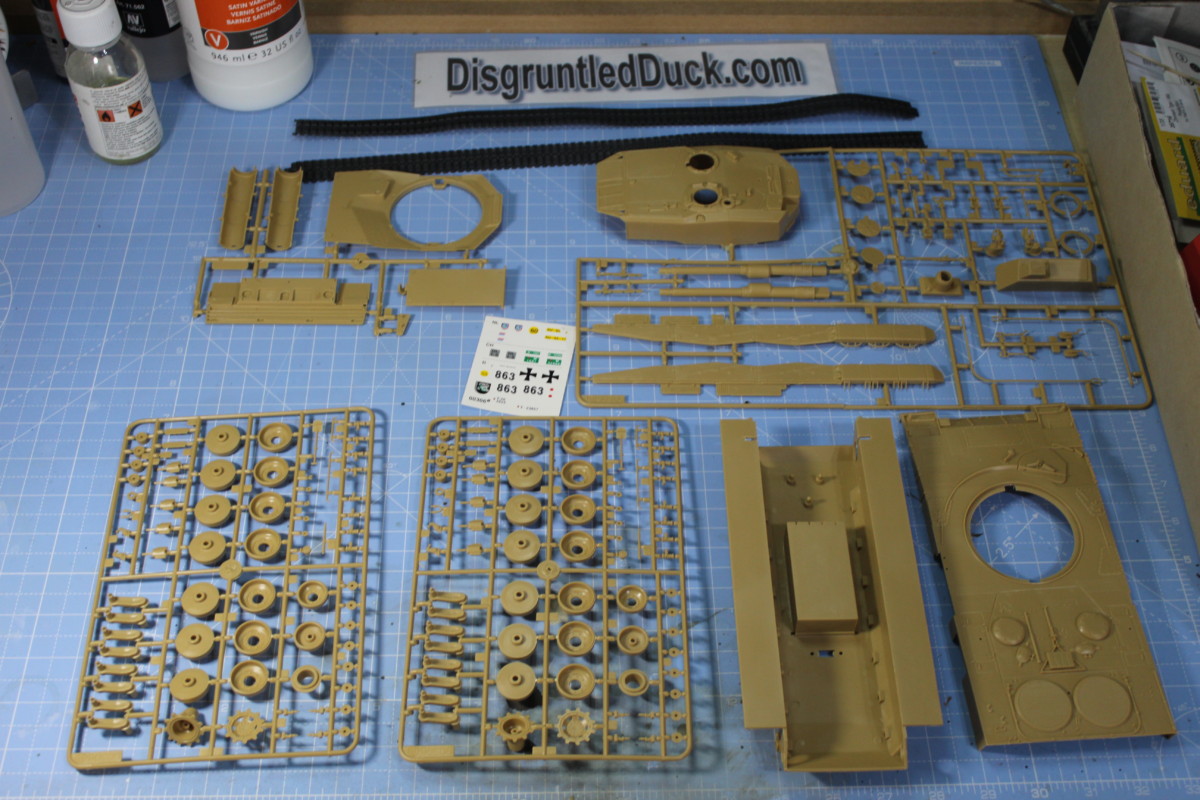
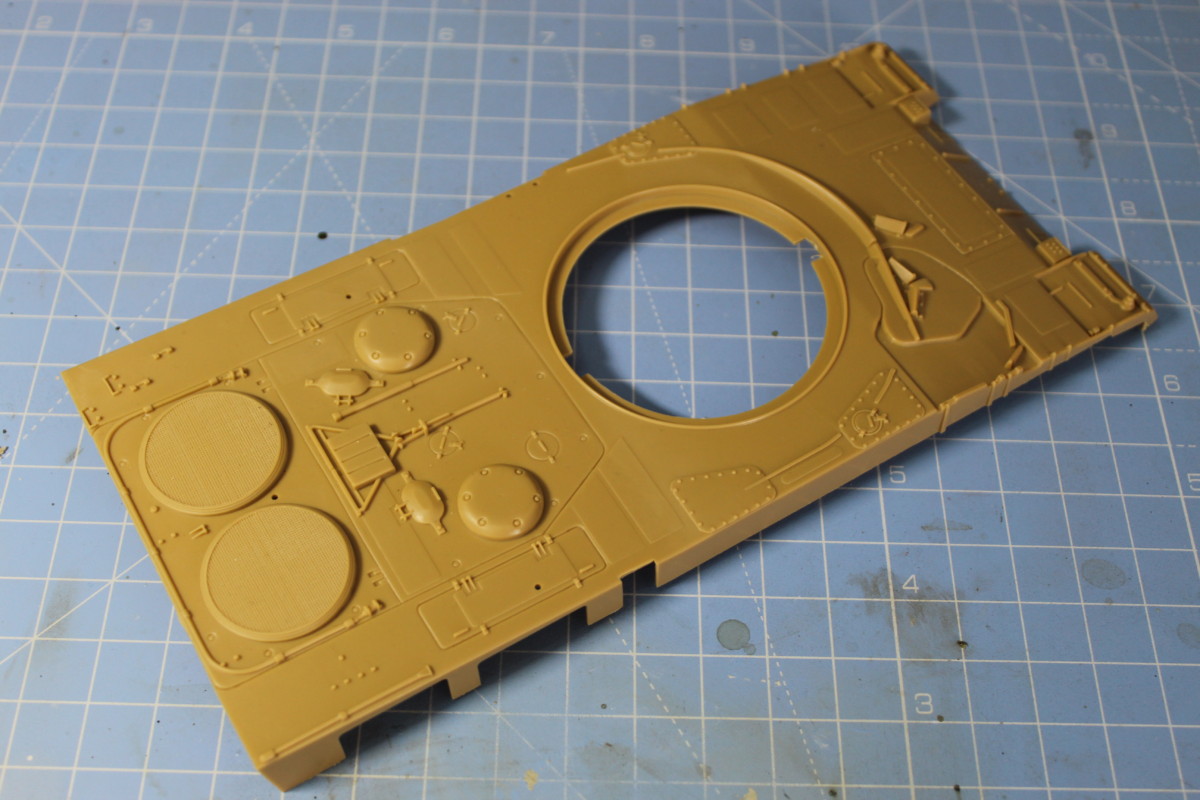
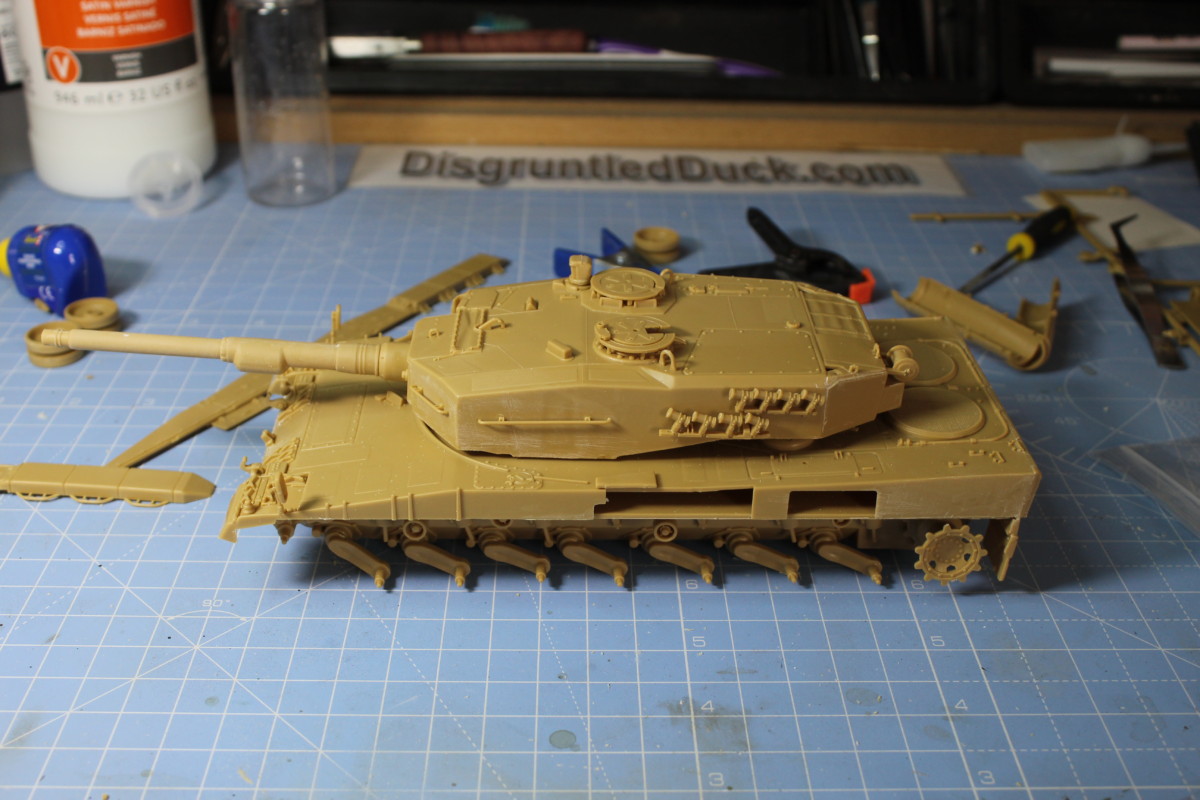
As you can see there are not a load of parts however the body of the hull is very detailed, to begin with.

The Parts Of The Leopard 2 Main Battle Tank Scale Model .
The Parts Of The Leopard 2 Tank Laid Out, There Are Not A Load Of Parts But The Tank Body Is Already Quite Detailed.

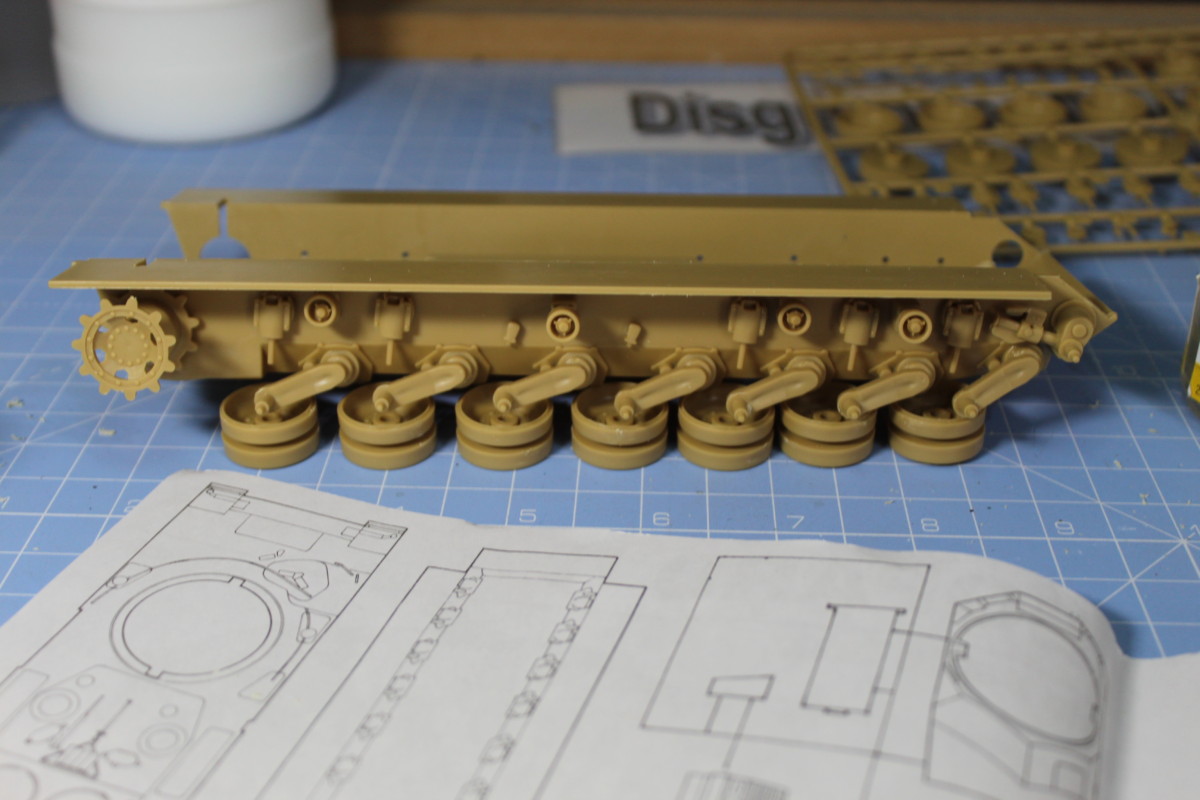
I have now fitted the torsion bars and suspension to the hull of the tank. As you can see there is a lot of detail so far, a clean fit and not too much flashing on the parts.

The Suspension And Torsion Bars Fitted To The Leopard 2 MBT.
Showing Some Of The detail on the Lee Leopard 2 Tank
As You Can See They Have Got A Lot Of Detail On To The Top Of This Tank.
close up photo showing some of the details on the scale model leopard 2 mbt
A Close Up Shot Of Some Of The Detail, They Have Done A Really Nice Job With Casting As These Details Look Pretty Crisp.
joining the turret there is a lot of filling needed.
Joining The Turret Has Become An Issue, Suddenly I Can See Some Short Comings With This Kit.
A little bit off with the casting on some of the parts
What Were They Thinking When They Cast This Part!

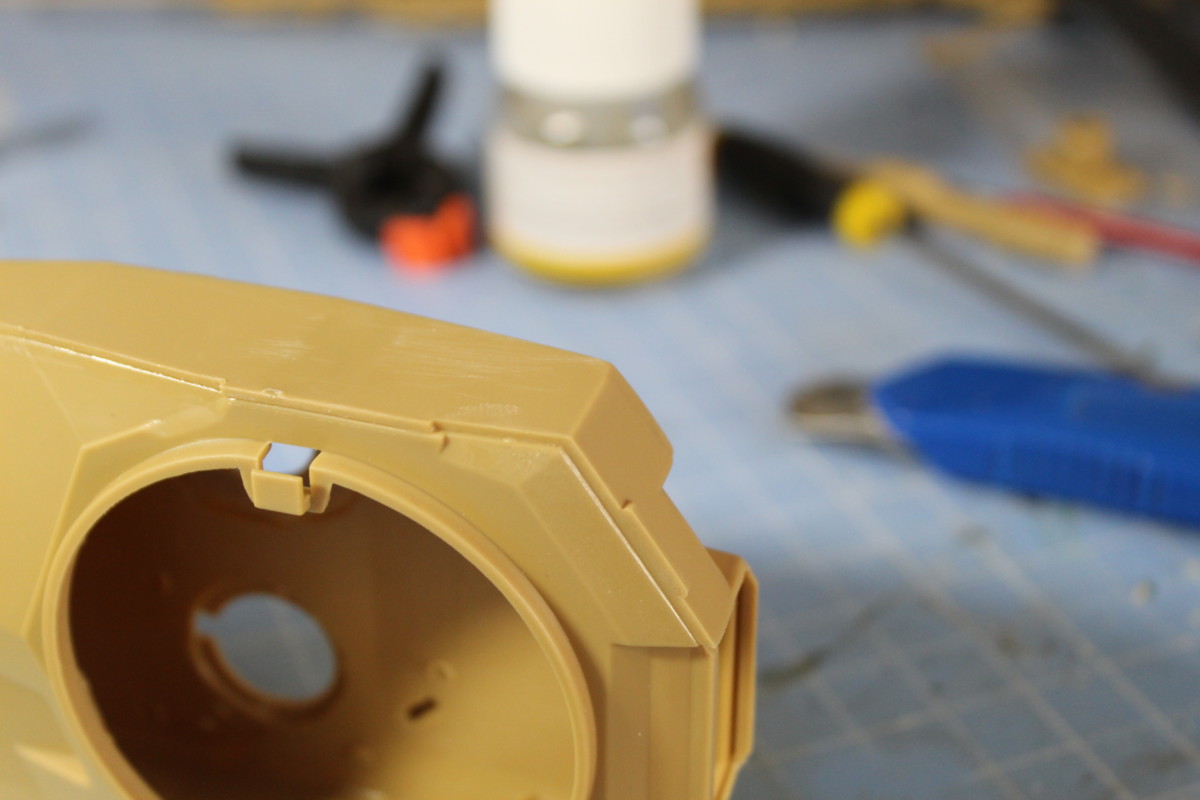
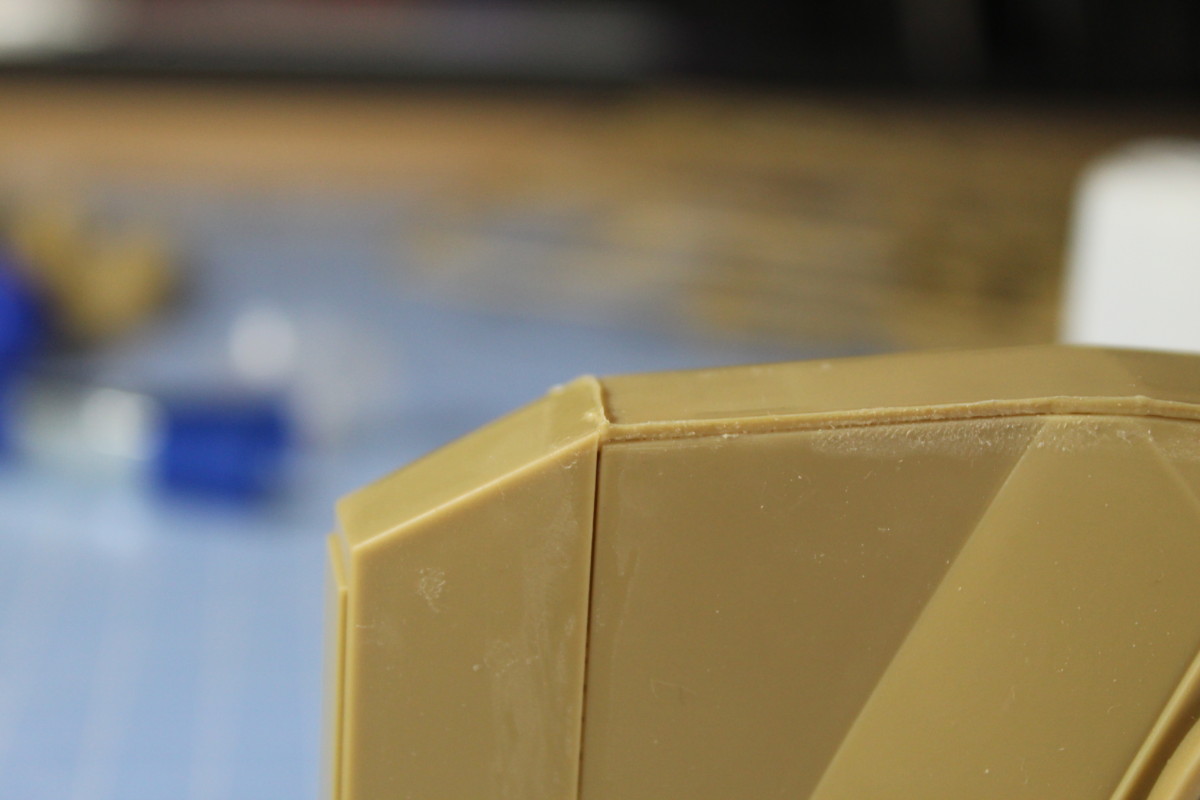
Now I have seen someone building a Leopard 2 on YouTube and I believe theirs is an Italeri version, it, however, has this same huge joint line, which makes me think they are using the same moulds or maybe just a re-brand?

A whole hell of a lot of work joining the main parts of the leopard 2 tank.
The Turret And Hull Are Joined, It Has Been A Whole Mission But Now It Is Done.

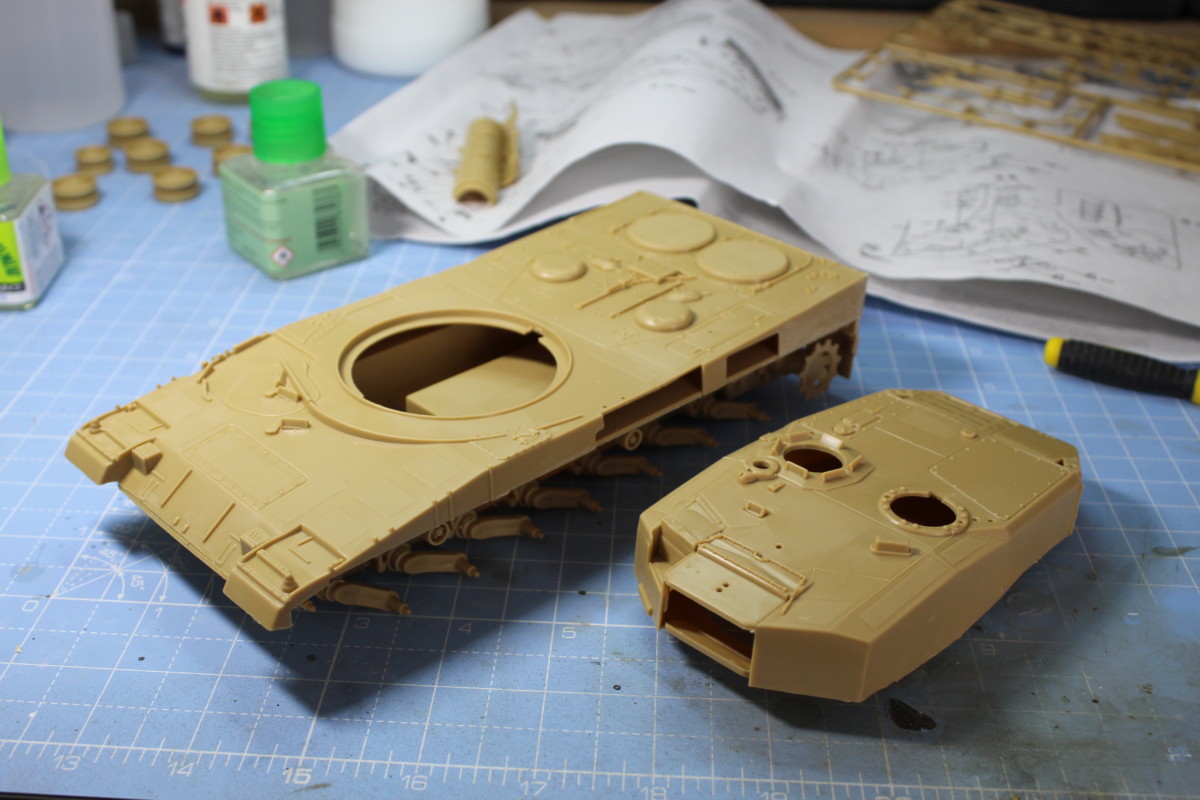
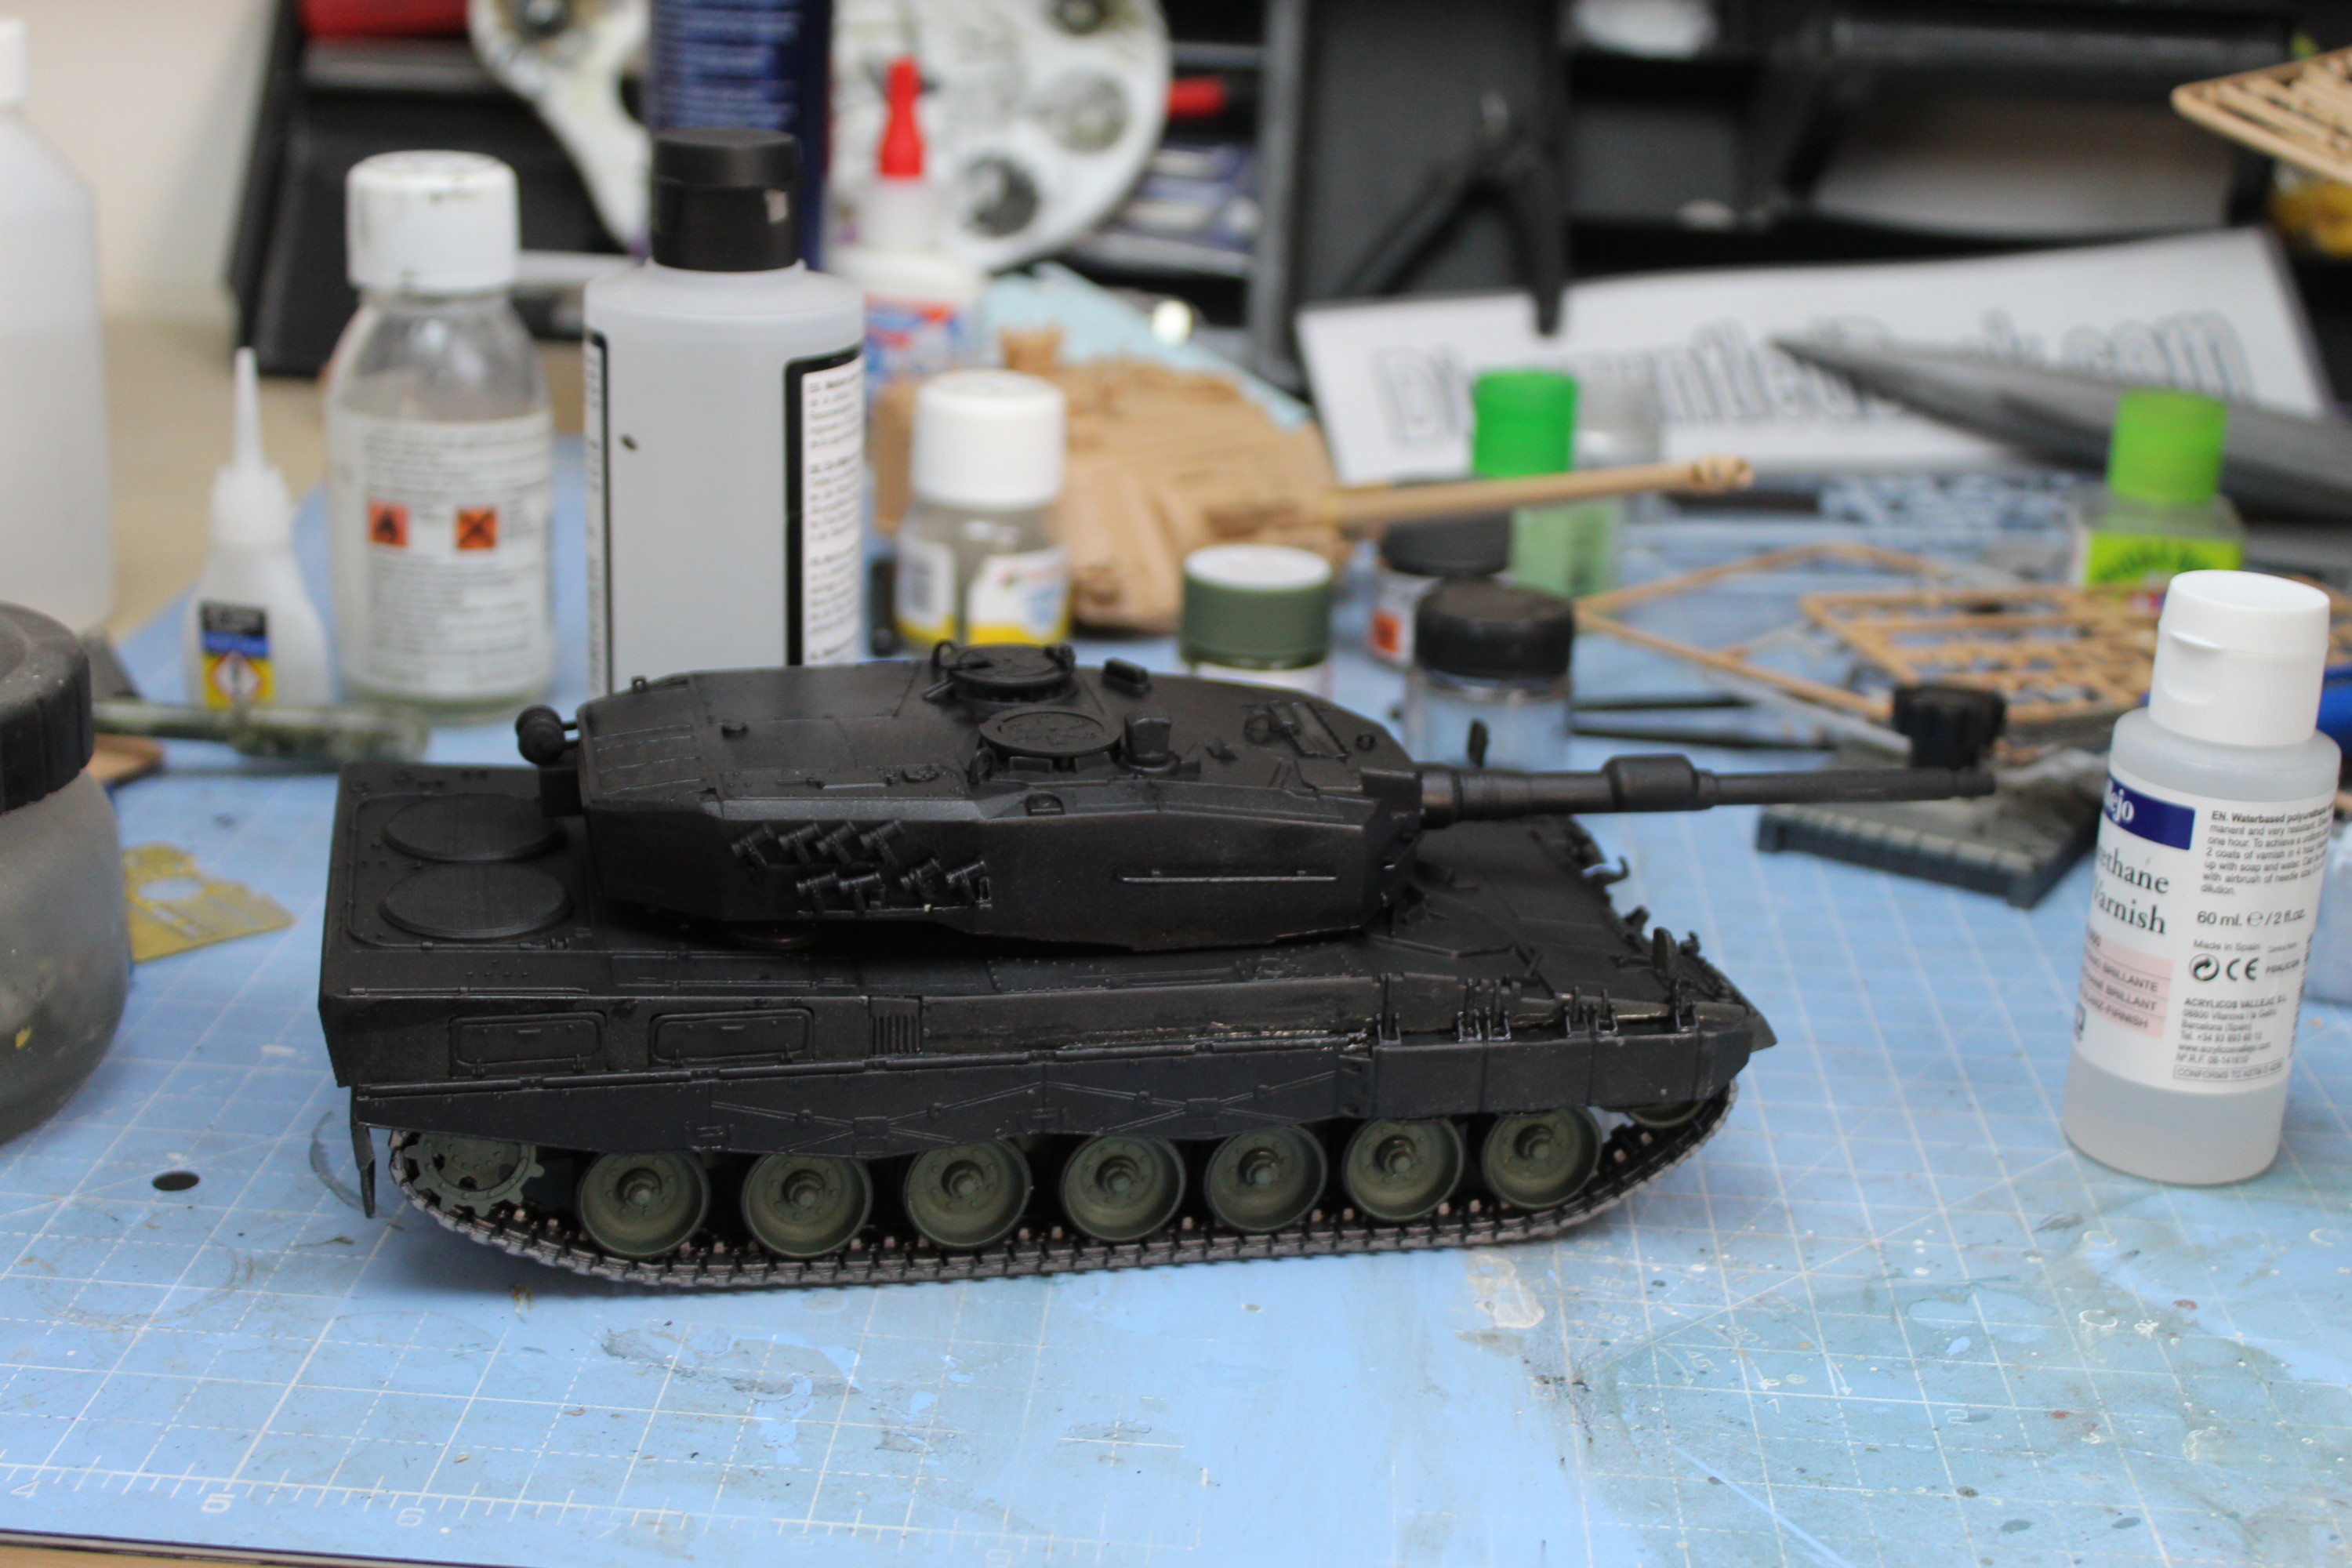
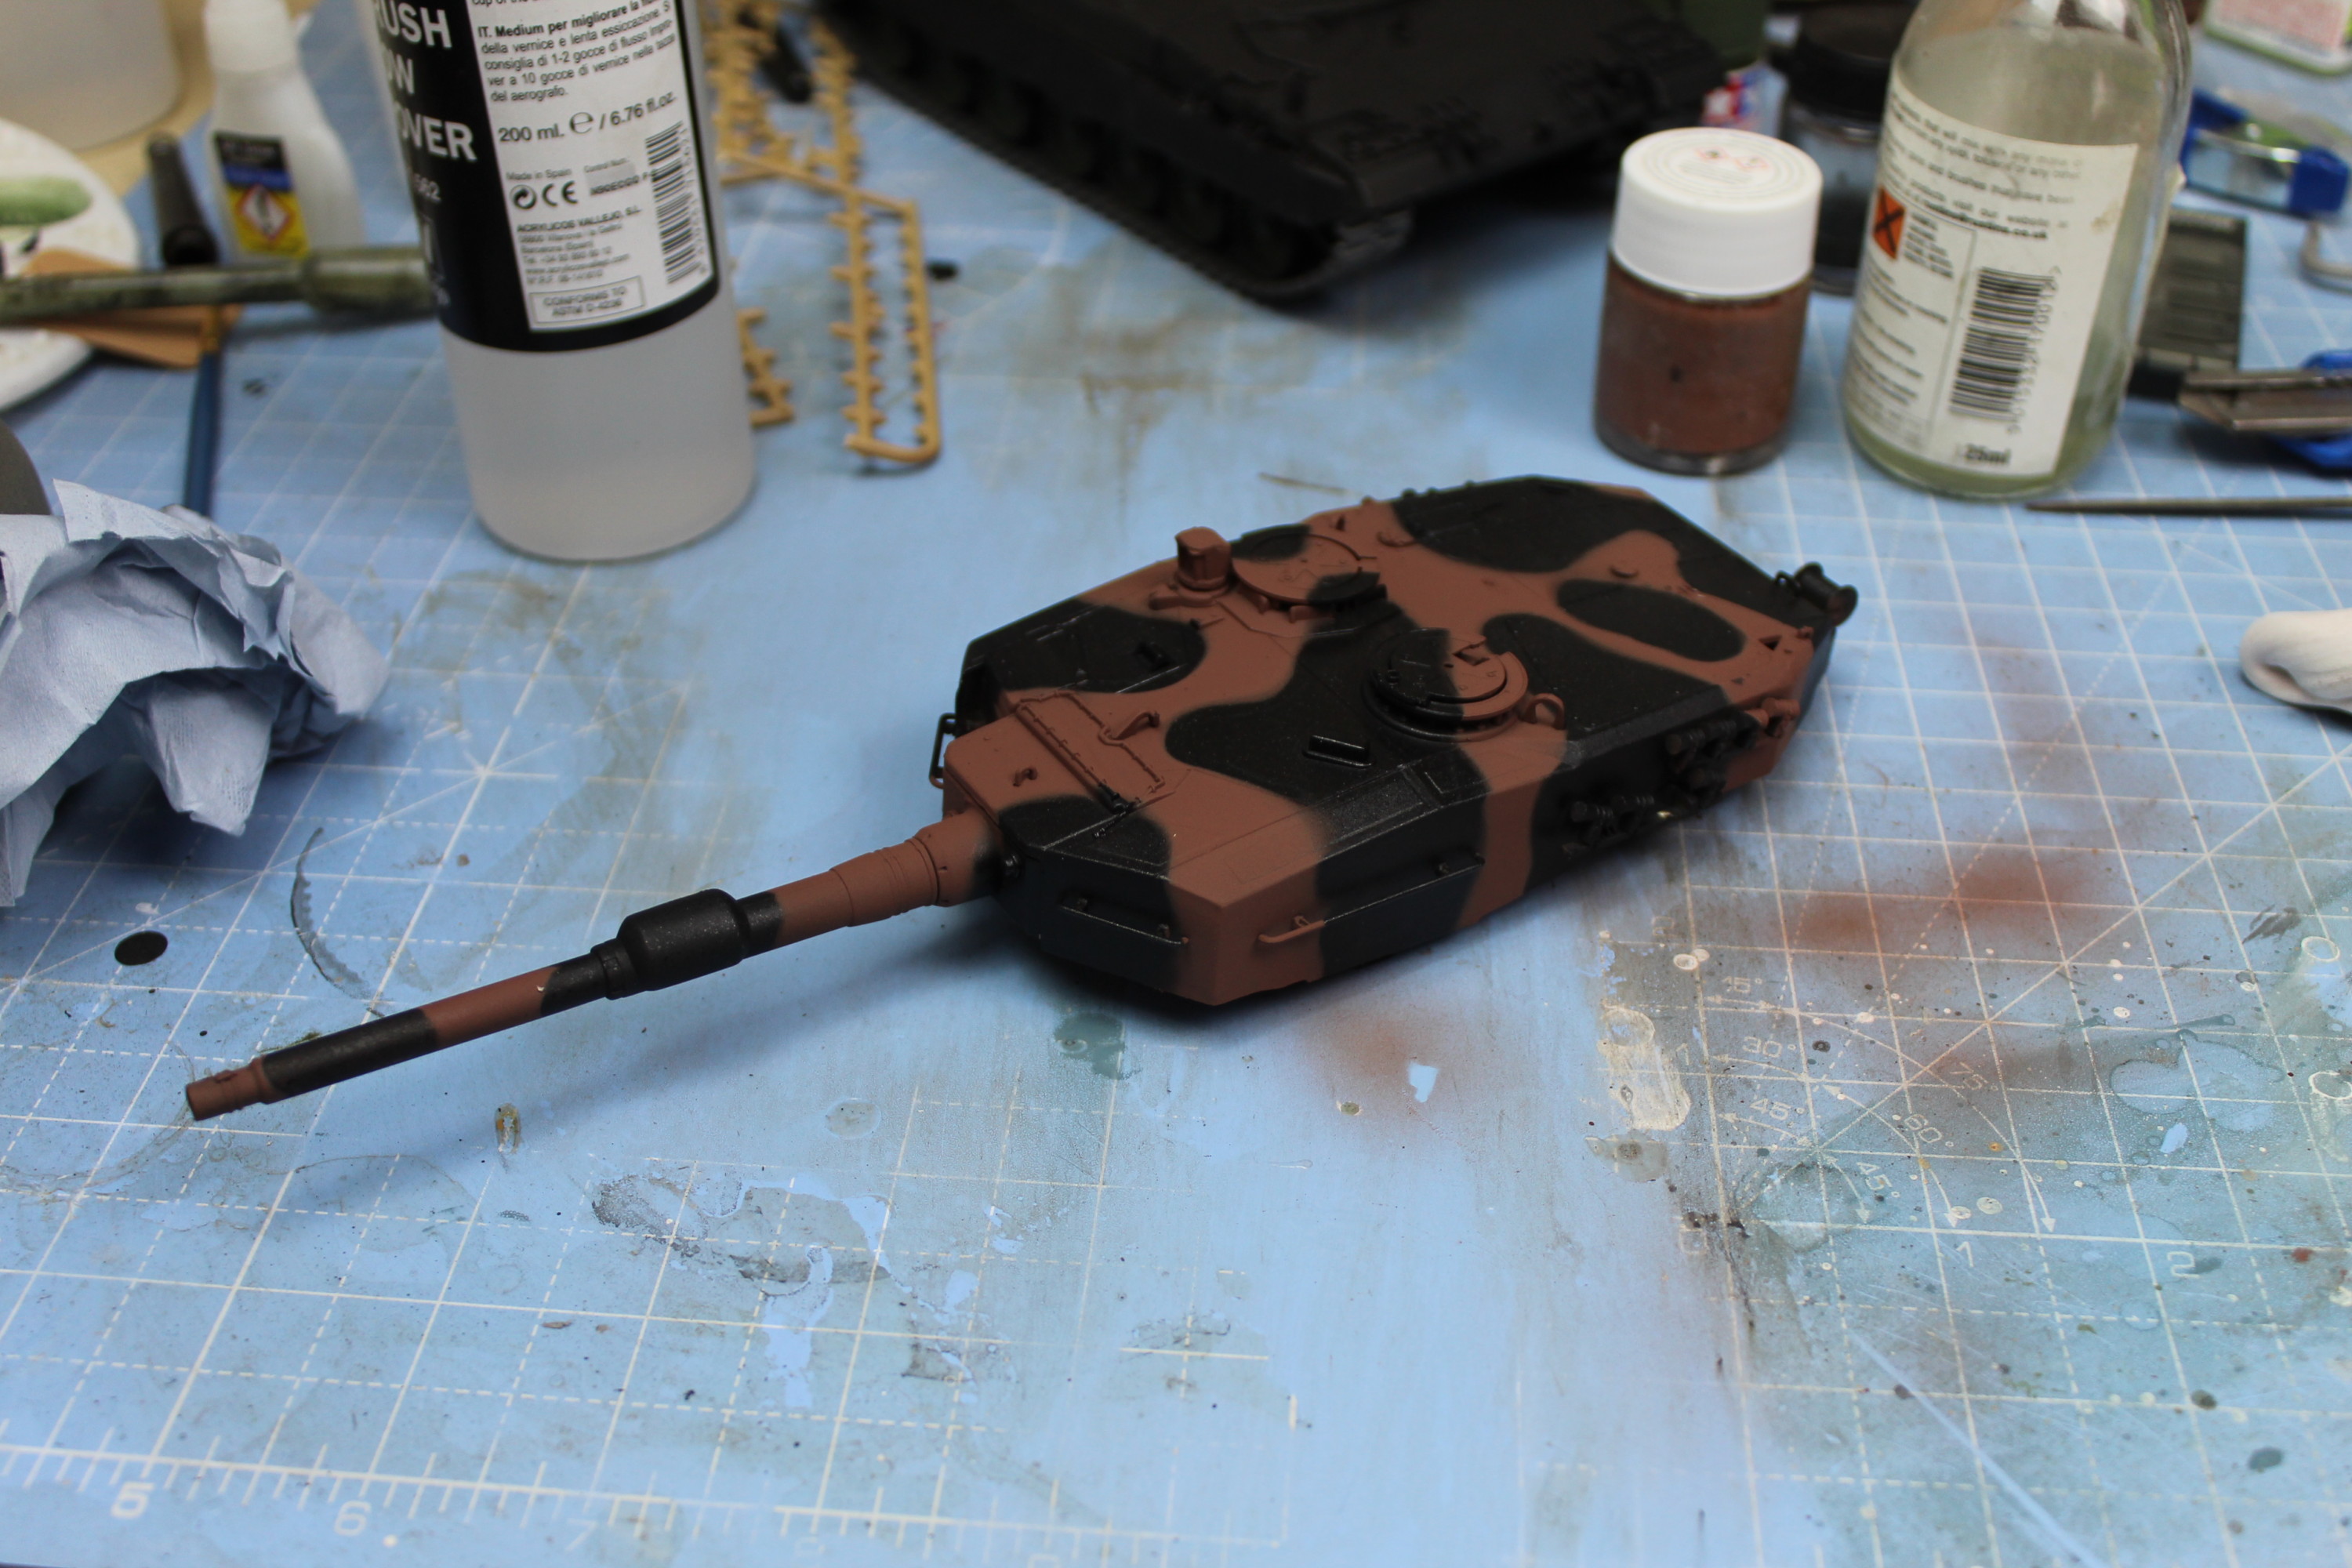
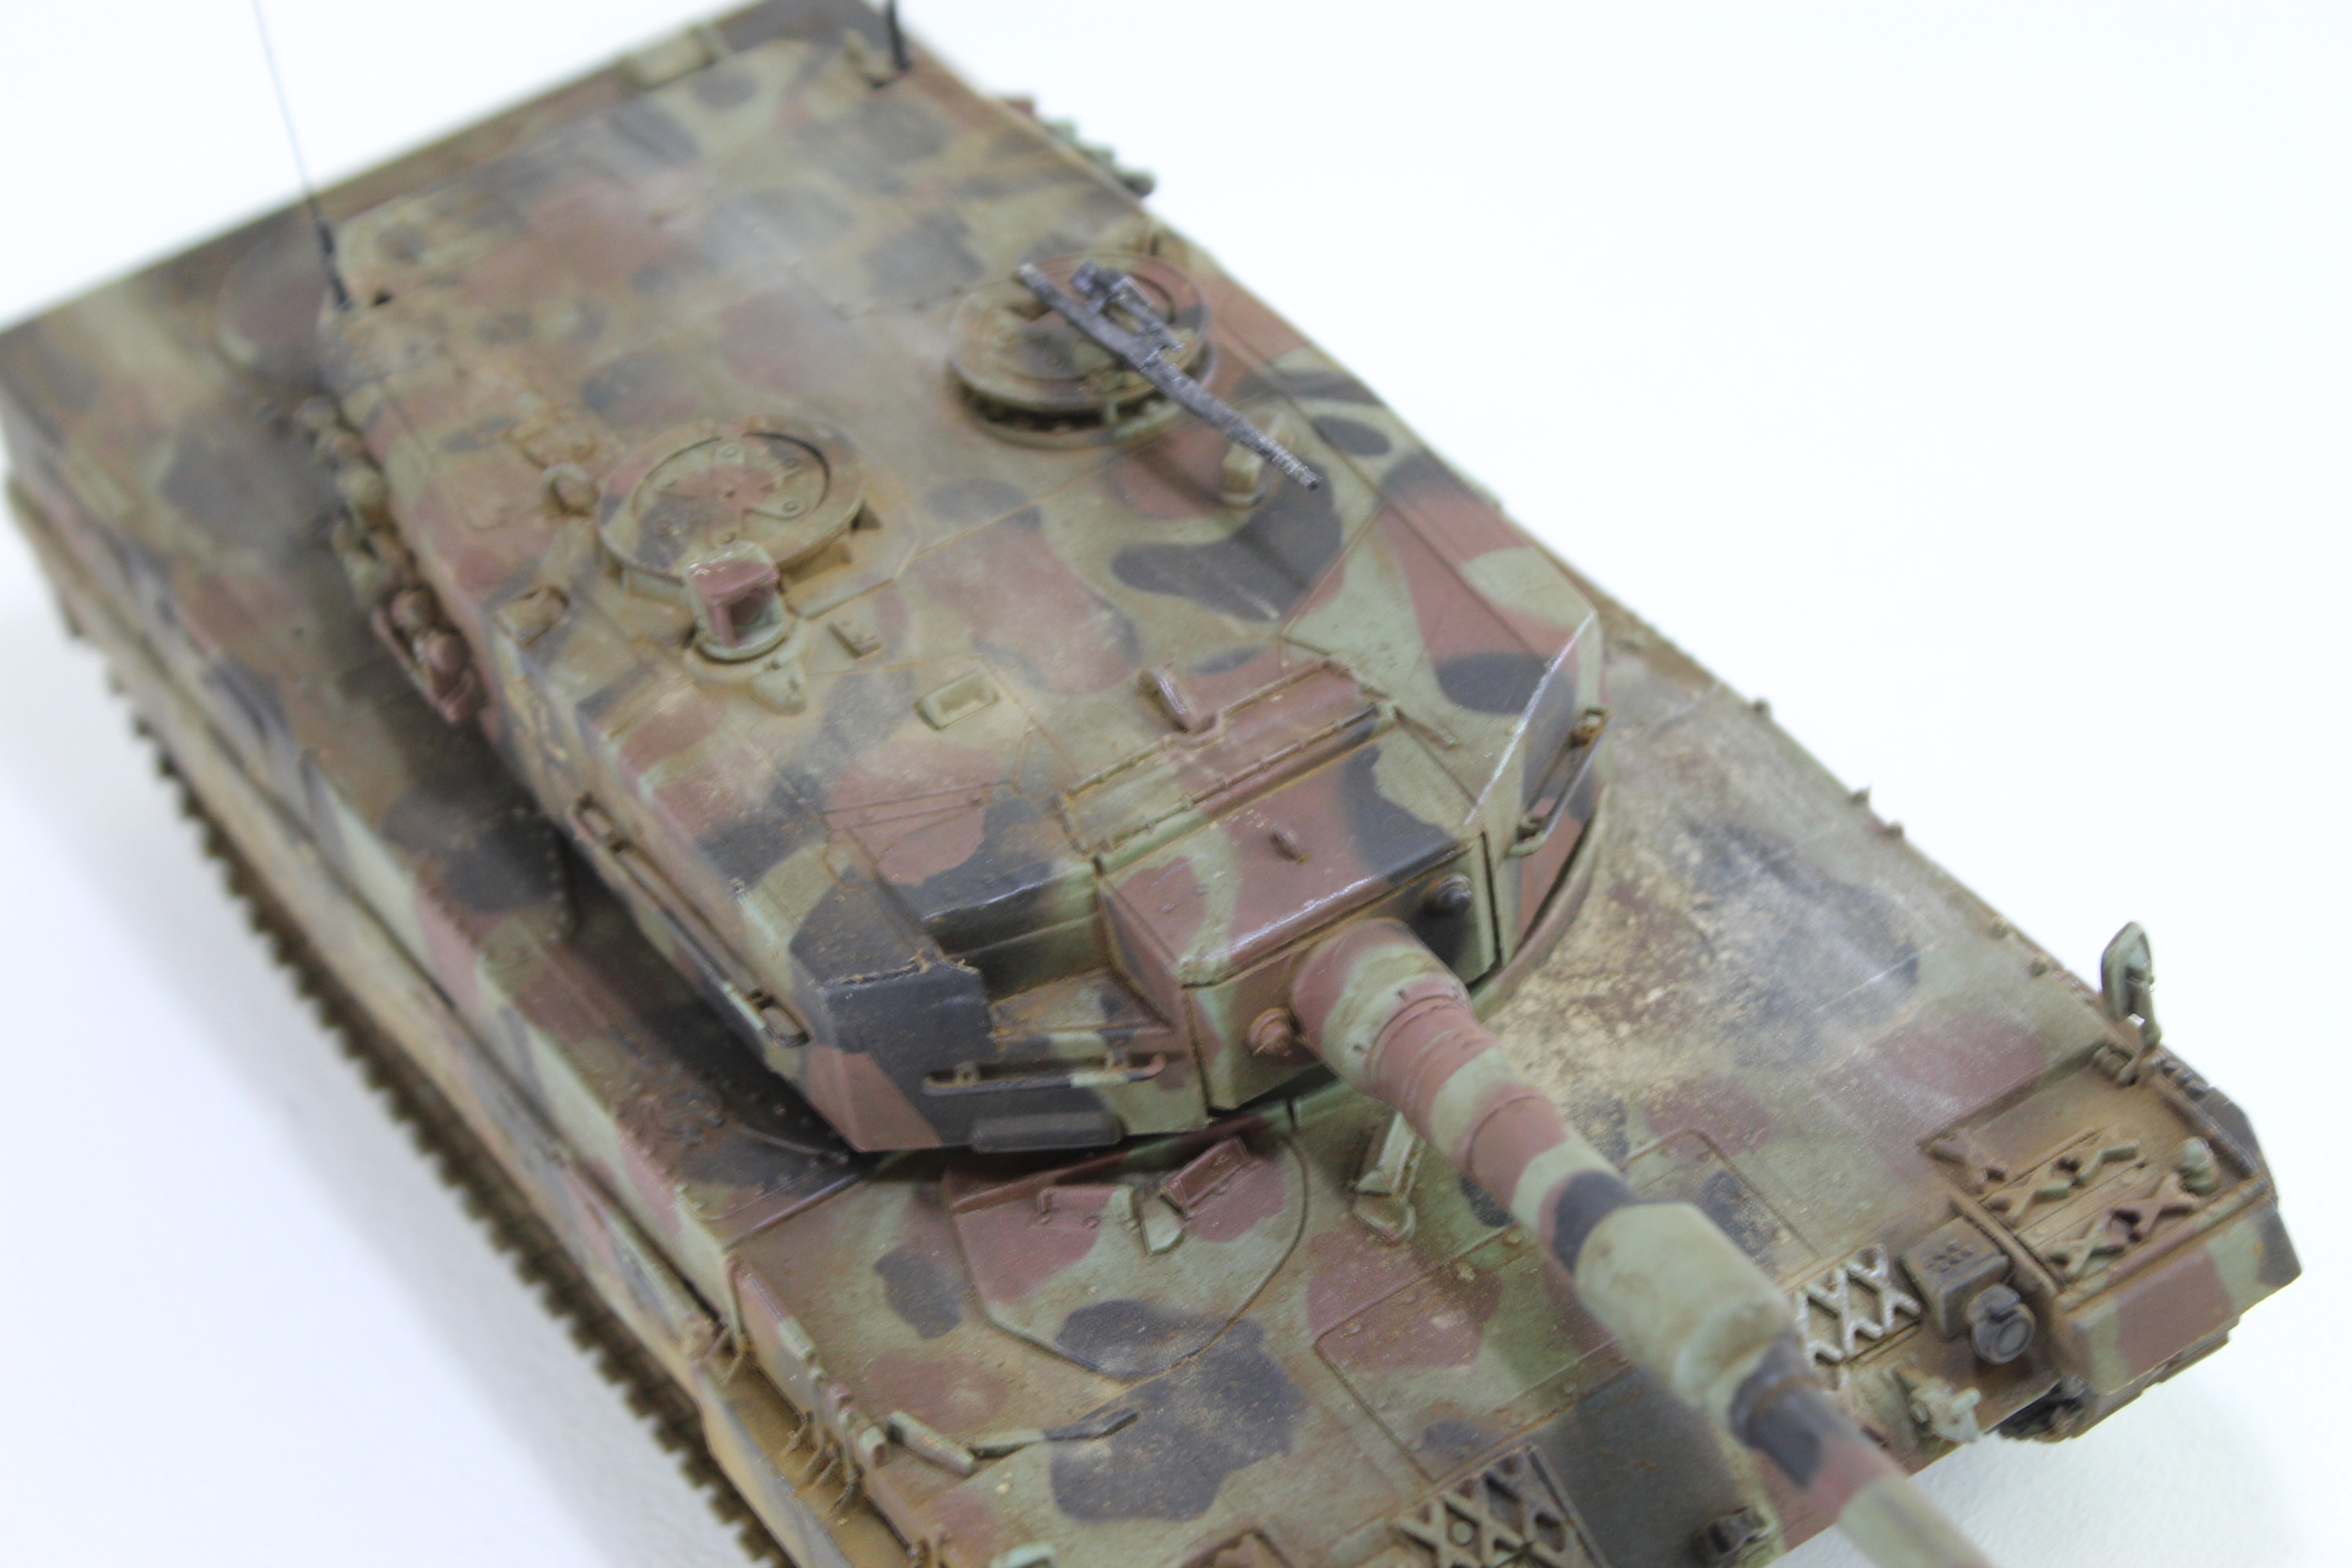
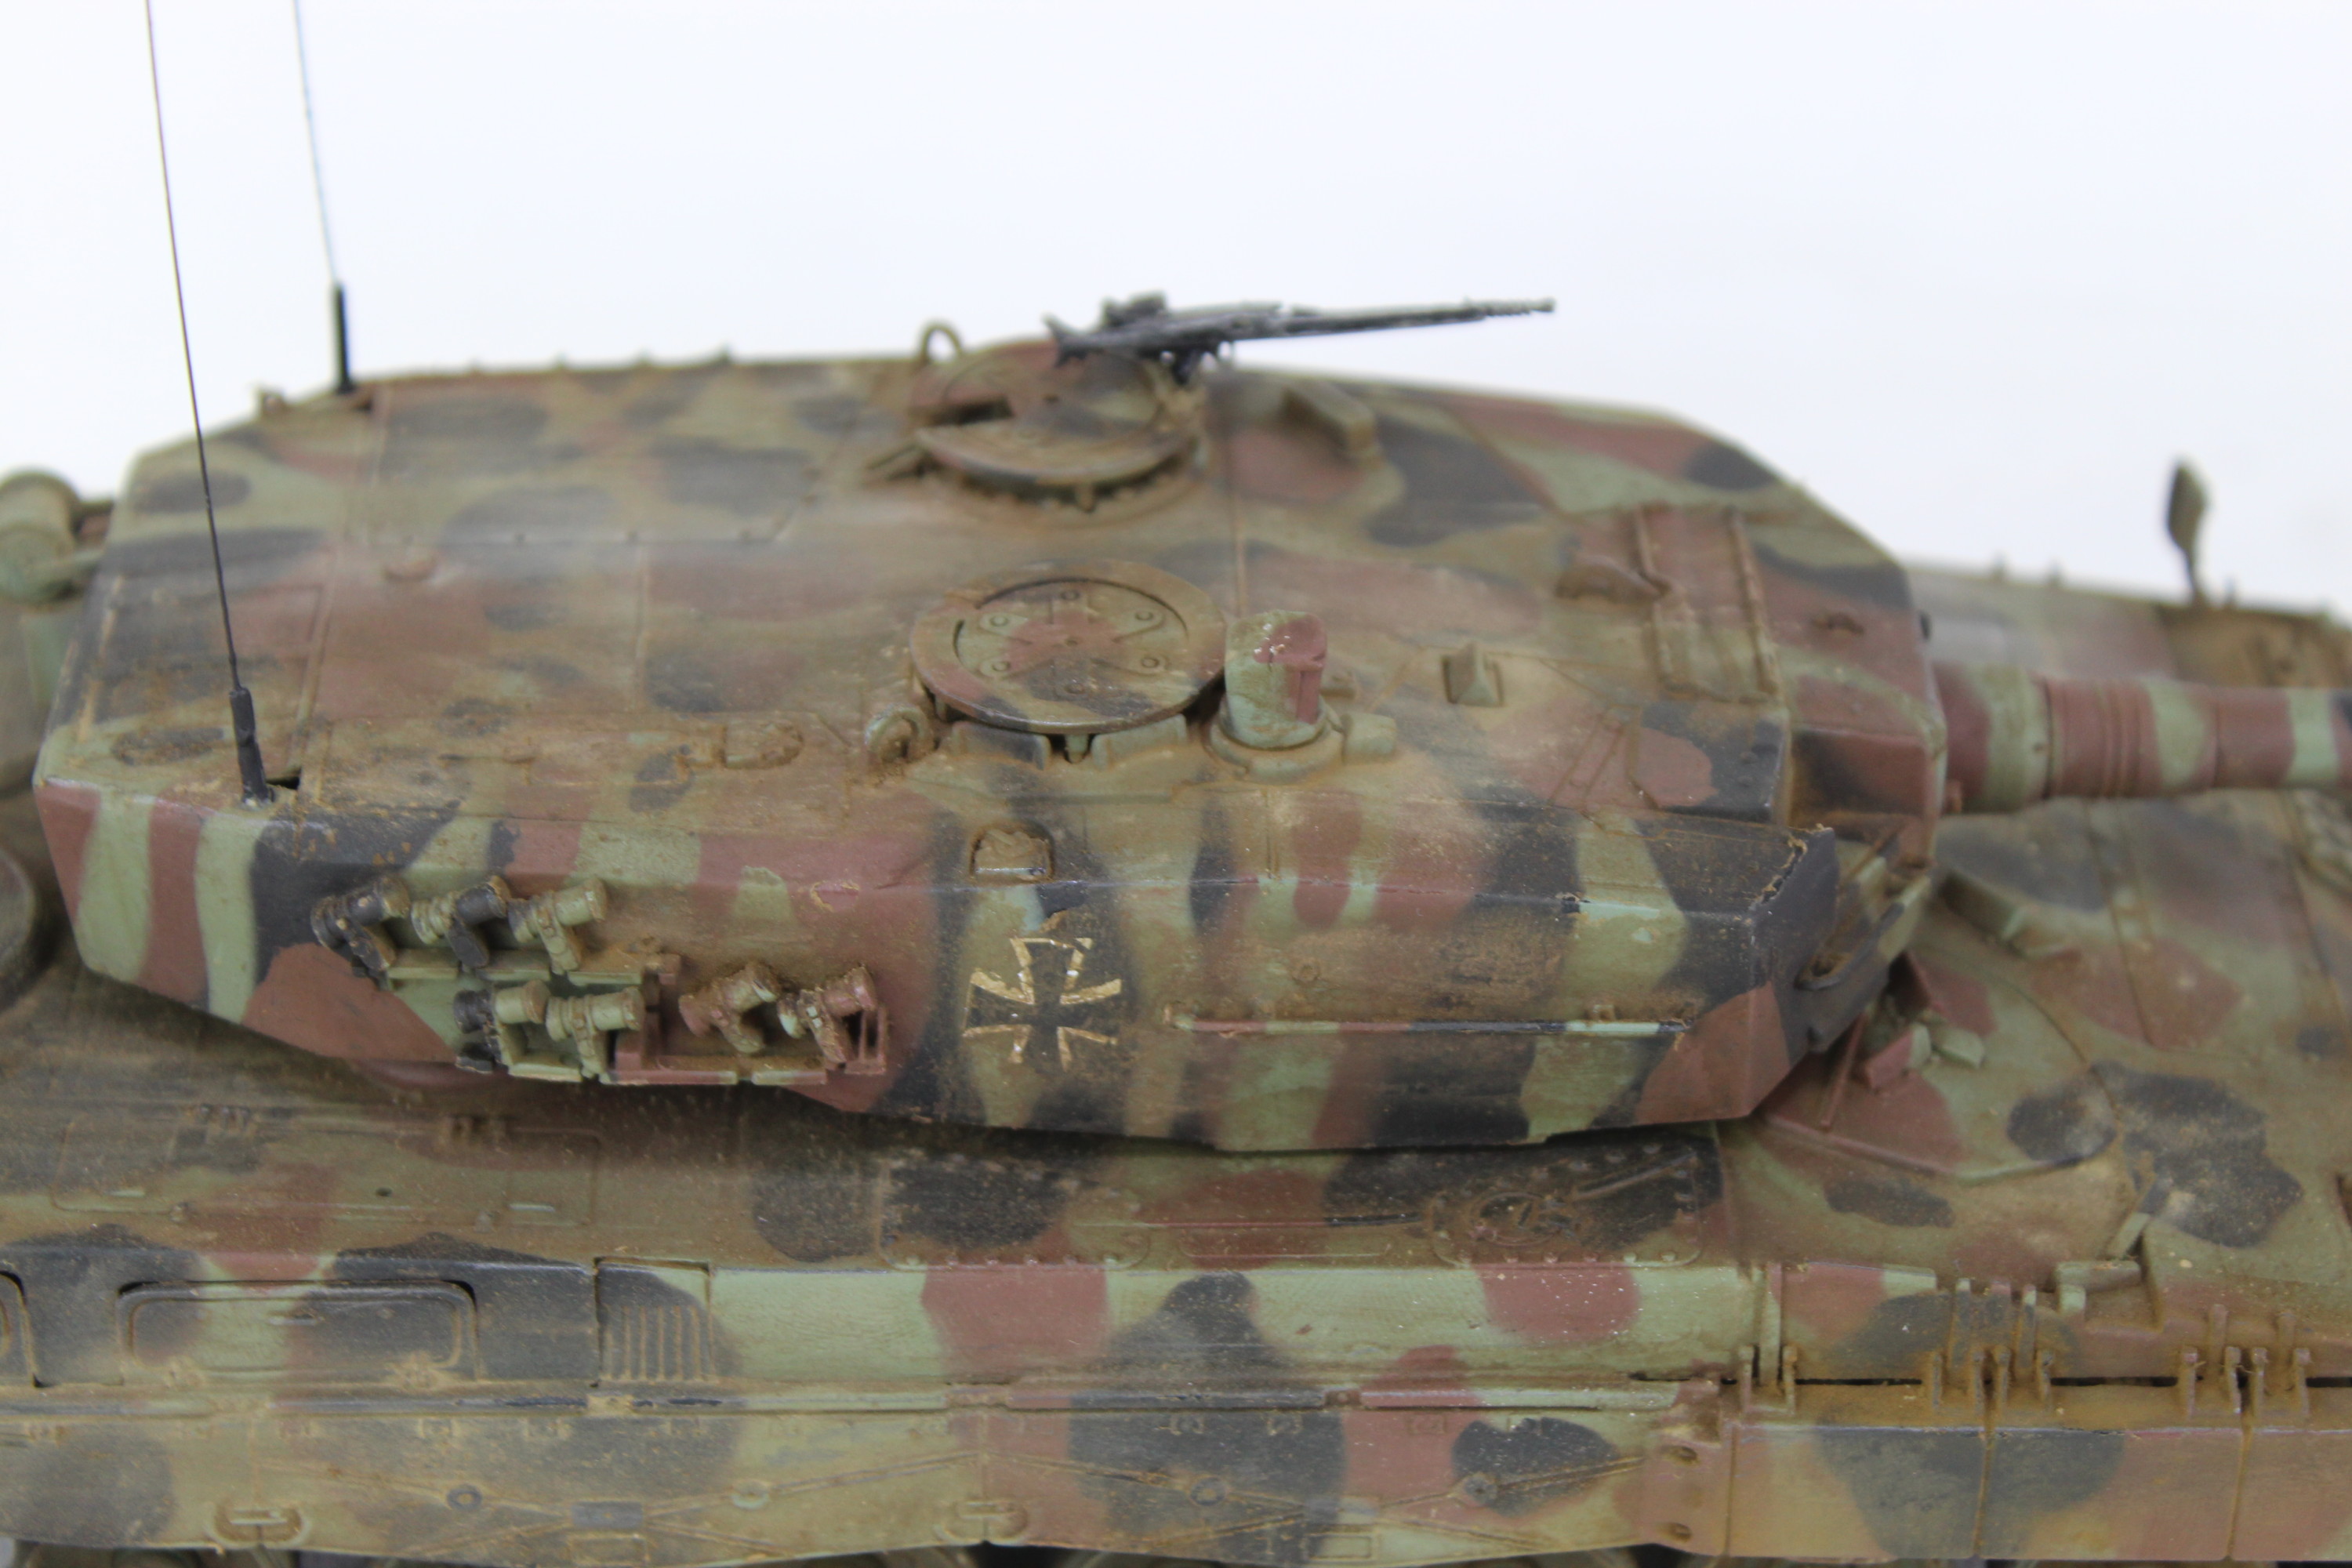
Fitted the gun barrel and also all the small parts to the turret, including the hatches and smoke grenade launchers.

Test Fitting The Turret And Hull Of The Leopard 2 Scale Model
Test Fitting The Turret And Hull Of The Leopard 2

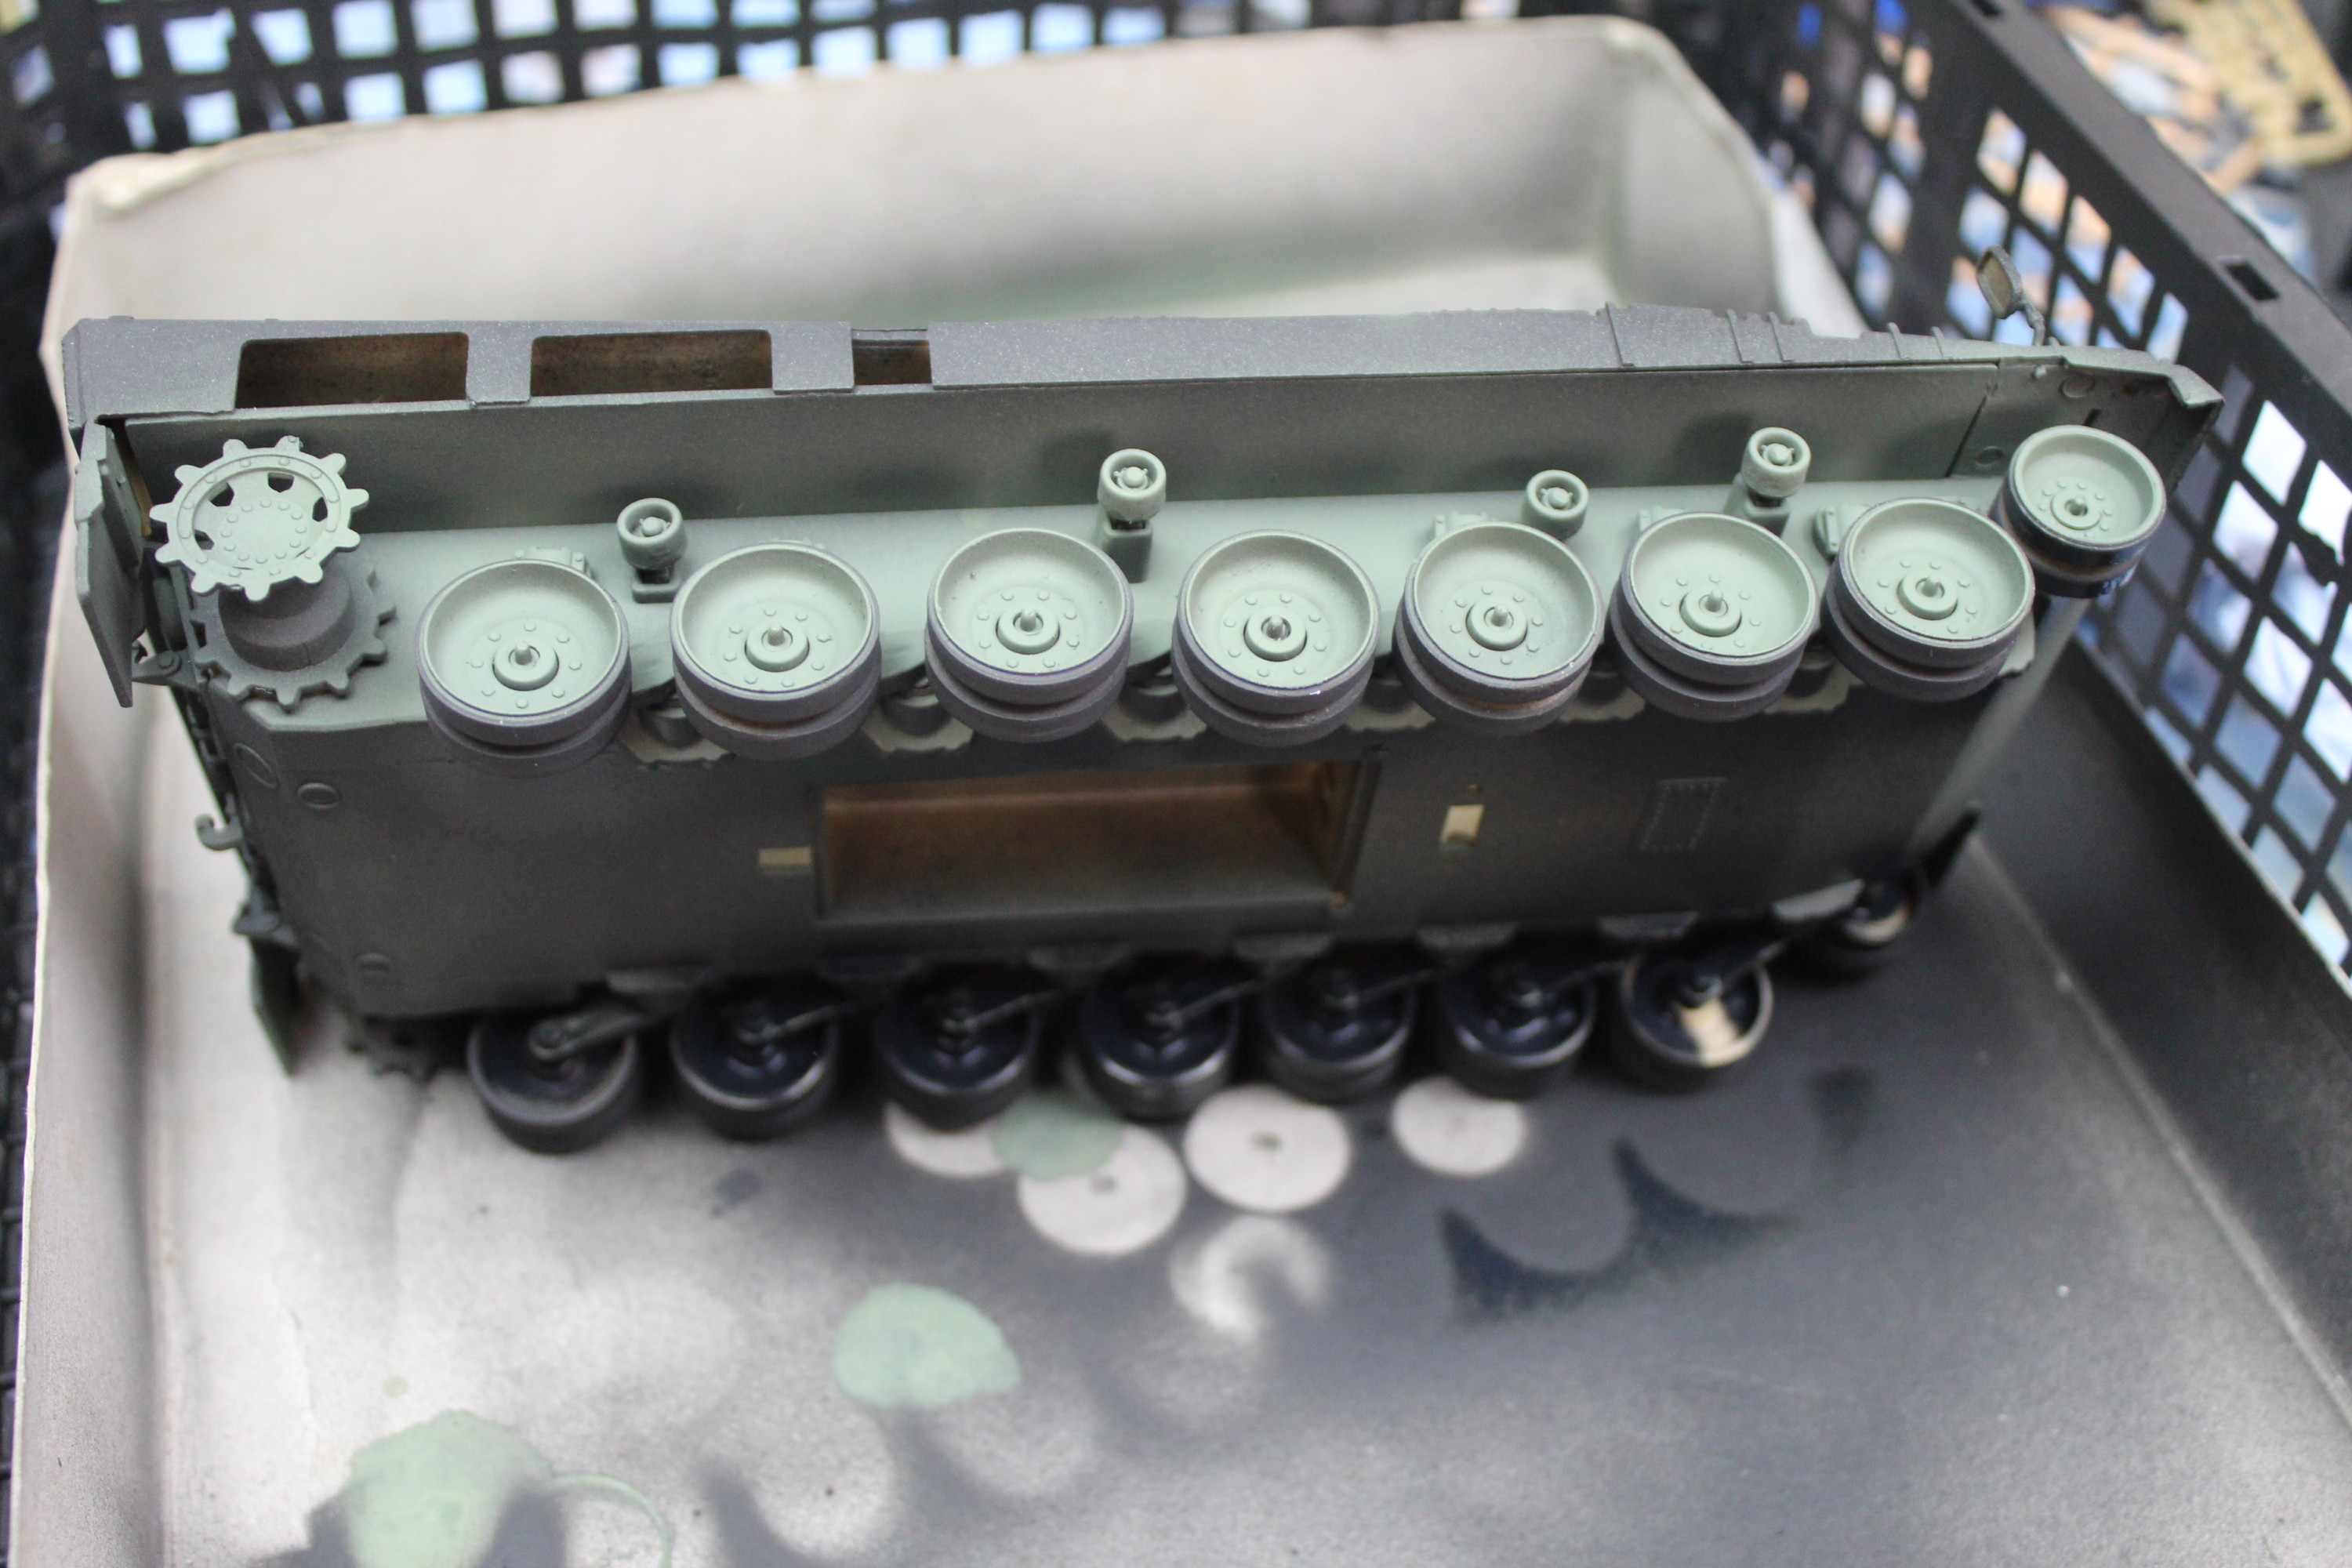
After a quick undercoat, I could get on with the wheels. Using the plastic stencil tool, I painted the wheels Nato Green. I also gave the underside of the hull a light airbrushing with the same colour.

Wheels And Hull Painted In Nato Green
Painted The Wheels And The Underside Of The Hull.
Fitted The Road Wheels And Nuts To The Leopard 2 Tank Model
Wheels And Wheel Nuts Fitted.

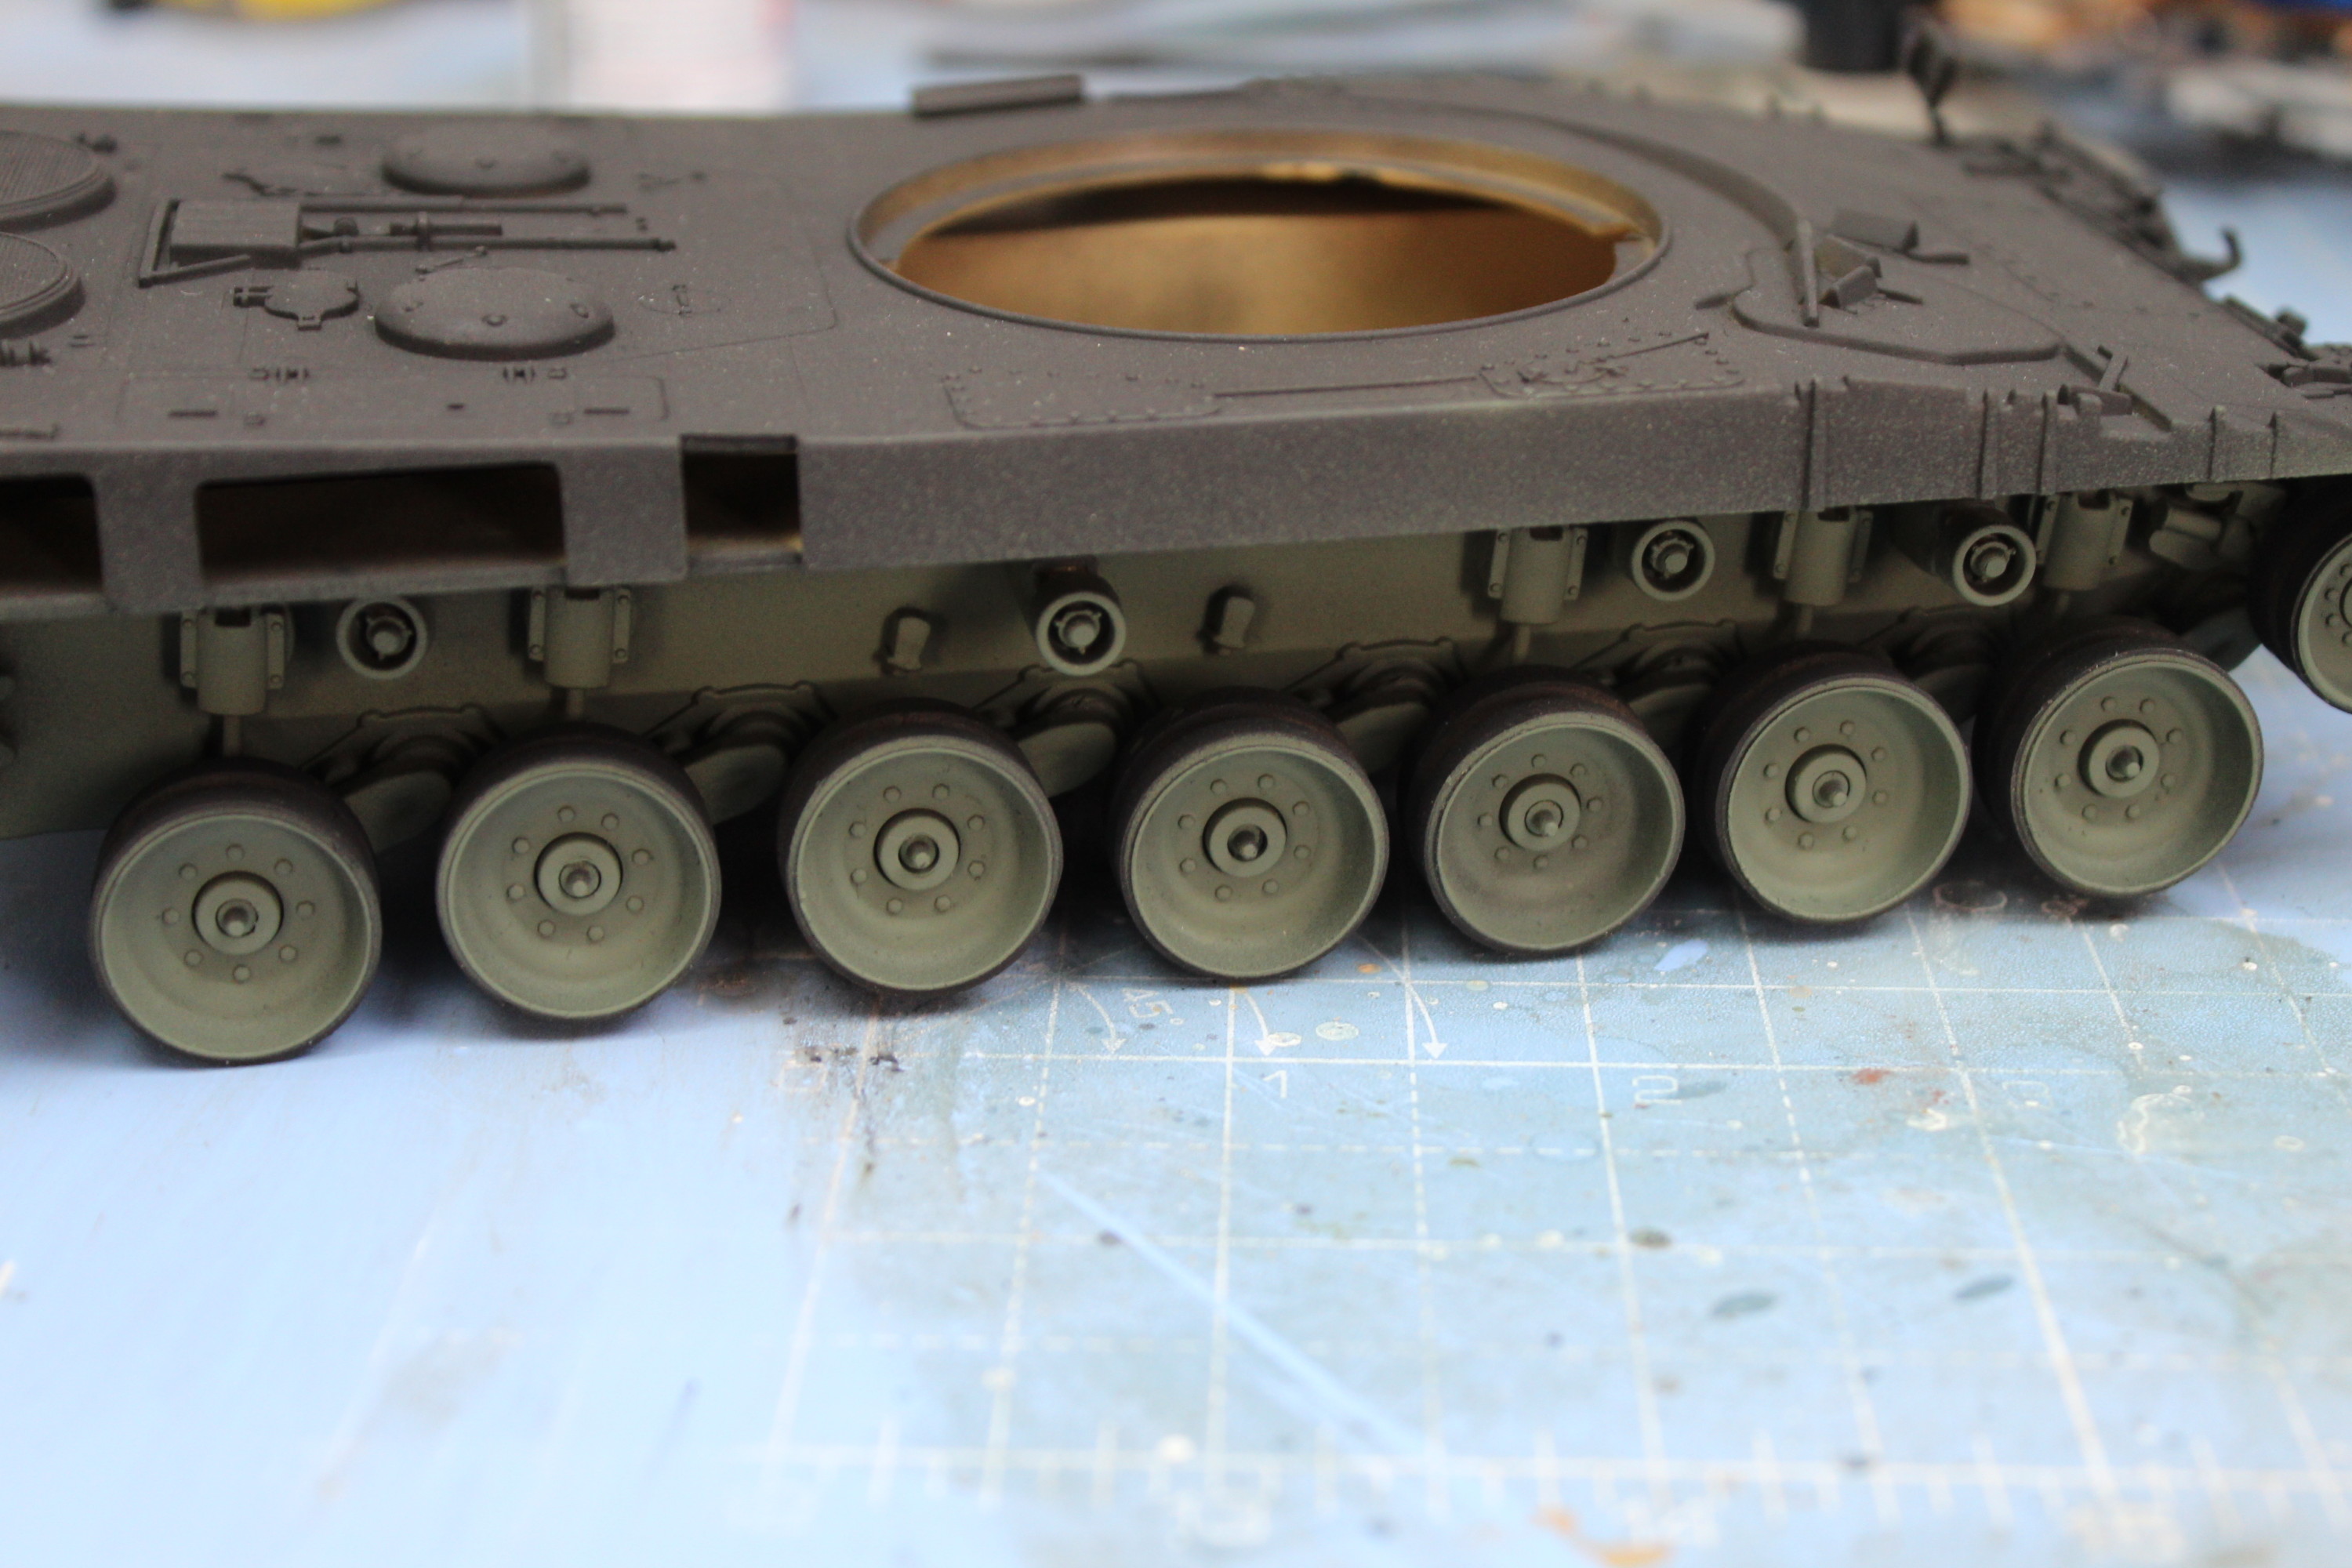
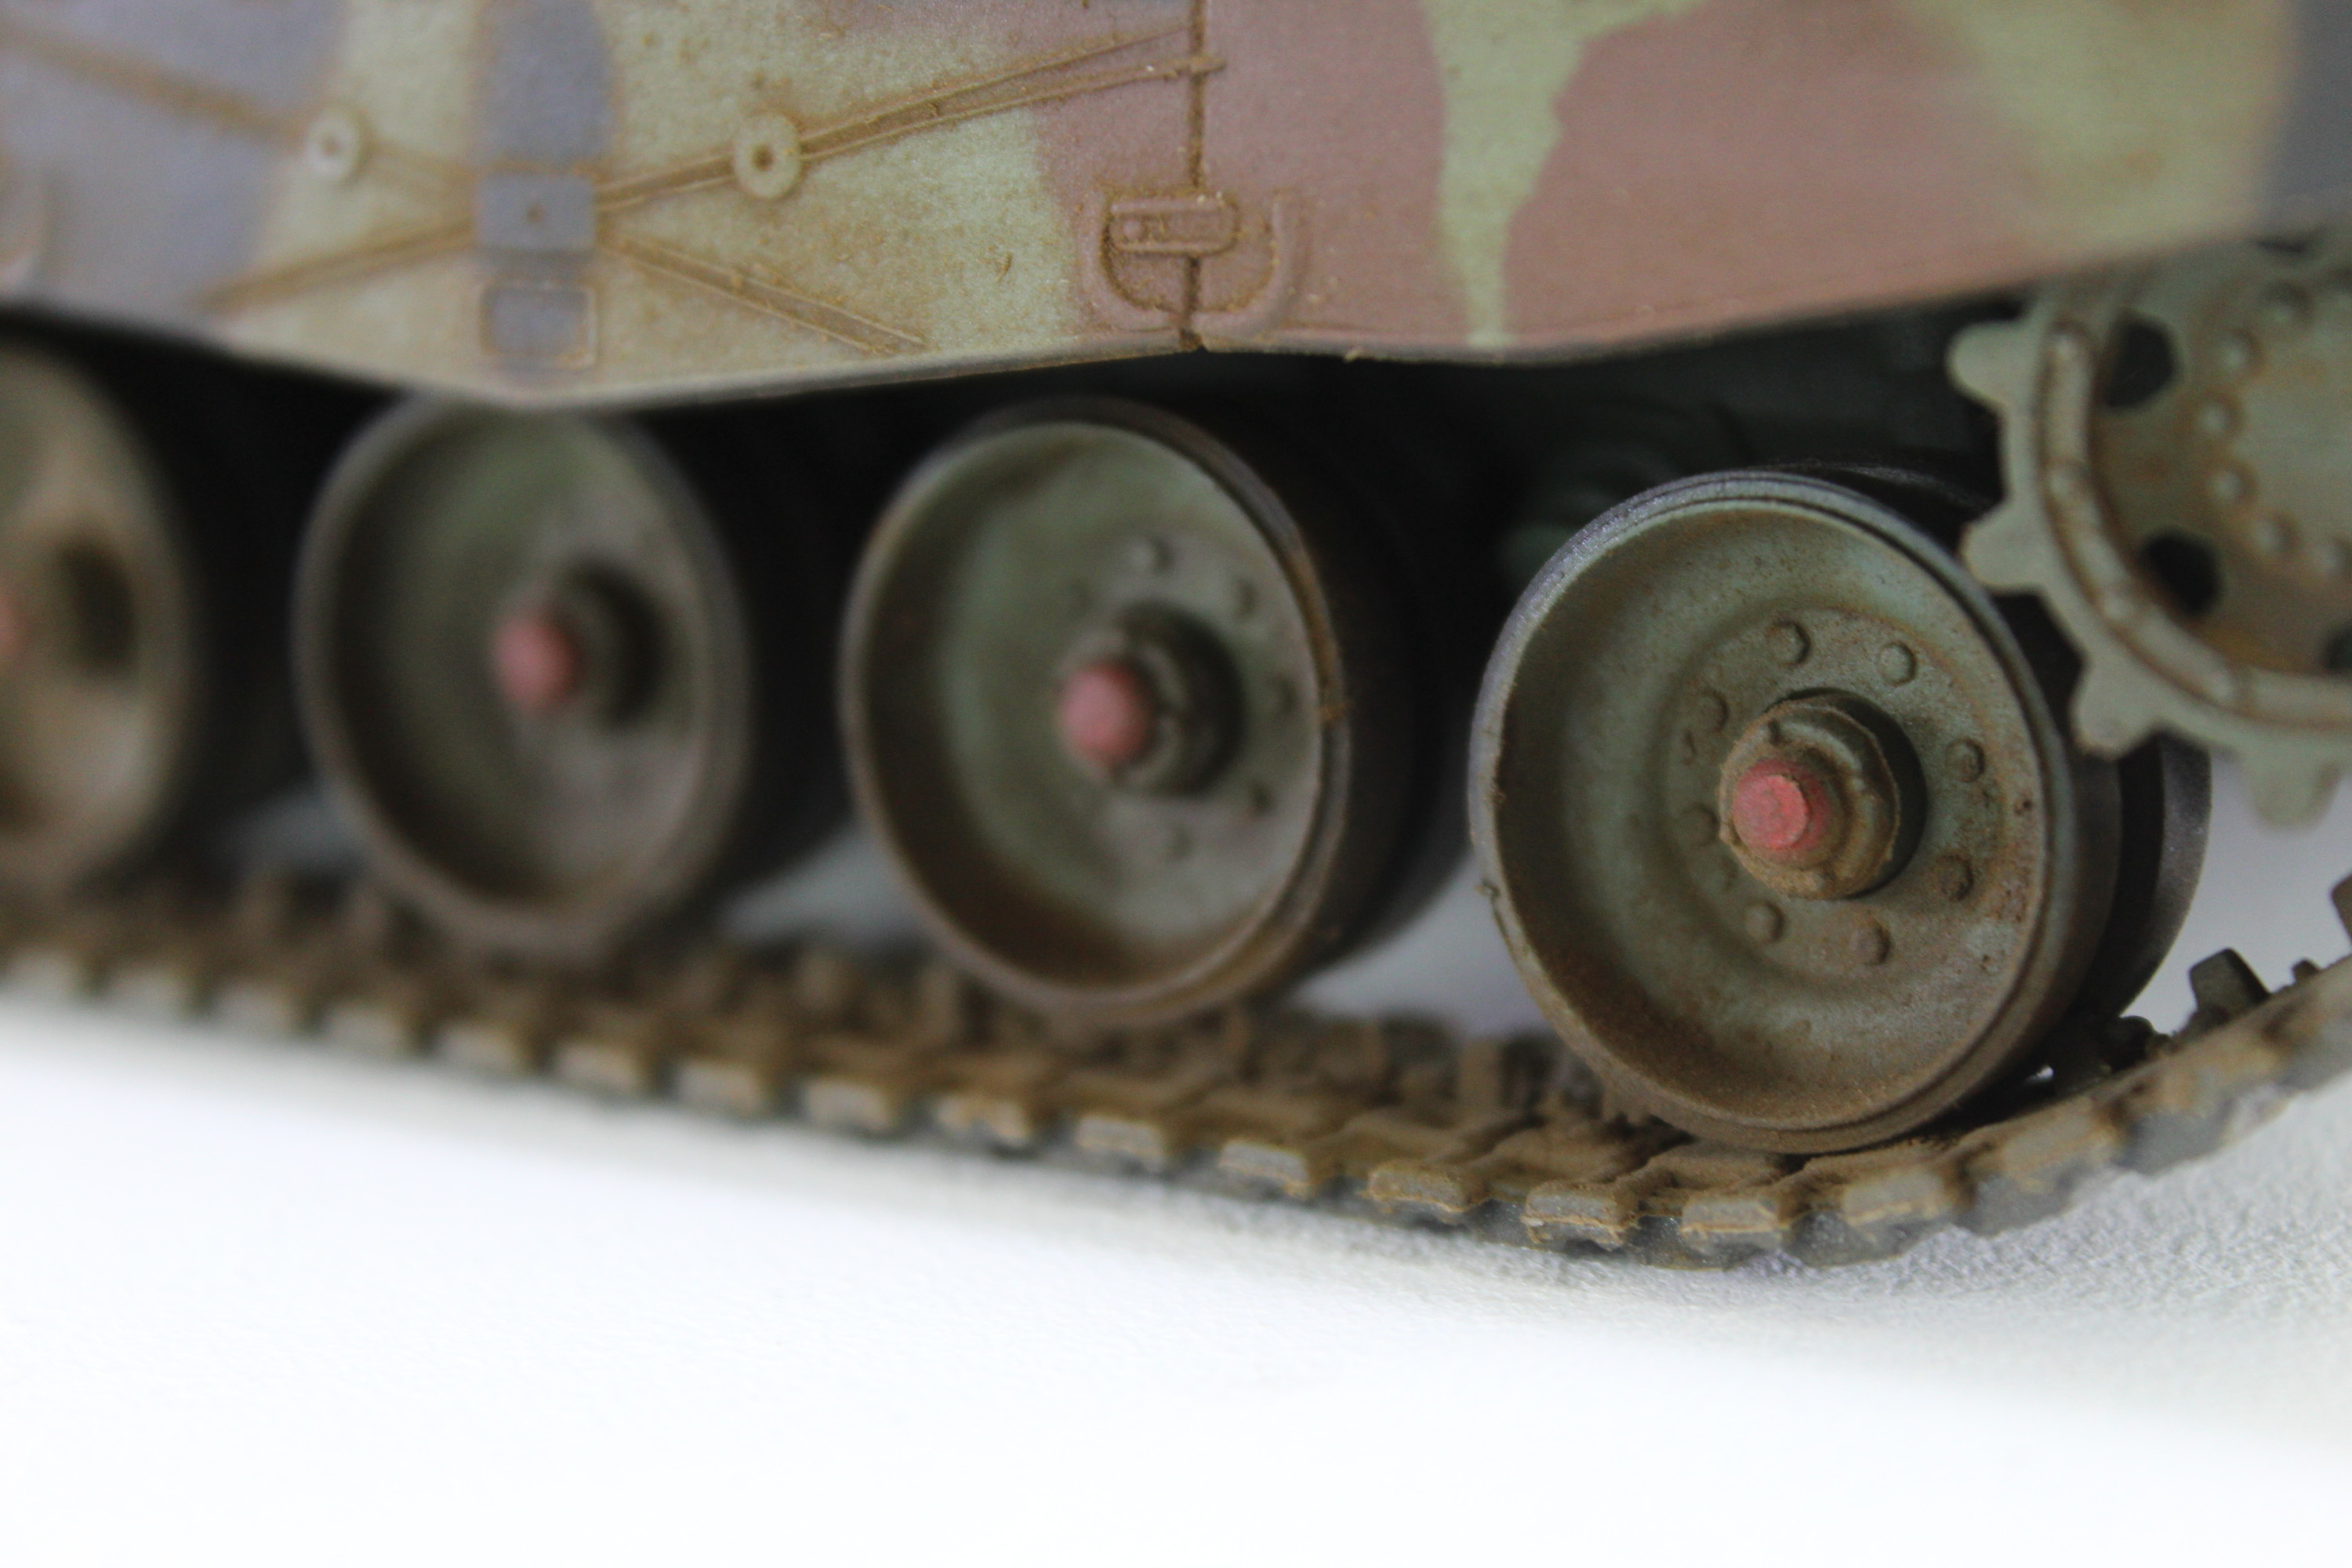
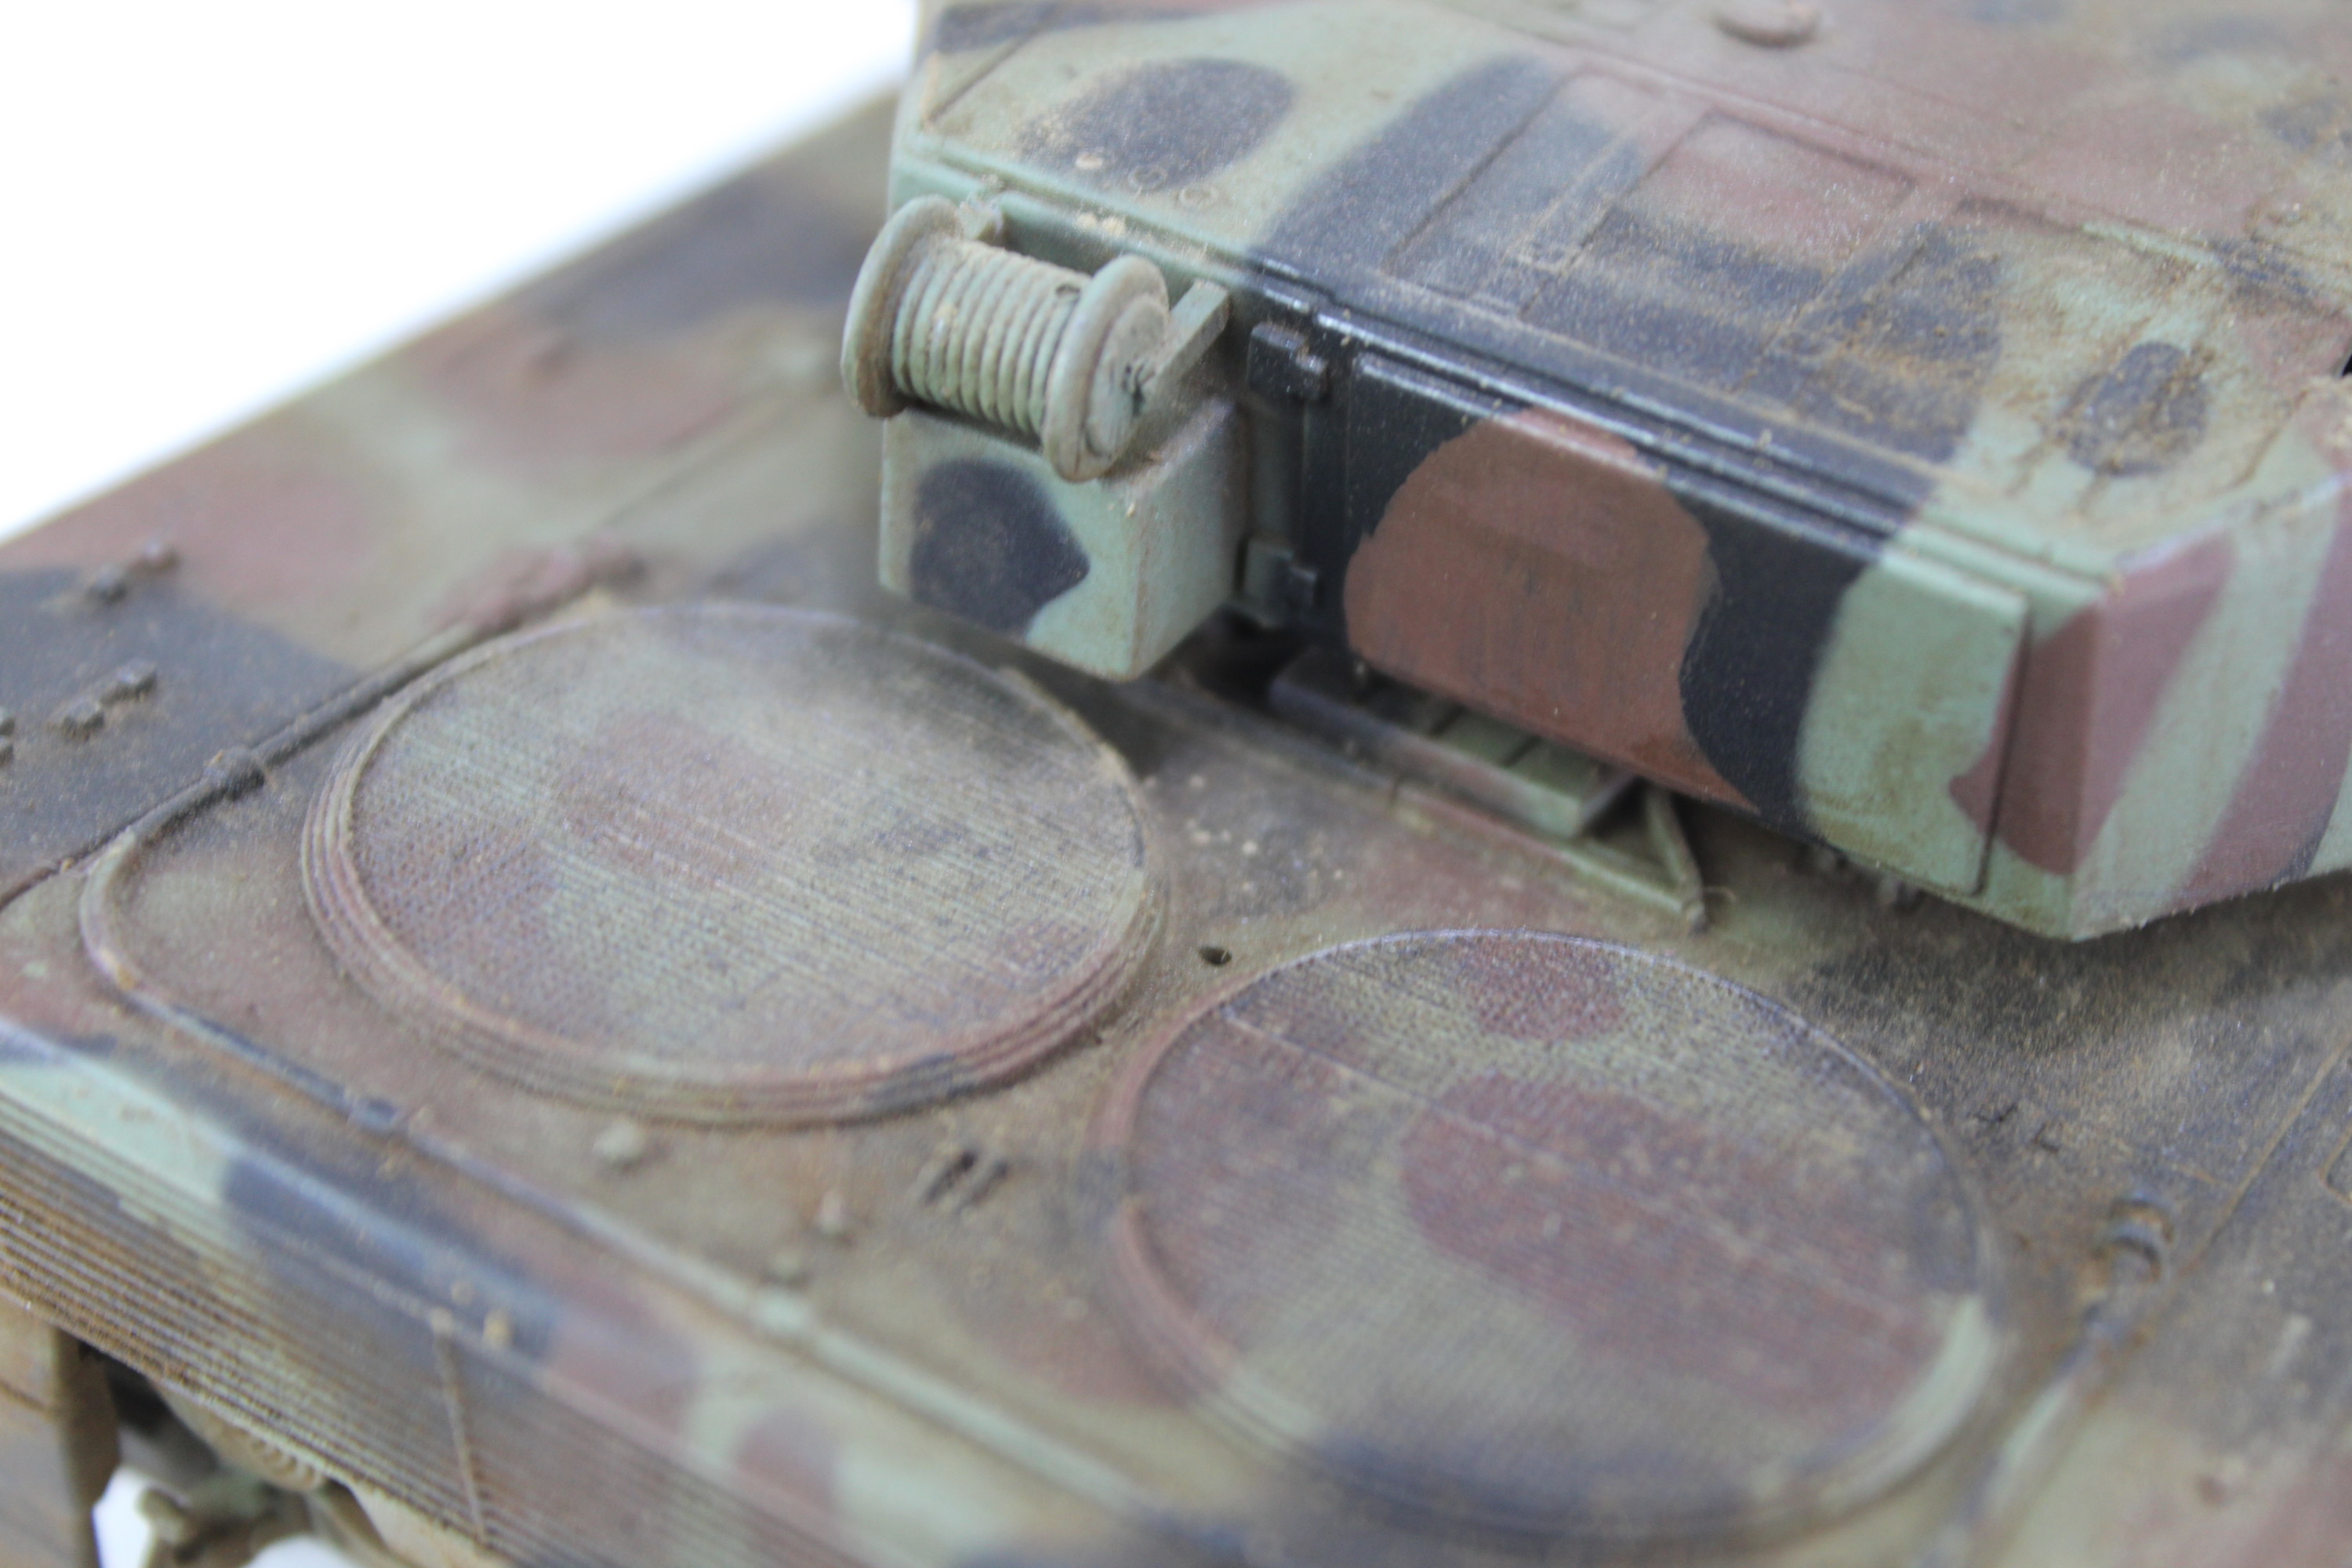
The tracks were primed then given a quick spray of aluminium X56 then I rubbed it off the trackpads before it dried. The tracks went on quite easily but what I noticed is the wheel are not level. Also, I stuck on the side skirts. These are really not well cast, but we try our best.

Fitted Tracks To The Leopard 2 Scale Model
The Tracks And The Side Skirt Fitted.

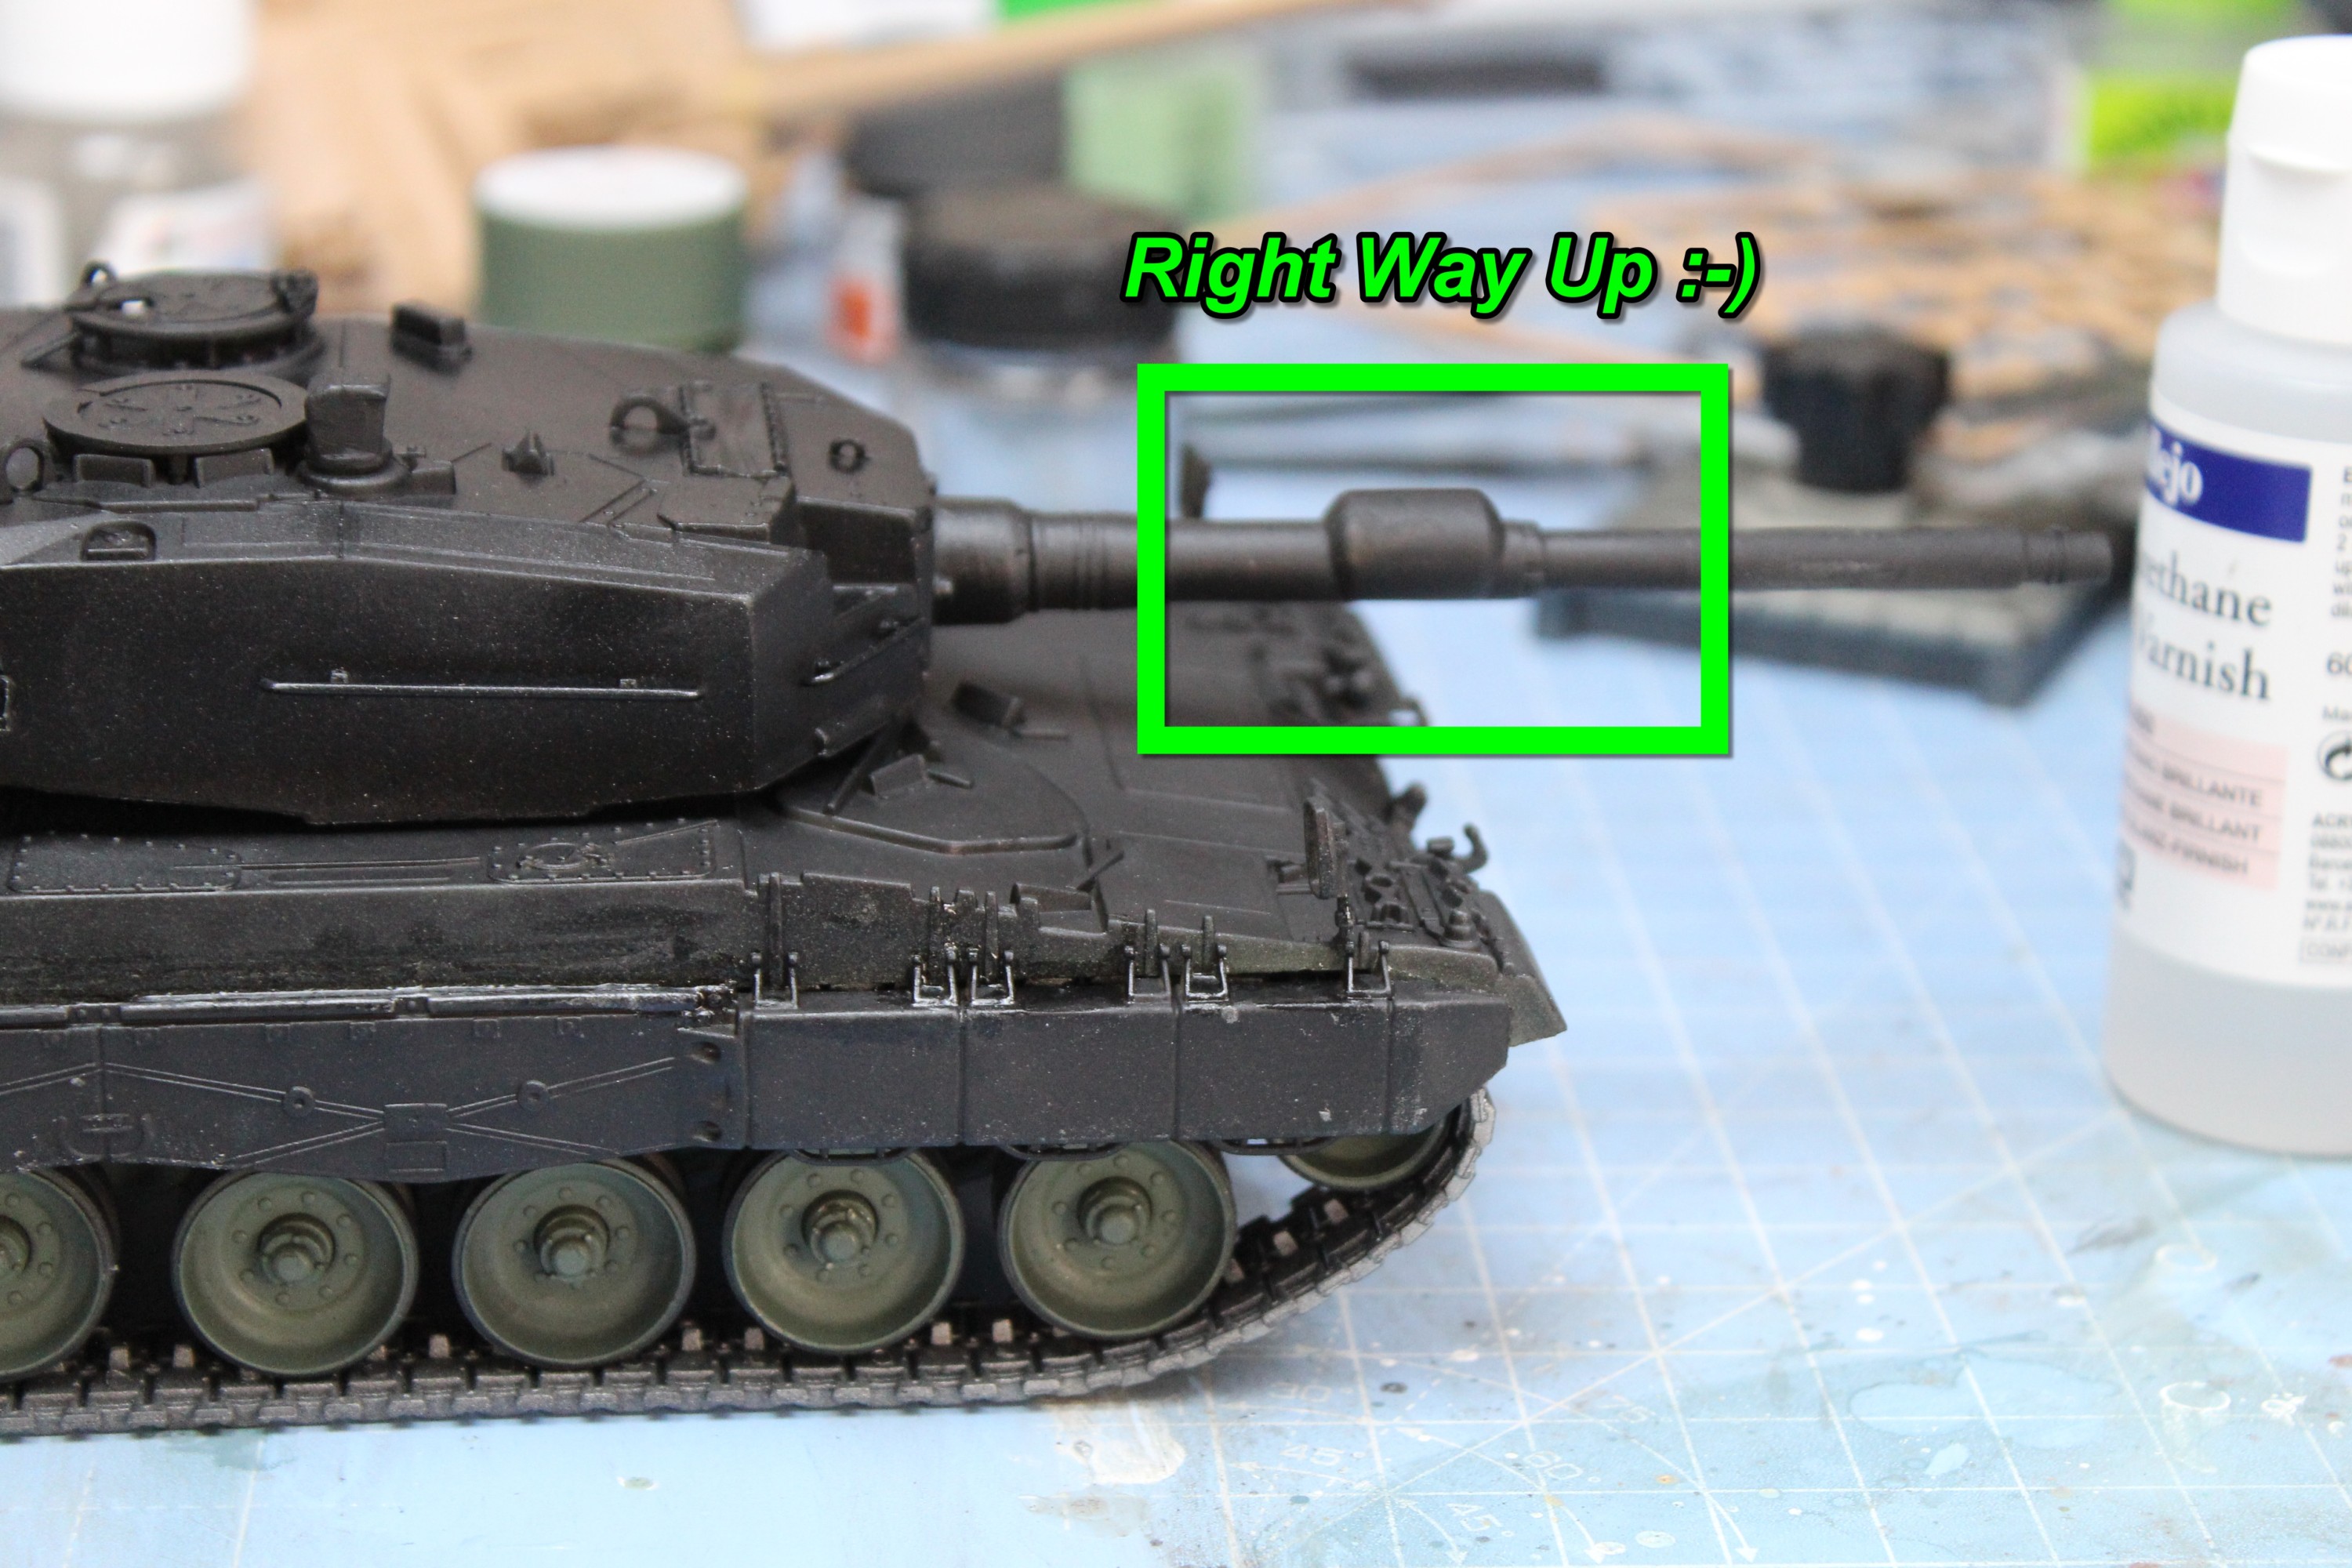
One thing I did suddenly notice is the fact I fitted the gun barrel upside down. So a little bit of wriggling and some superglue and the problem is solved.

Fitted The Gun Barrel upside down on the leopard 2 135th scale model
So Just Noticed That I have Attached The Gun Barrel Upside Down.
Gun Barrel Fitted Correctly On Scale Model Tank
So I Now Have Put The Gun Barrel The Correct Way Up.

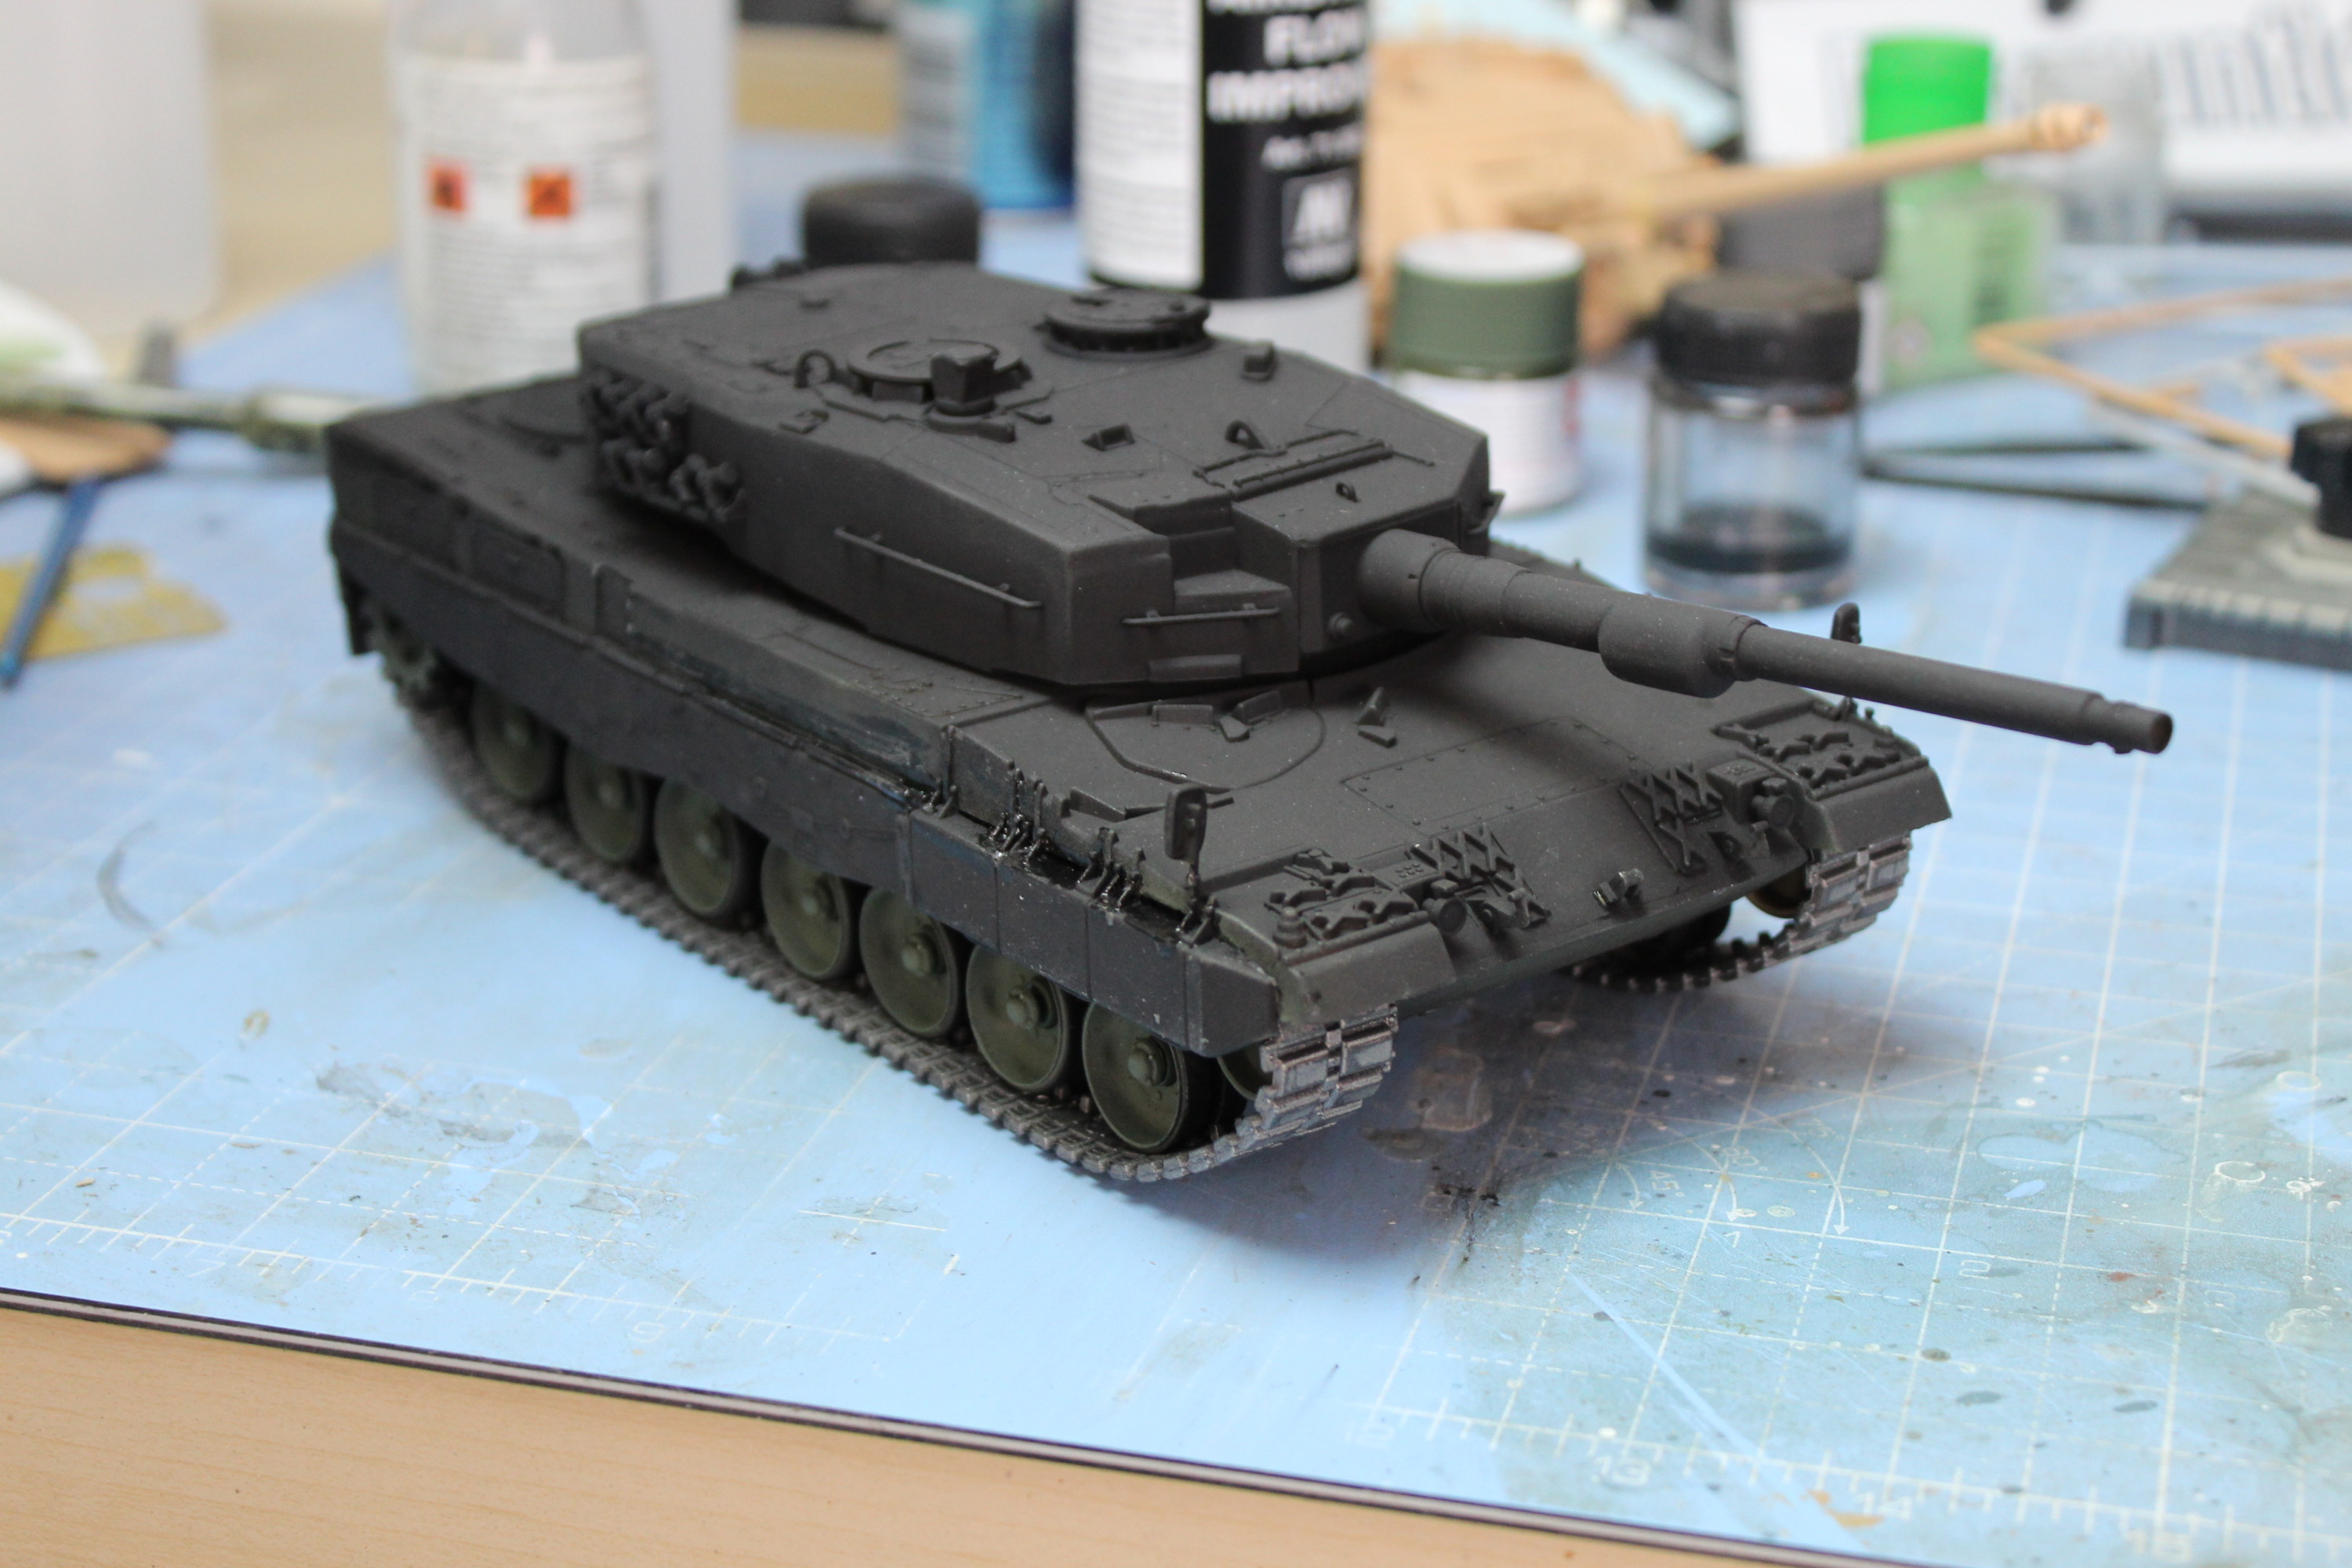
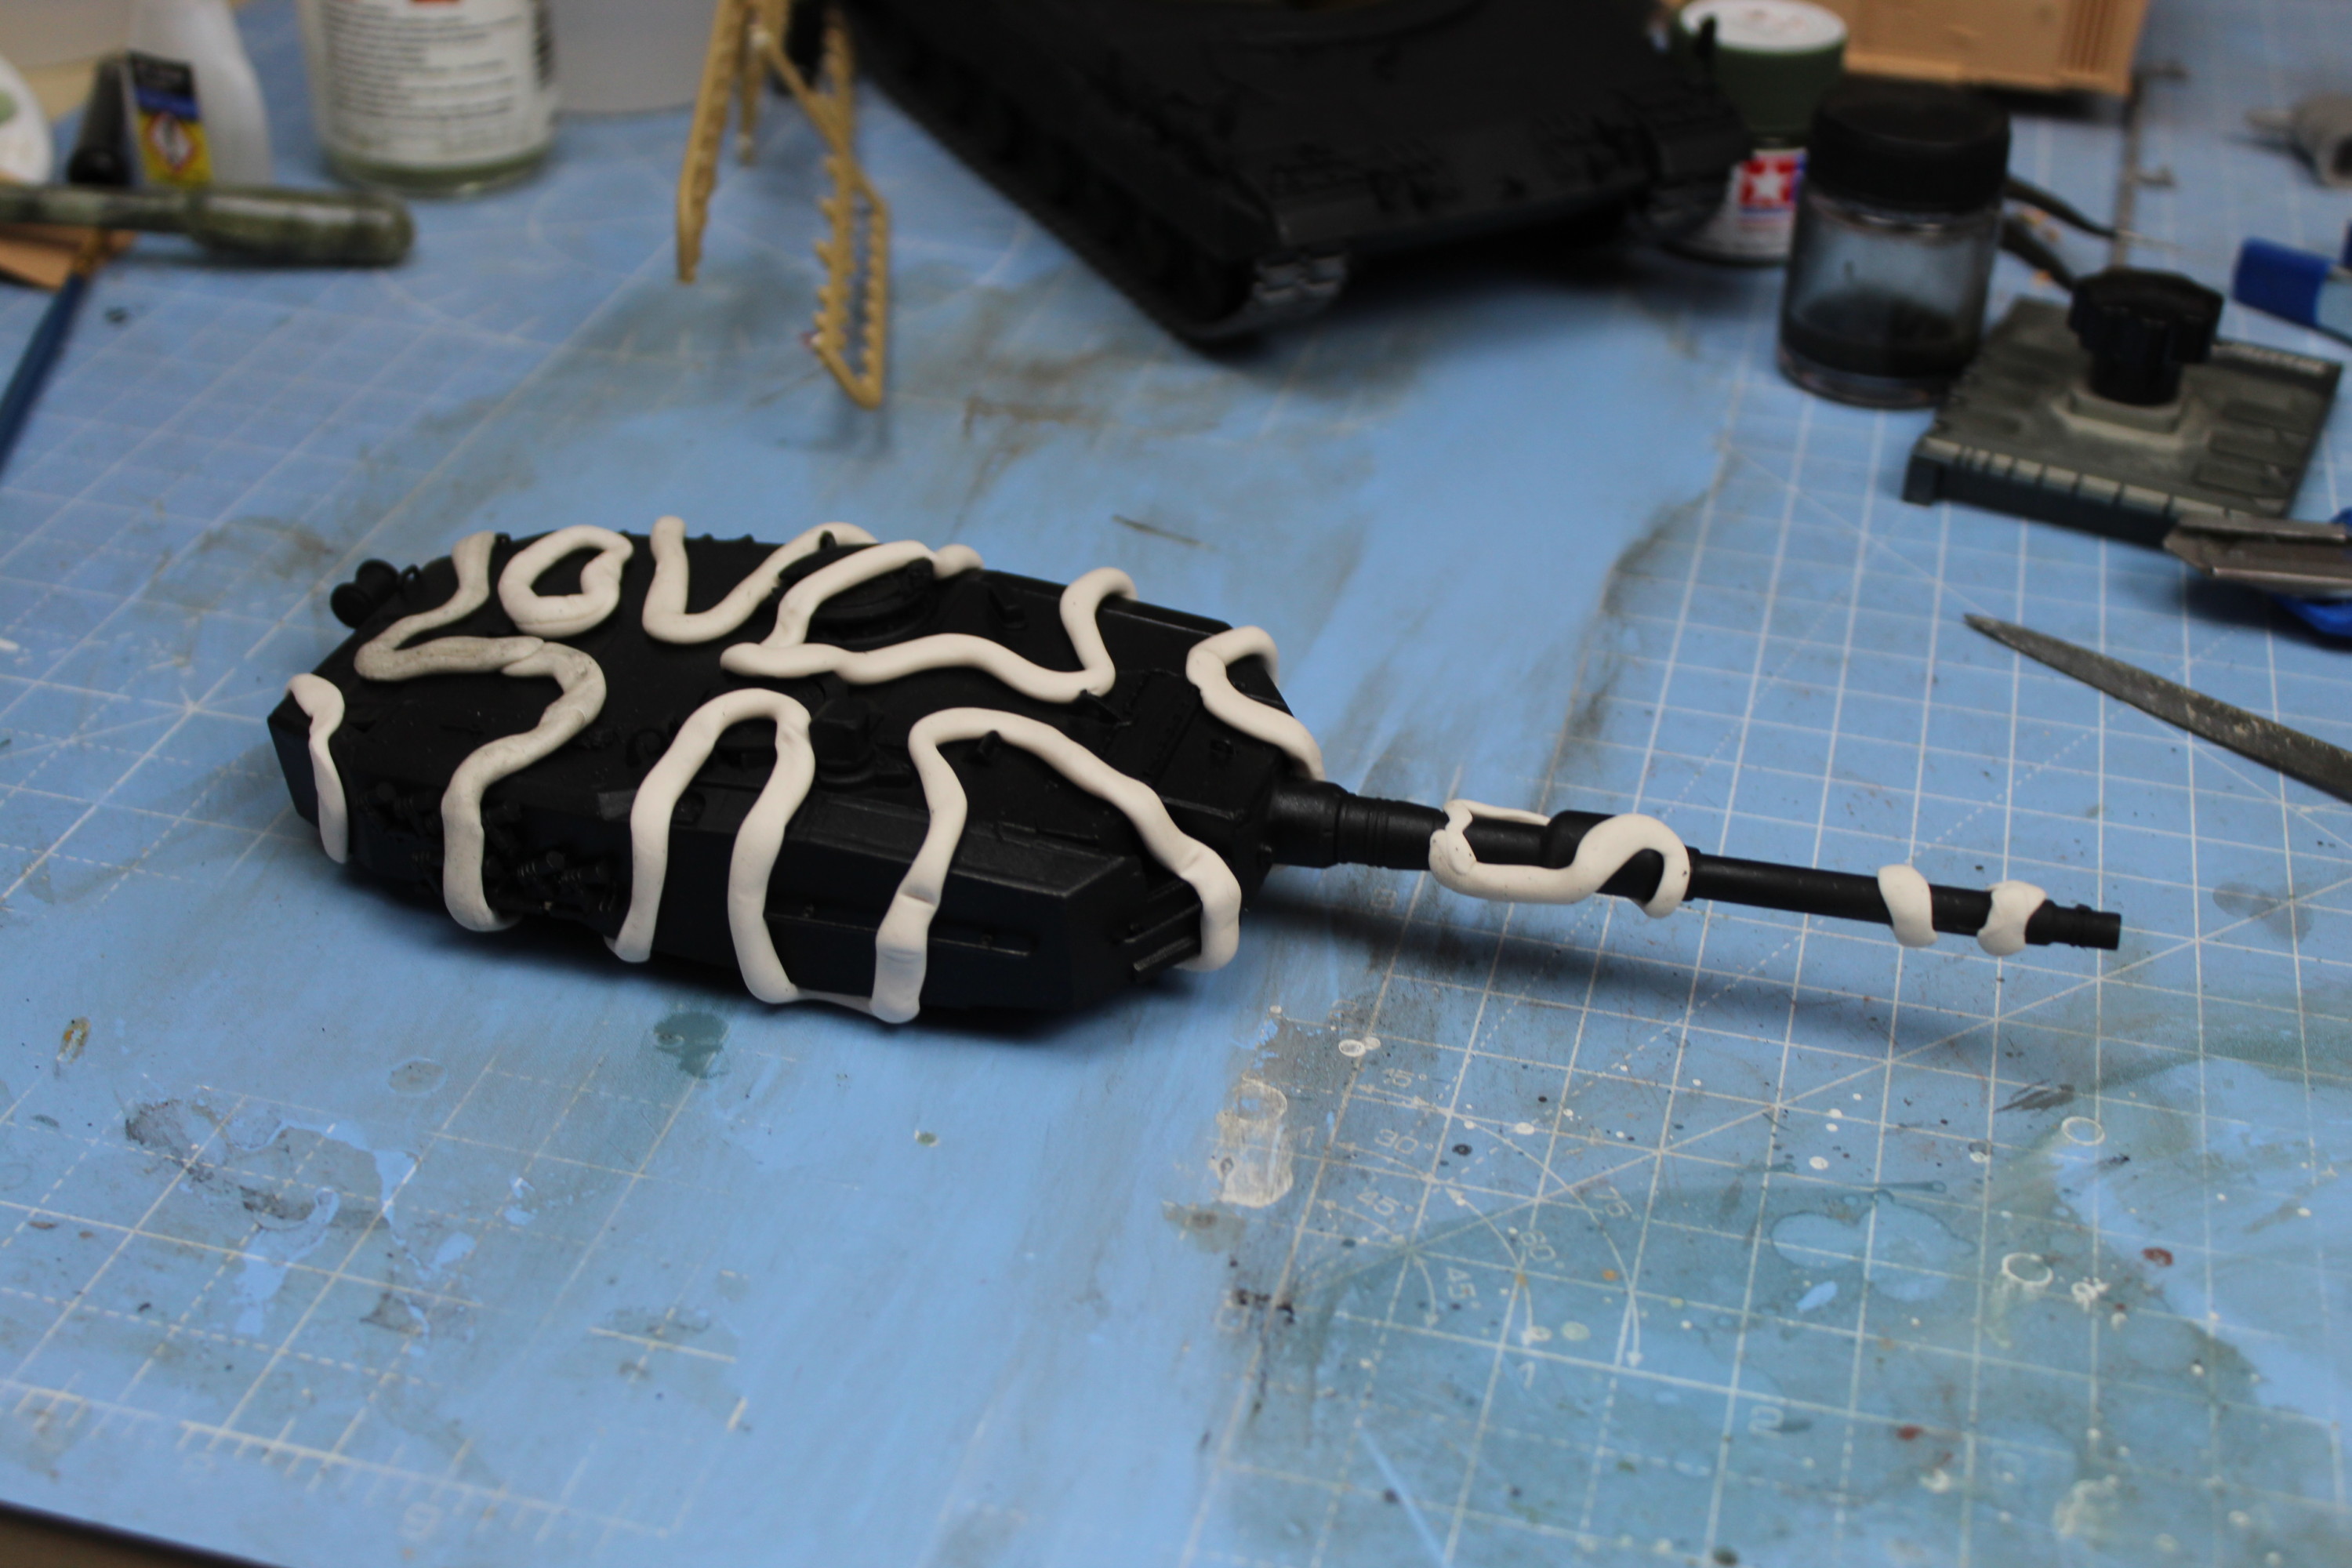
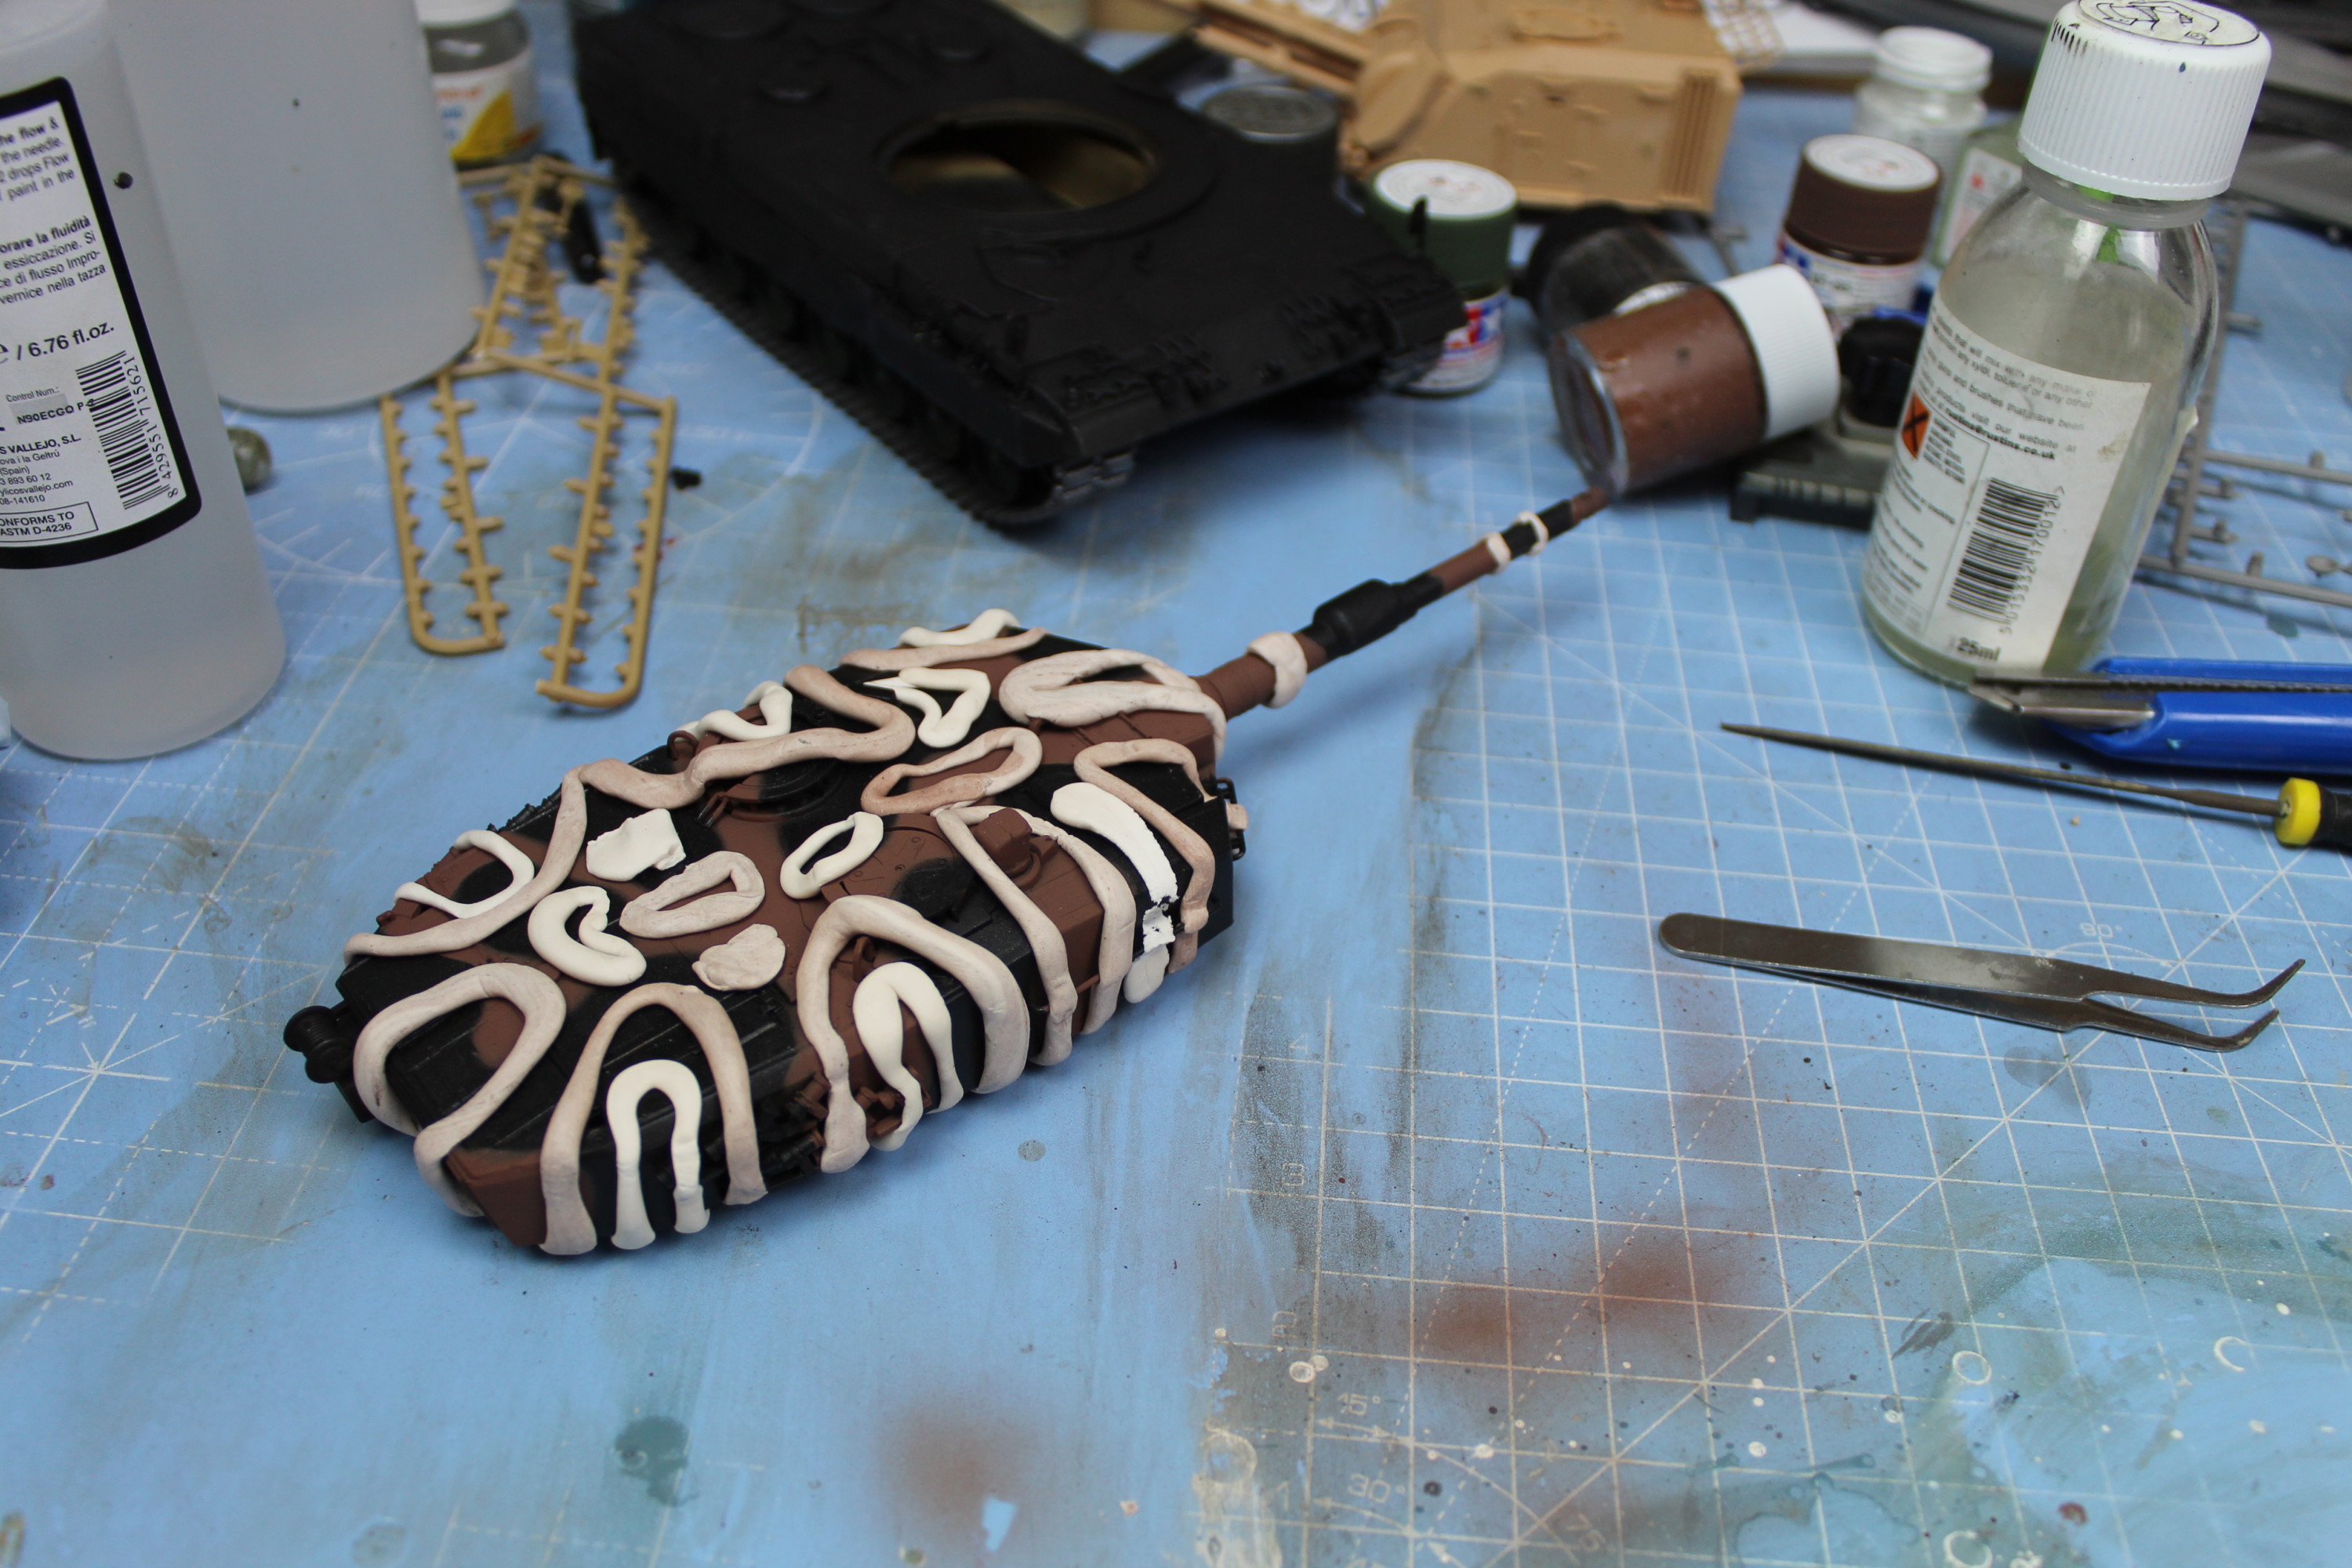
That is the build pretty much done, so now on to the painting. I have given the model a coat of Gloss AV polyurethane varnish. A new product for me and the jury is still out. Anyways! Now that I have given it a quick varnish, I can now start masking off for the camouflage painting.

Leopard 2 135th scale model first coat ofvarnish
Gloss Varnish Now Ready For Some NATO Camouflage.

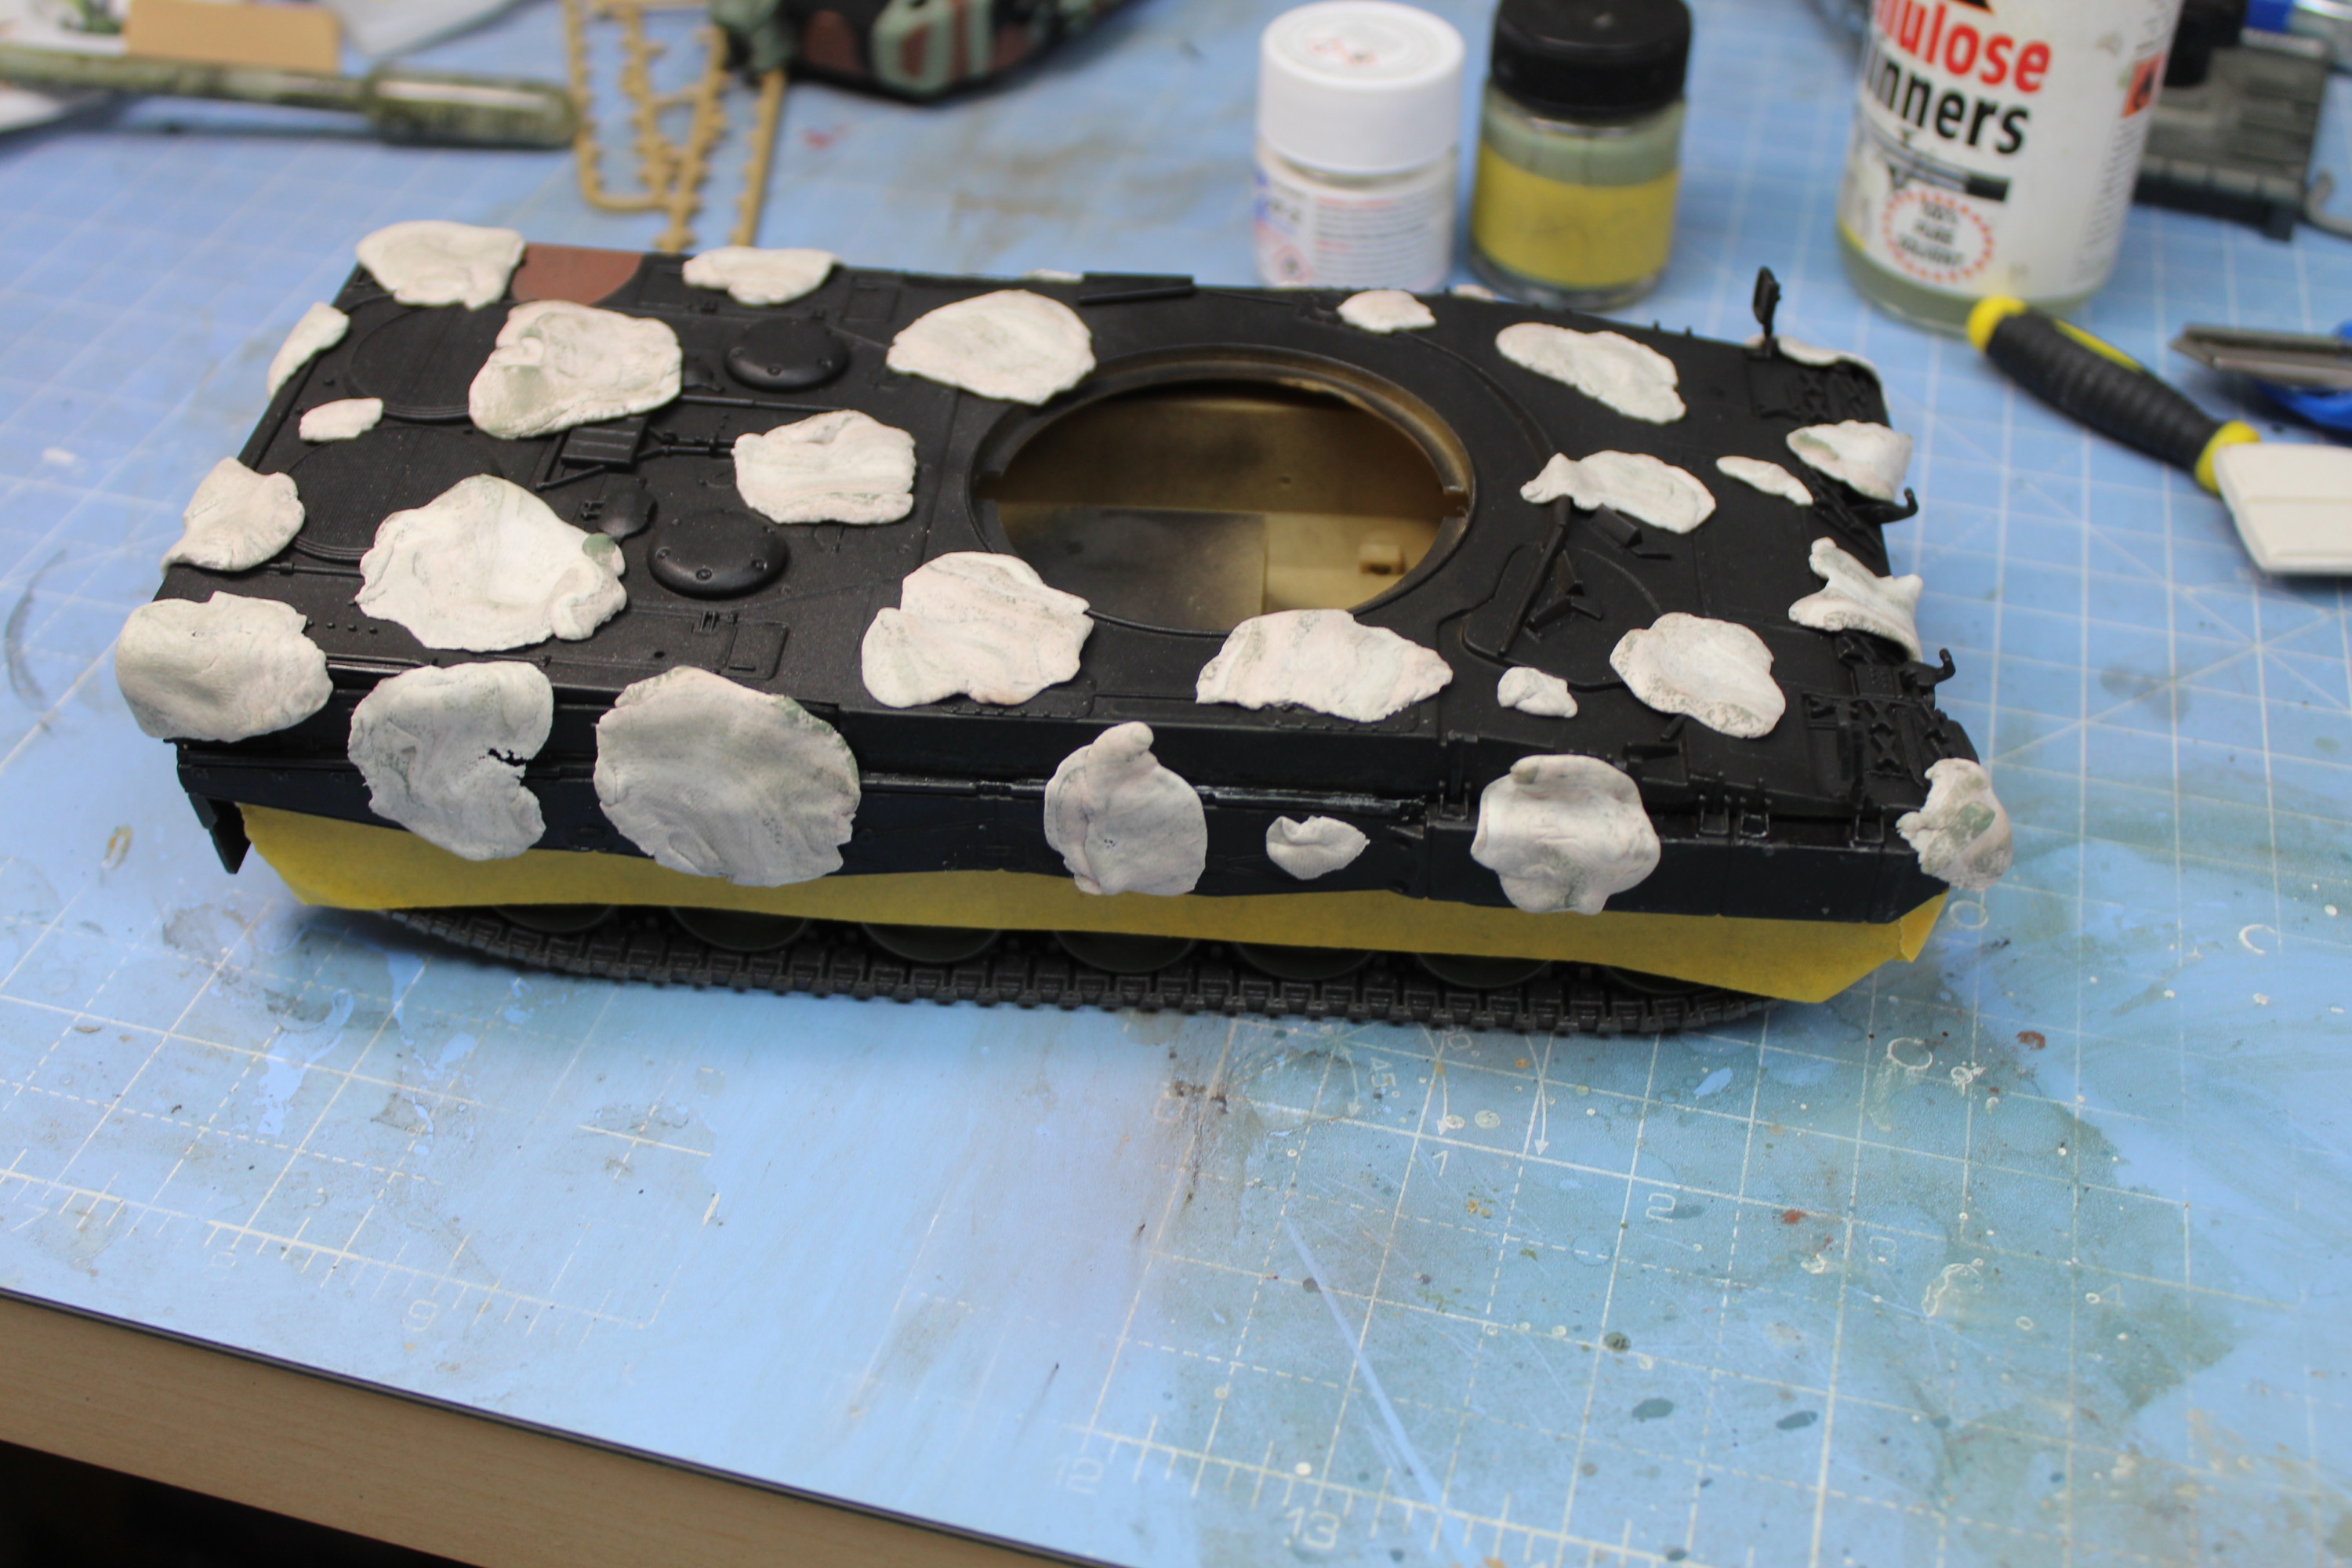
So I picked up some cheap white tack from Asda so I want to try using that to mask off parts of the tank for airbrushing.

Masking The Leopard 2 Turret For Painting
Applying White Tack To Start Off The Camo Pattern On The Tank Turret.
Masking The Tank Turret For The Leopard 2 Scale Model
First Masking The Turret With White Tack.
Turret Masked And Ready For The First Coat Of Paint
Applied Masking Tape, Now Need To Do The First Coat Of Paint.
Spray Painted The Leopard 2 Turret With Nato Brown
Sprayed With Tamiya XF-68 Nato Brown.
First Part Of The Camo Done On The Leopard 2 Turret
Peeled Off The Masking Tape.
Masking The Turret For The Second Coat Of Camouflage
Masking The Turret For The Second Layer Of Camouflage.
Second Coat Of Nato Camo About To Be Applied
Masked And Taped And Ready To Paint With Tamiya XF-67 Nato Green.

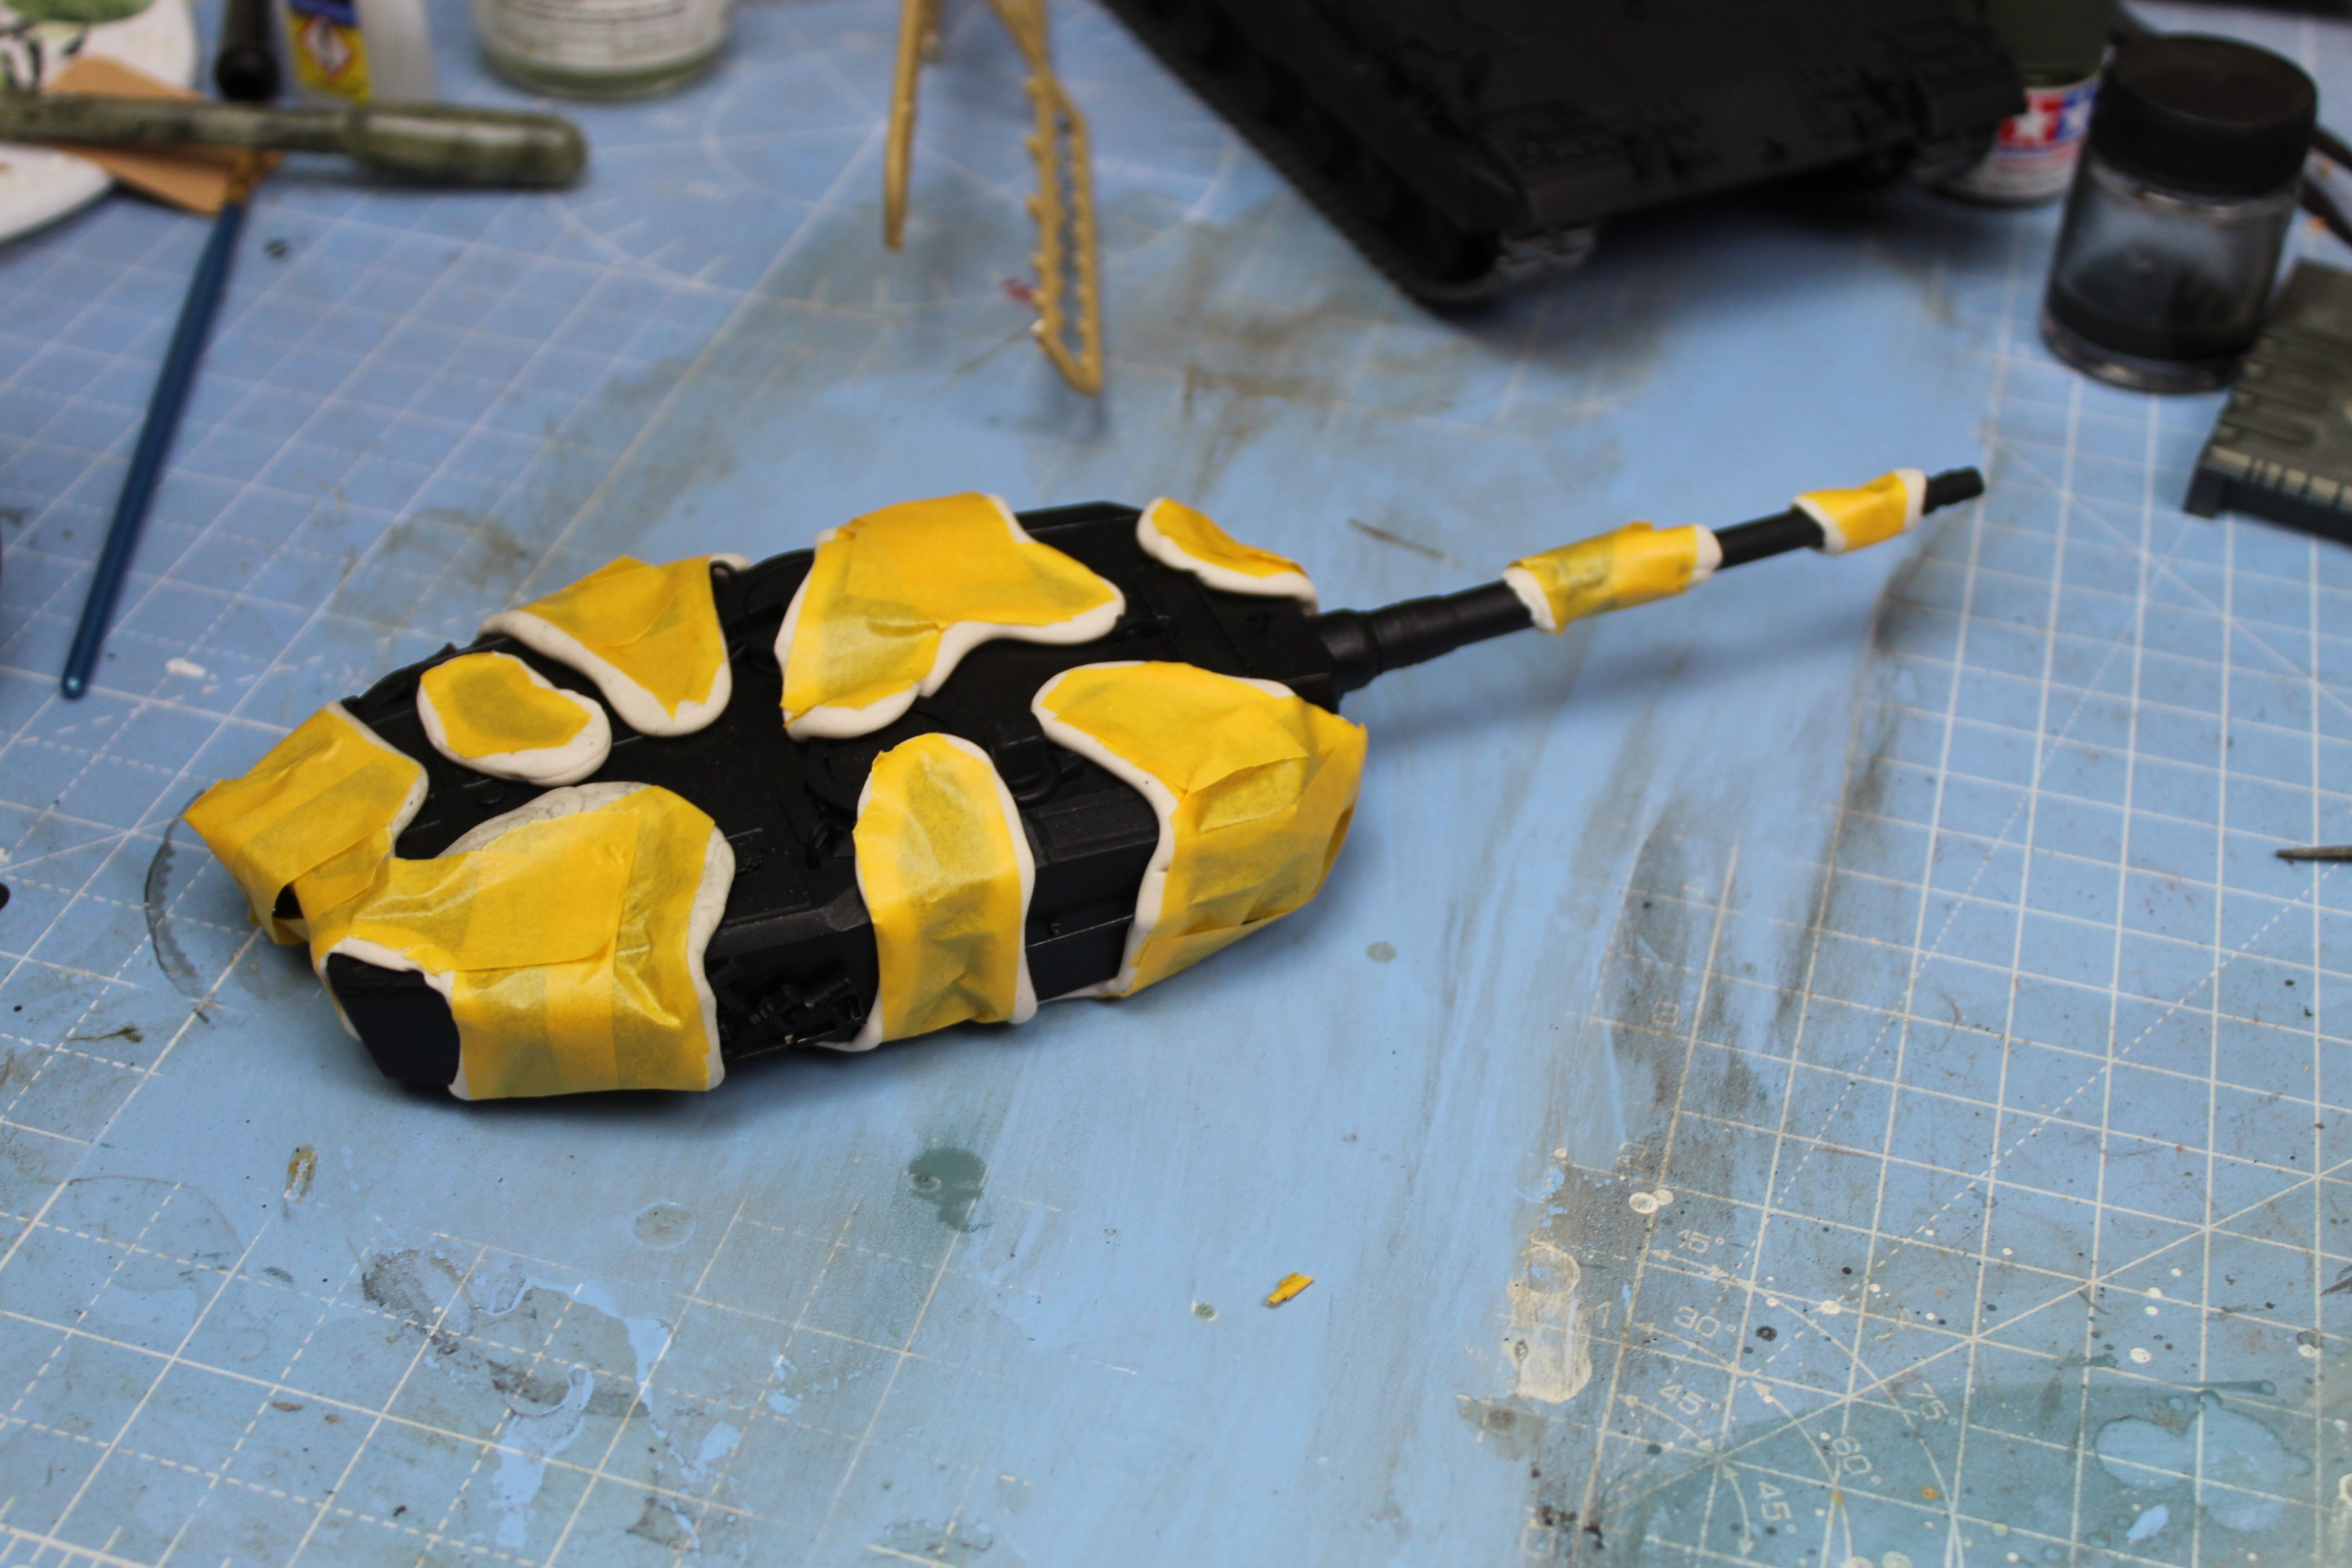
I also need to cover the tracks and wheels before going crazy with the airbrush.

The Scale Model Tank Hull Is Masked For Painting
Using White Tack To Mask The Tanks Hull For Painting.
Sprayed The Tank Hull With Nato Brown
Sprayed The Hull With Nato Brown.
Leopard 2 Sprayed With Nato Green Paint
Second Spraying With Nato Green.
The Camouflage Done On The Leopard 2 Scale Model Tank
Peeled Off The Masking And You Can Now See The Camouflage Pattern On The Leopard 2 Tank.
The Leopard 2 Scale Model Camouflage Finished
With The Turret On Top Starting To Look More Like A Tank.
Decals Applied To The Leopard 2 Scale Model
Applied The Decals To The Side Of The Turret.

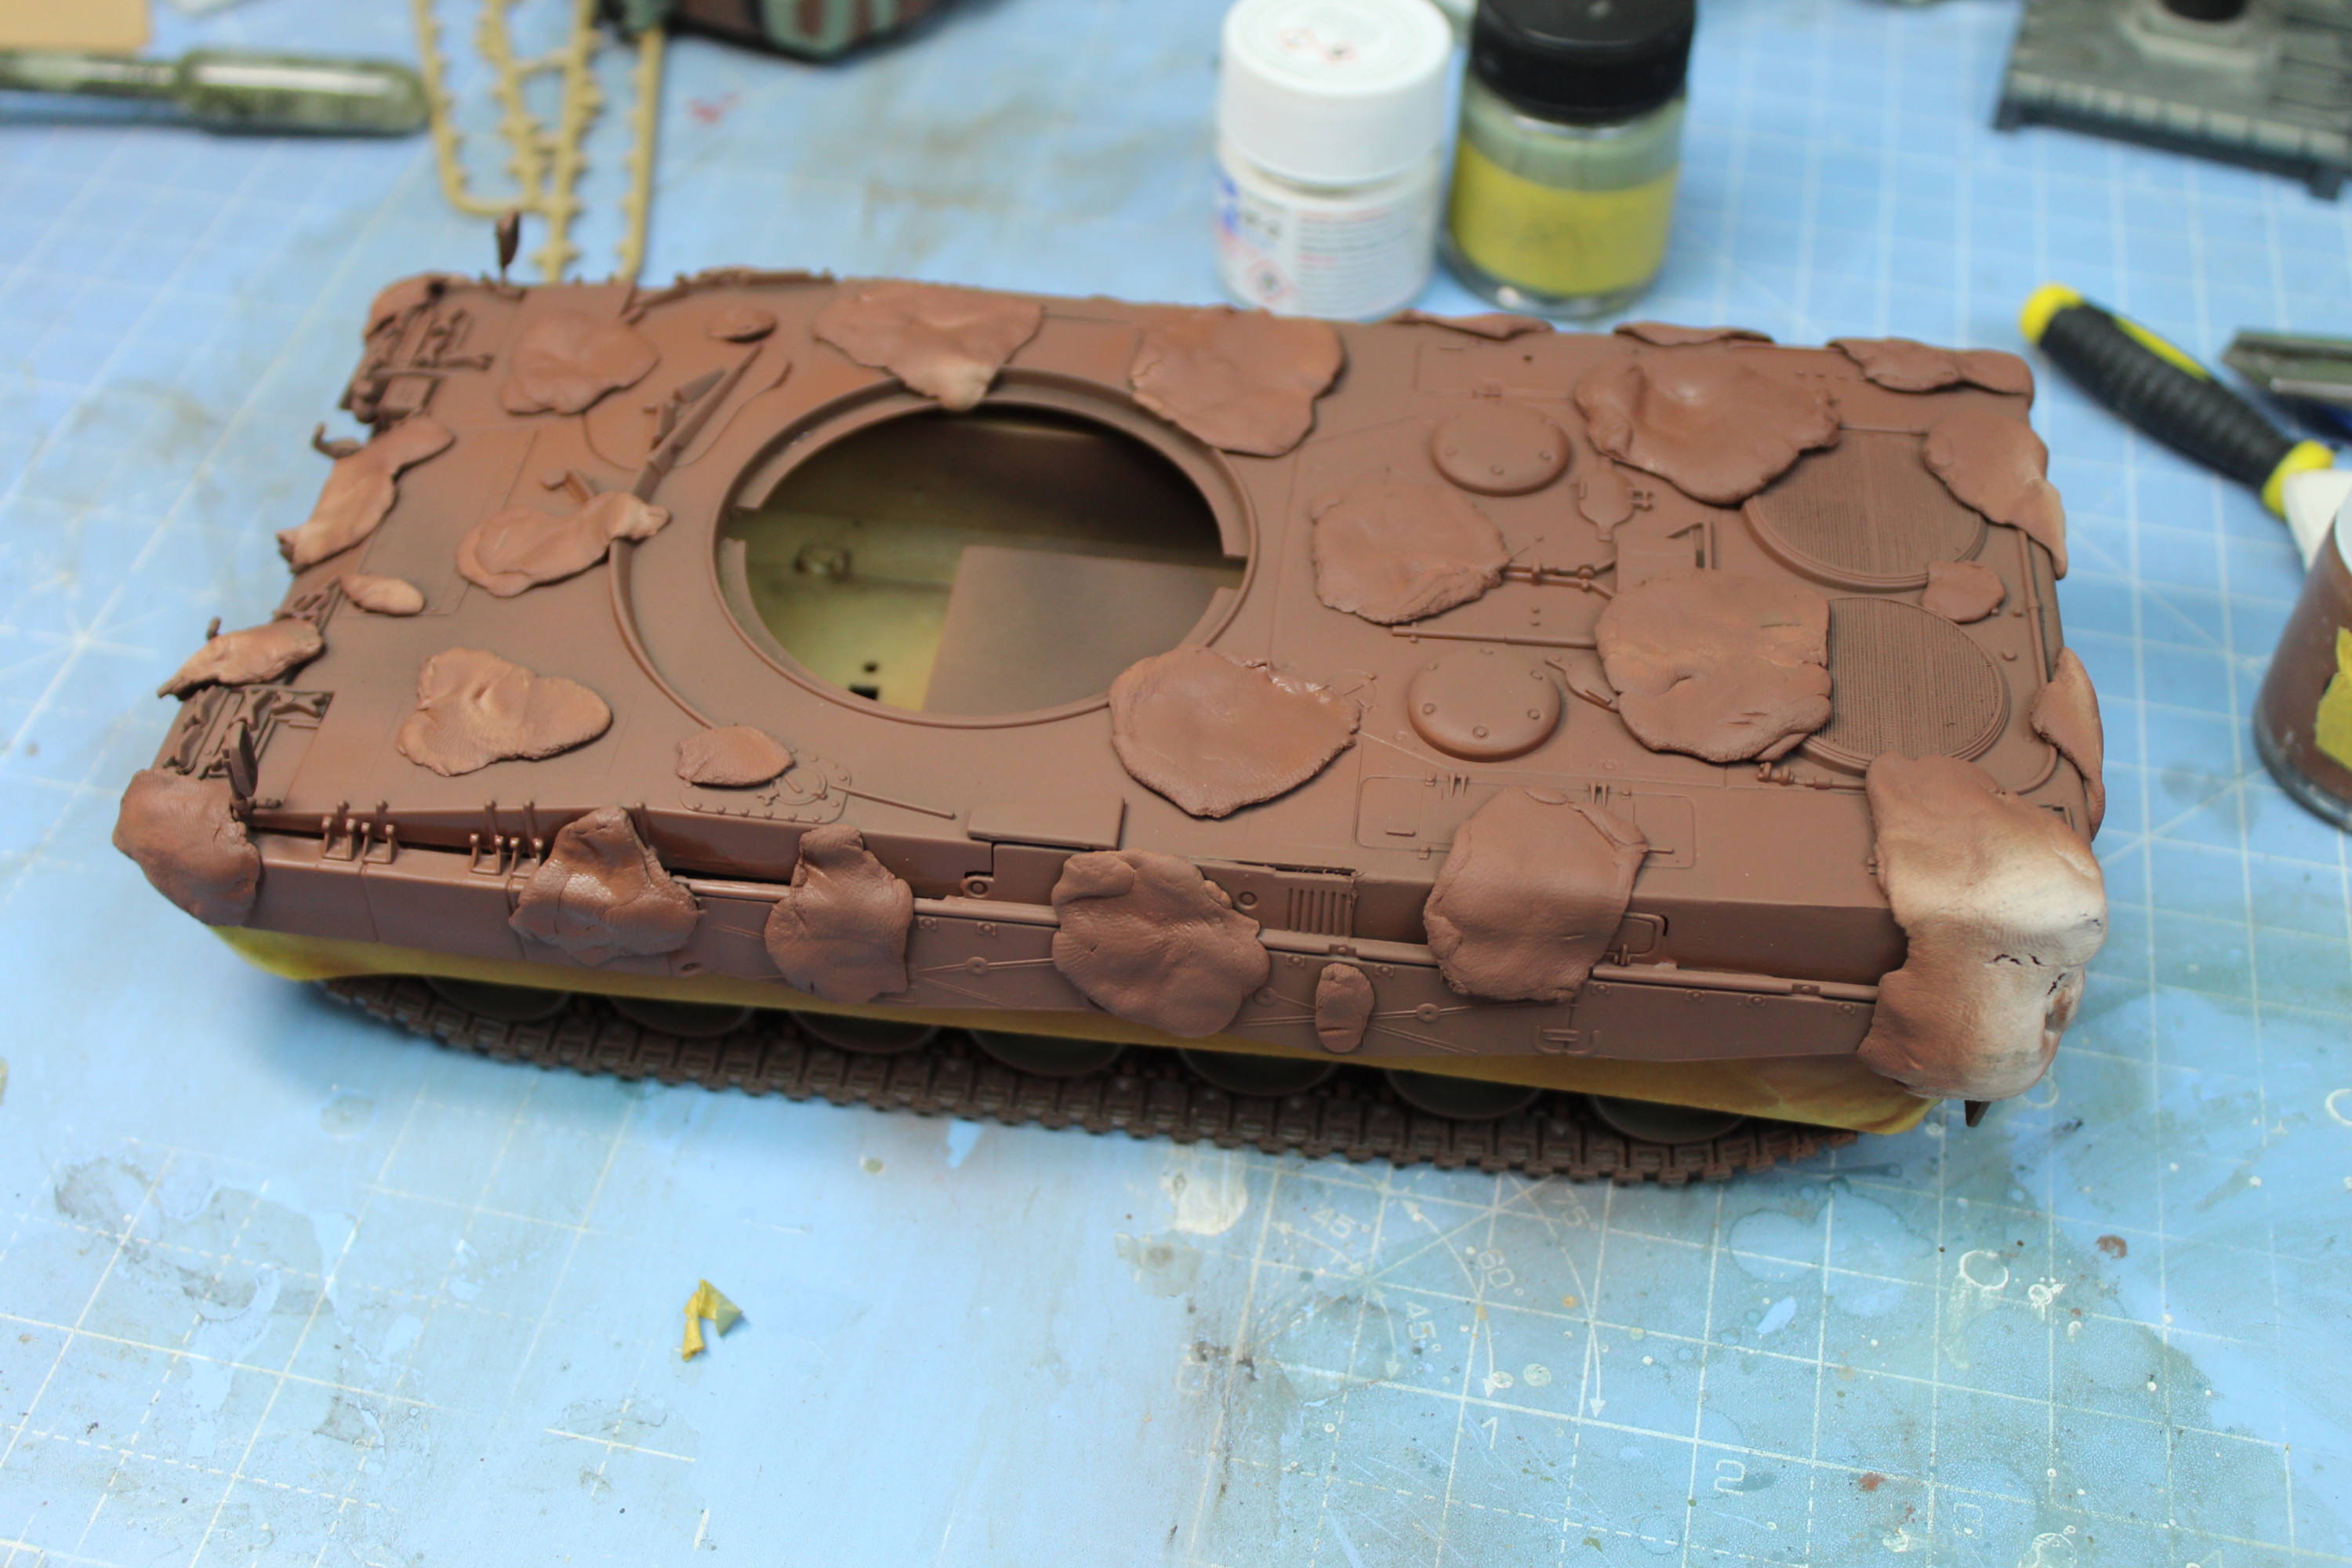
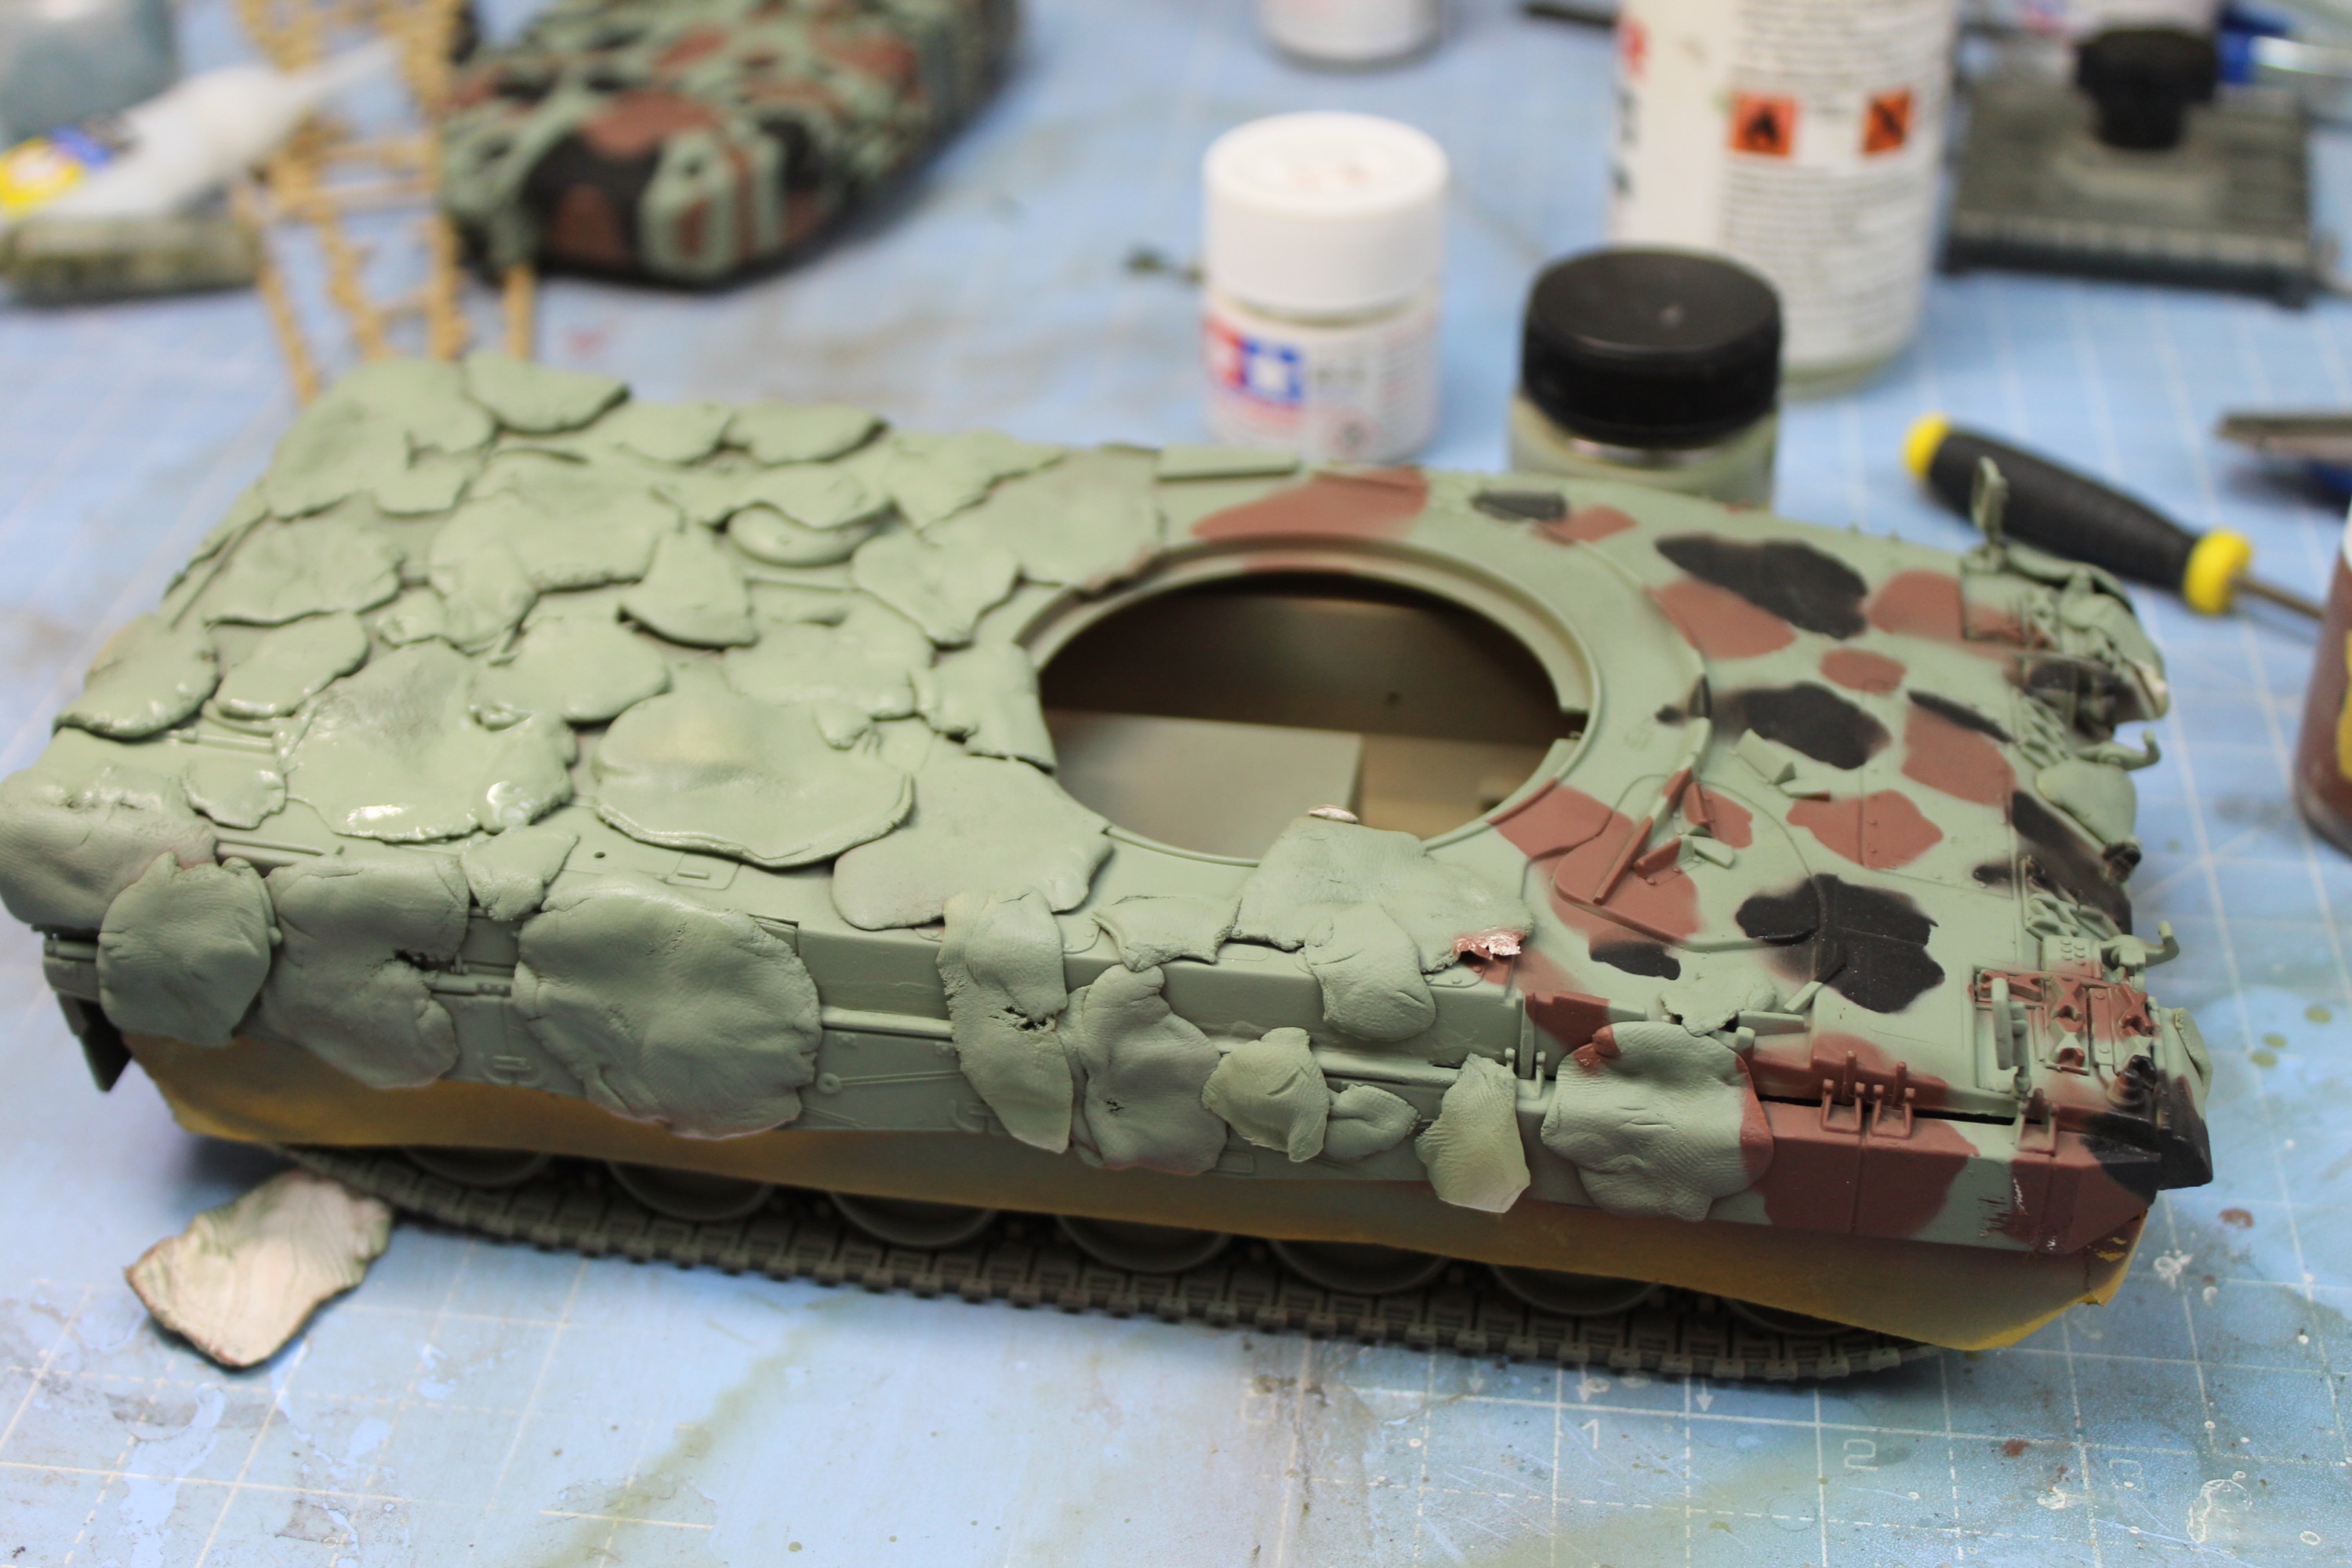
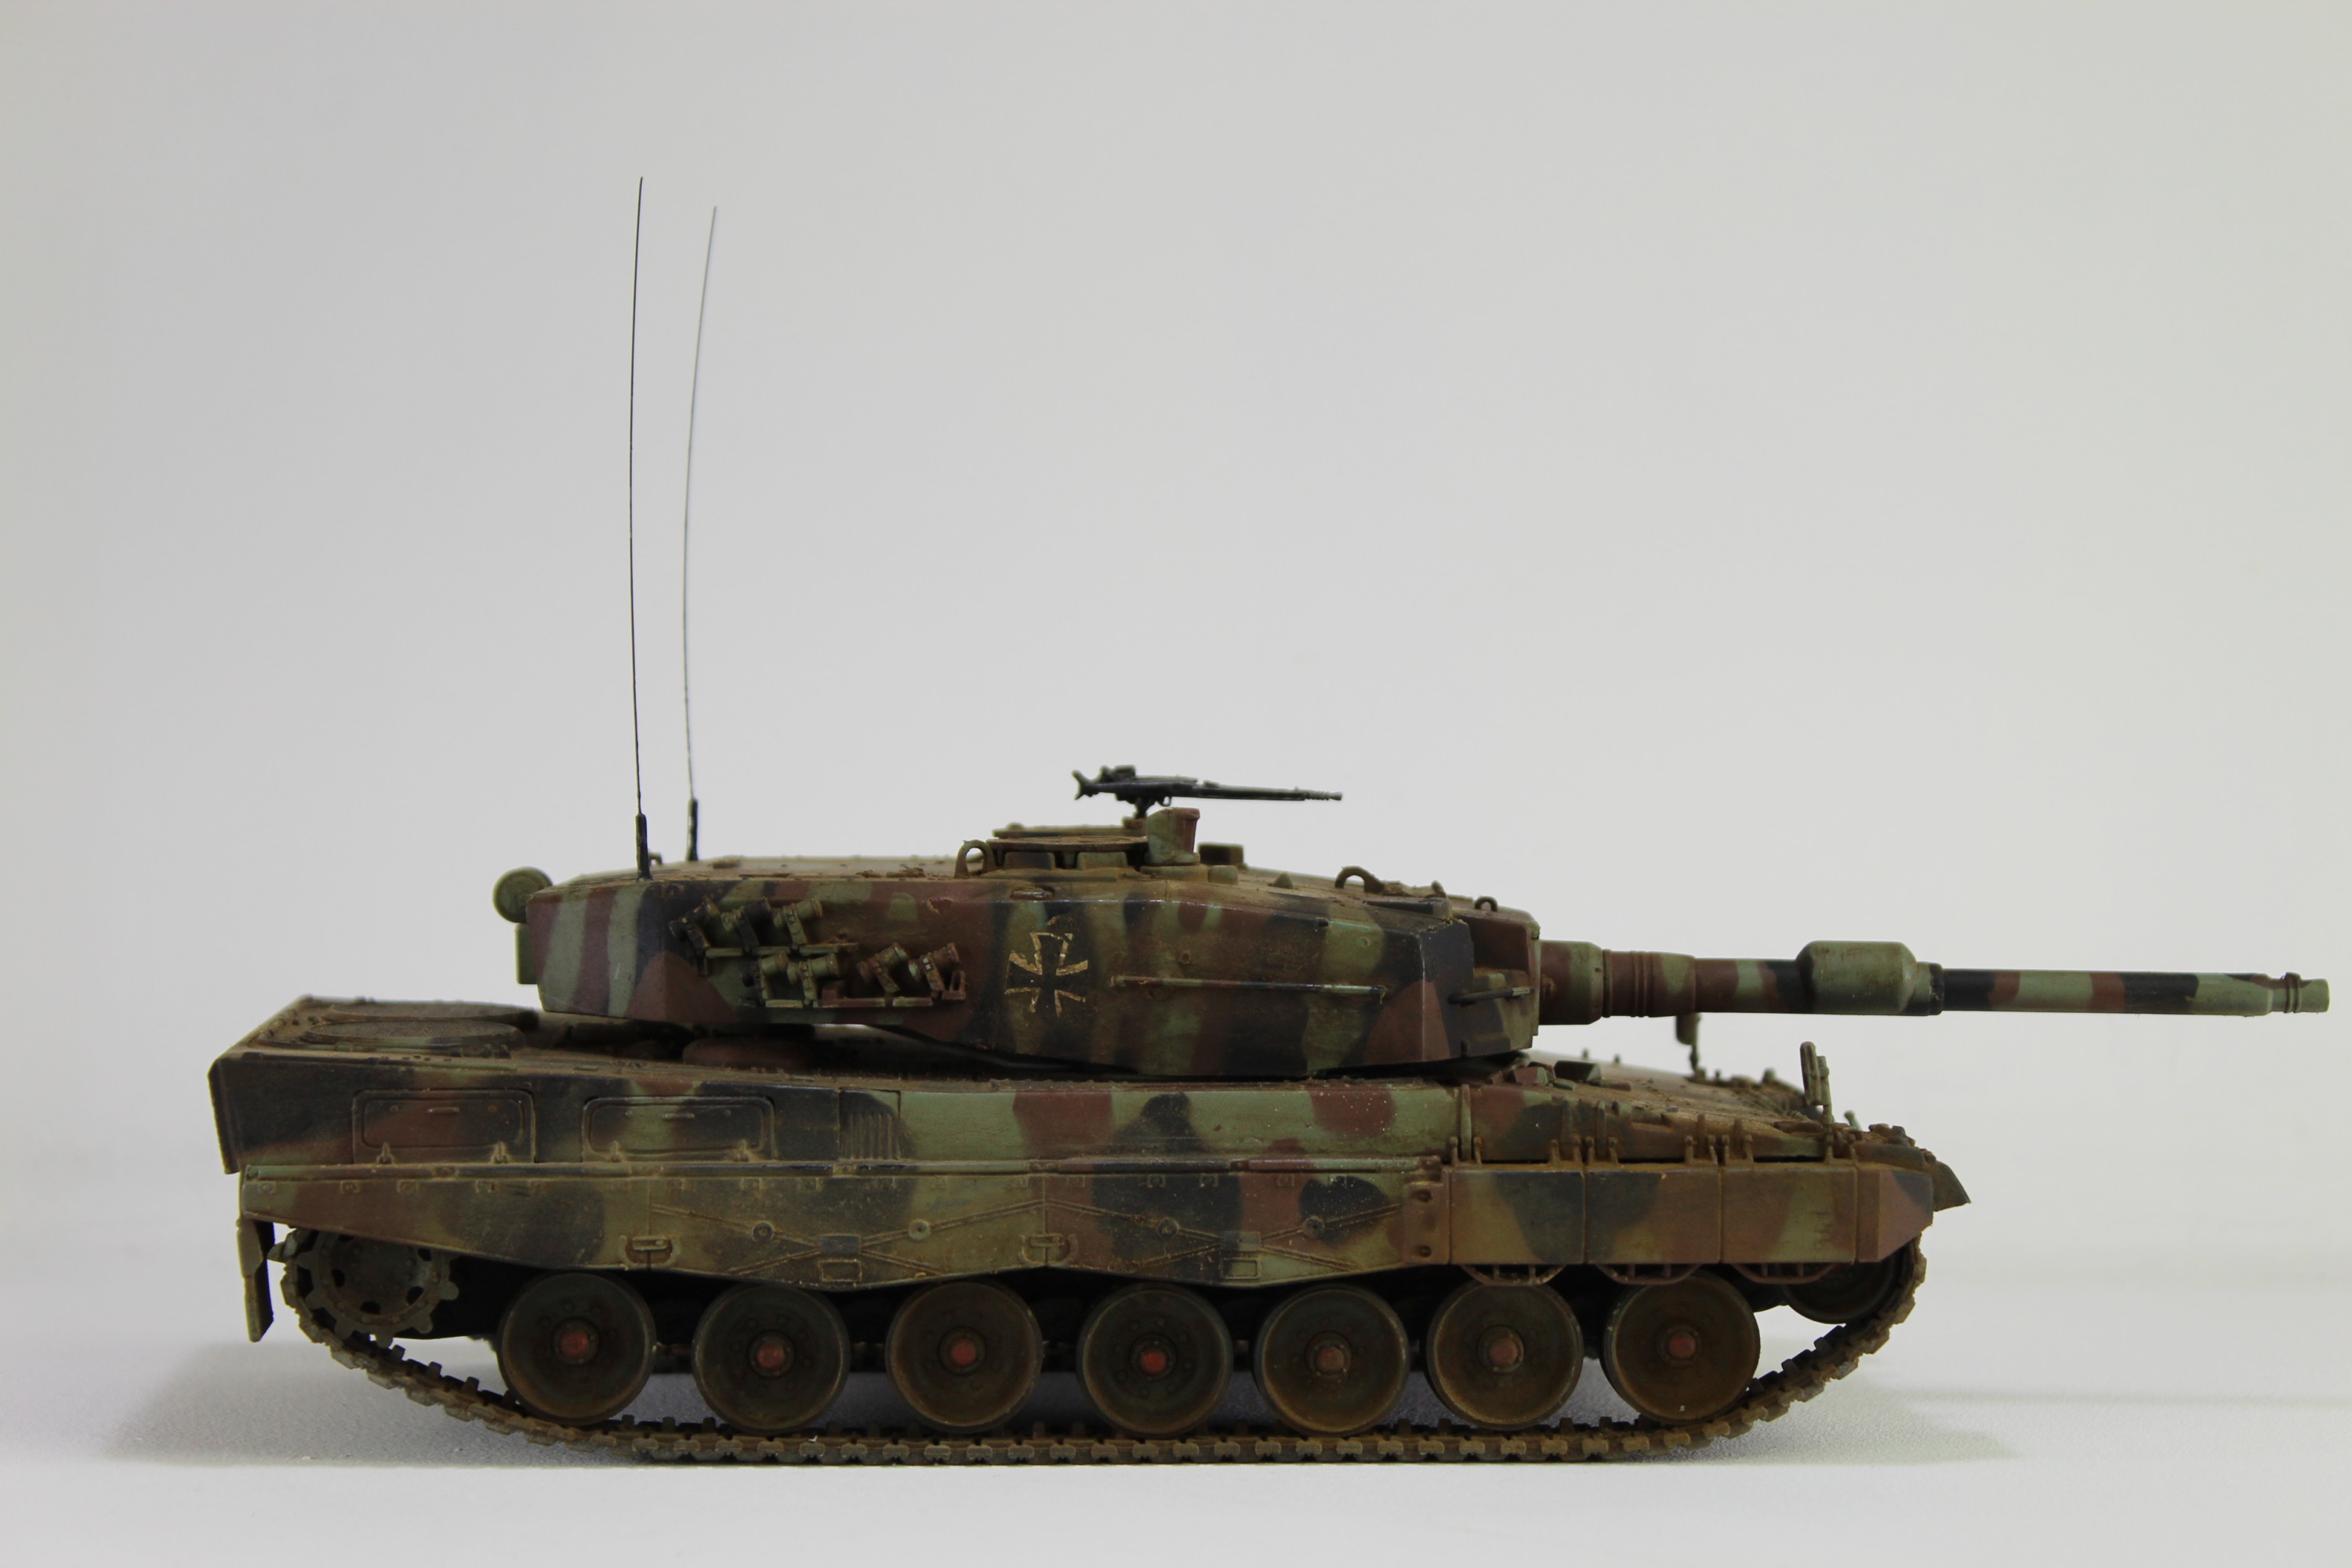
So I’m quite happy with how the camouflage has turned out, a little more practice is needed with the tack to get the right shapes but it seems to do the job. The only other problem was I over lightened the Nato green a little but I’m still learning, hopefully, I can darken it with a filter and washes.

The Scale Model Has Been Washed Wish Burnt Umber Oil Paint And White Spirit
I Have Given The Model A Wash With Burnt Umber Wash.

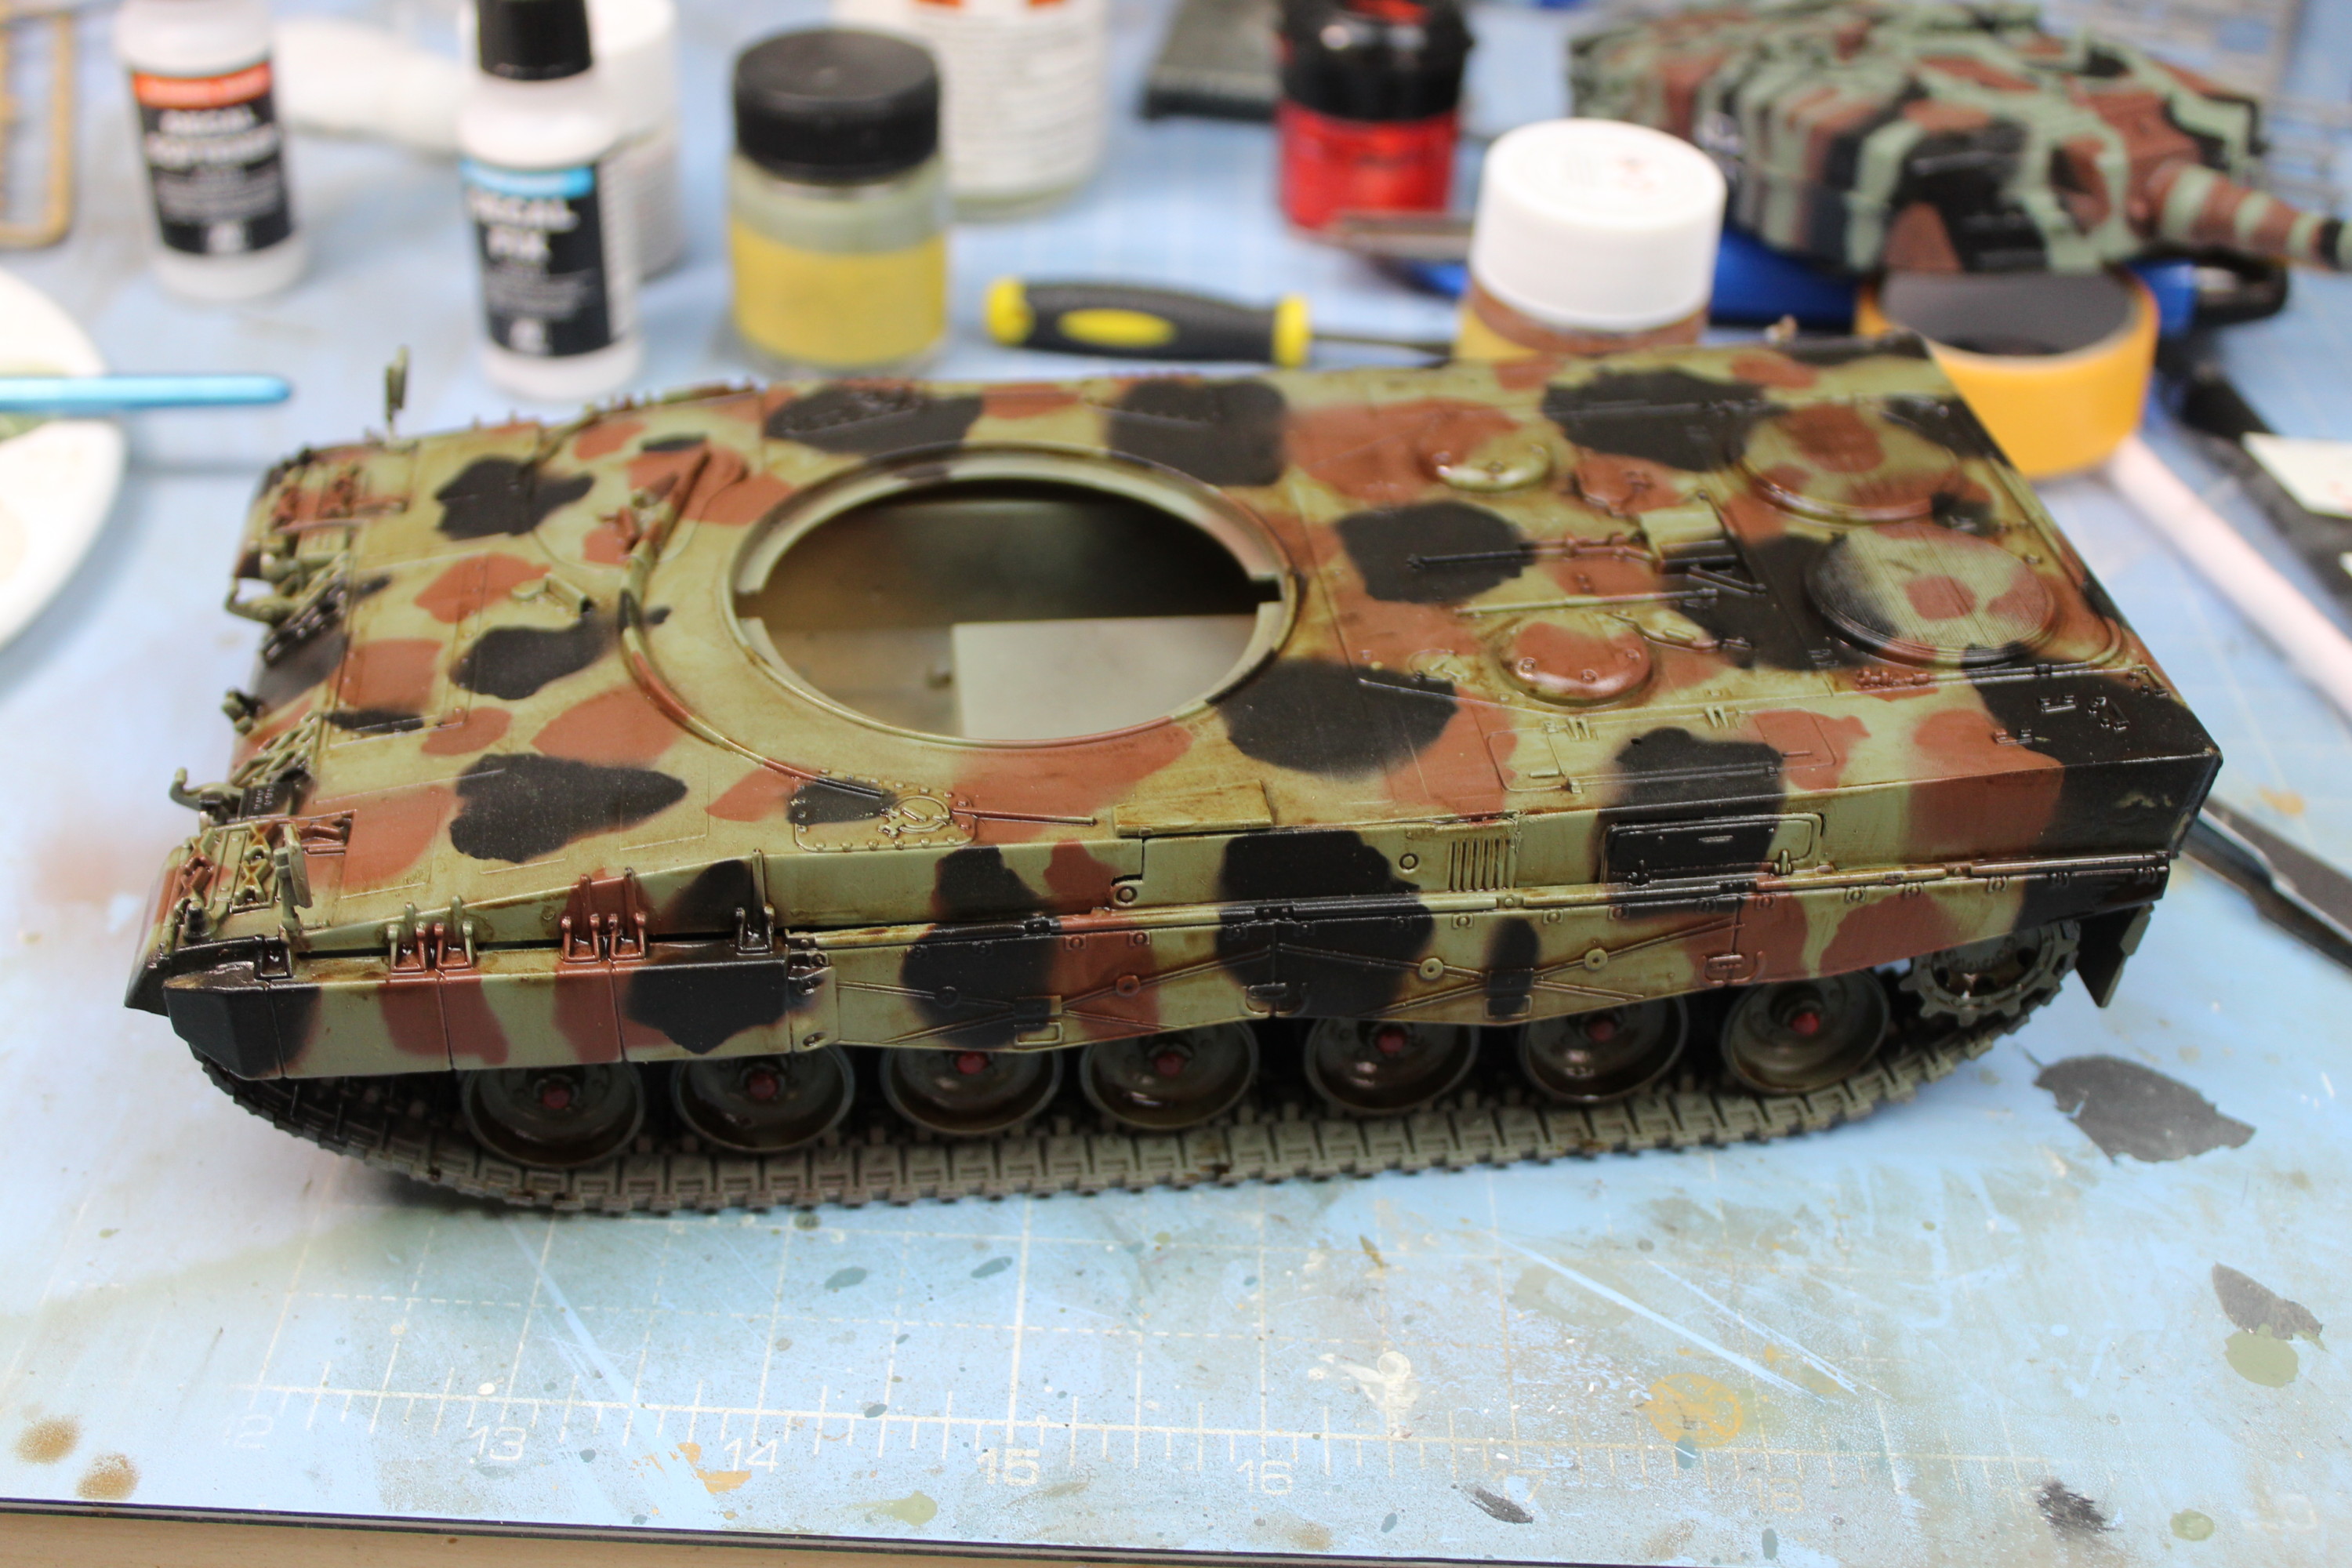
So after the wash, the green is still a little light, so next time I will leave it a lot darker before airbrushing.

Applied Some Weathering Pigments To The Tank Model
I have Applied Some Pigments To The Hull, Not Sure About The Green At The Moment.
Leopard 2 scale model pigment weathering done
The Leopard 2 Scale Model Pigment Done And Turret And Hull Joined.

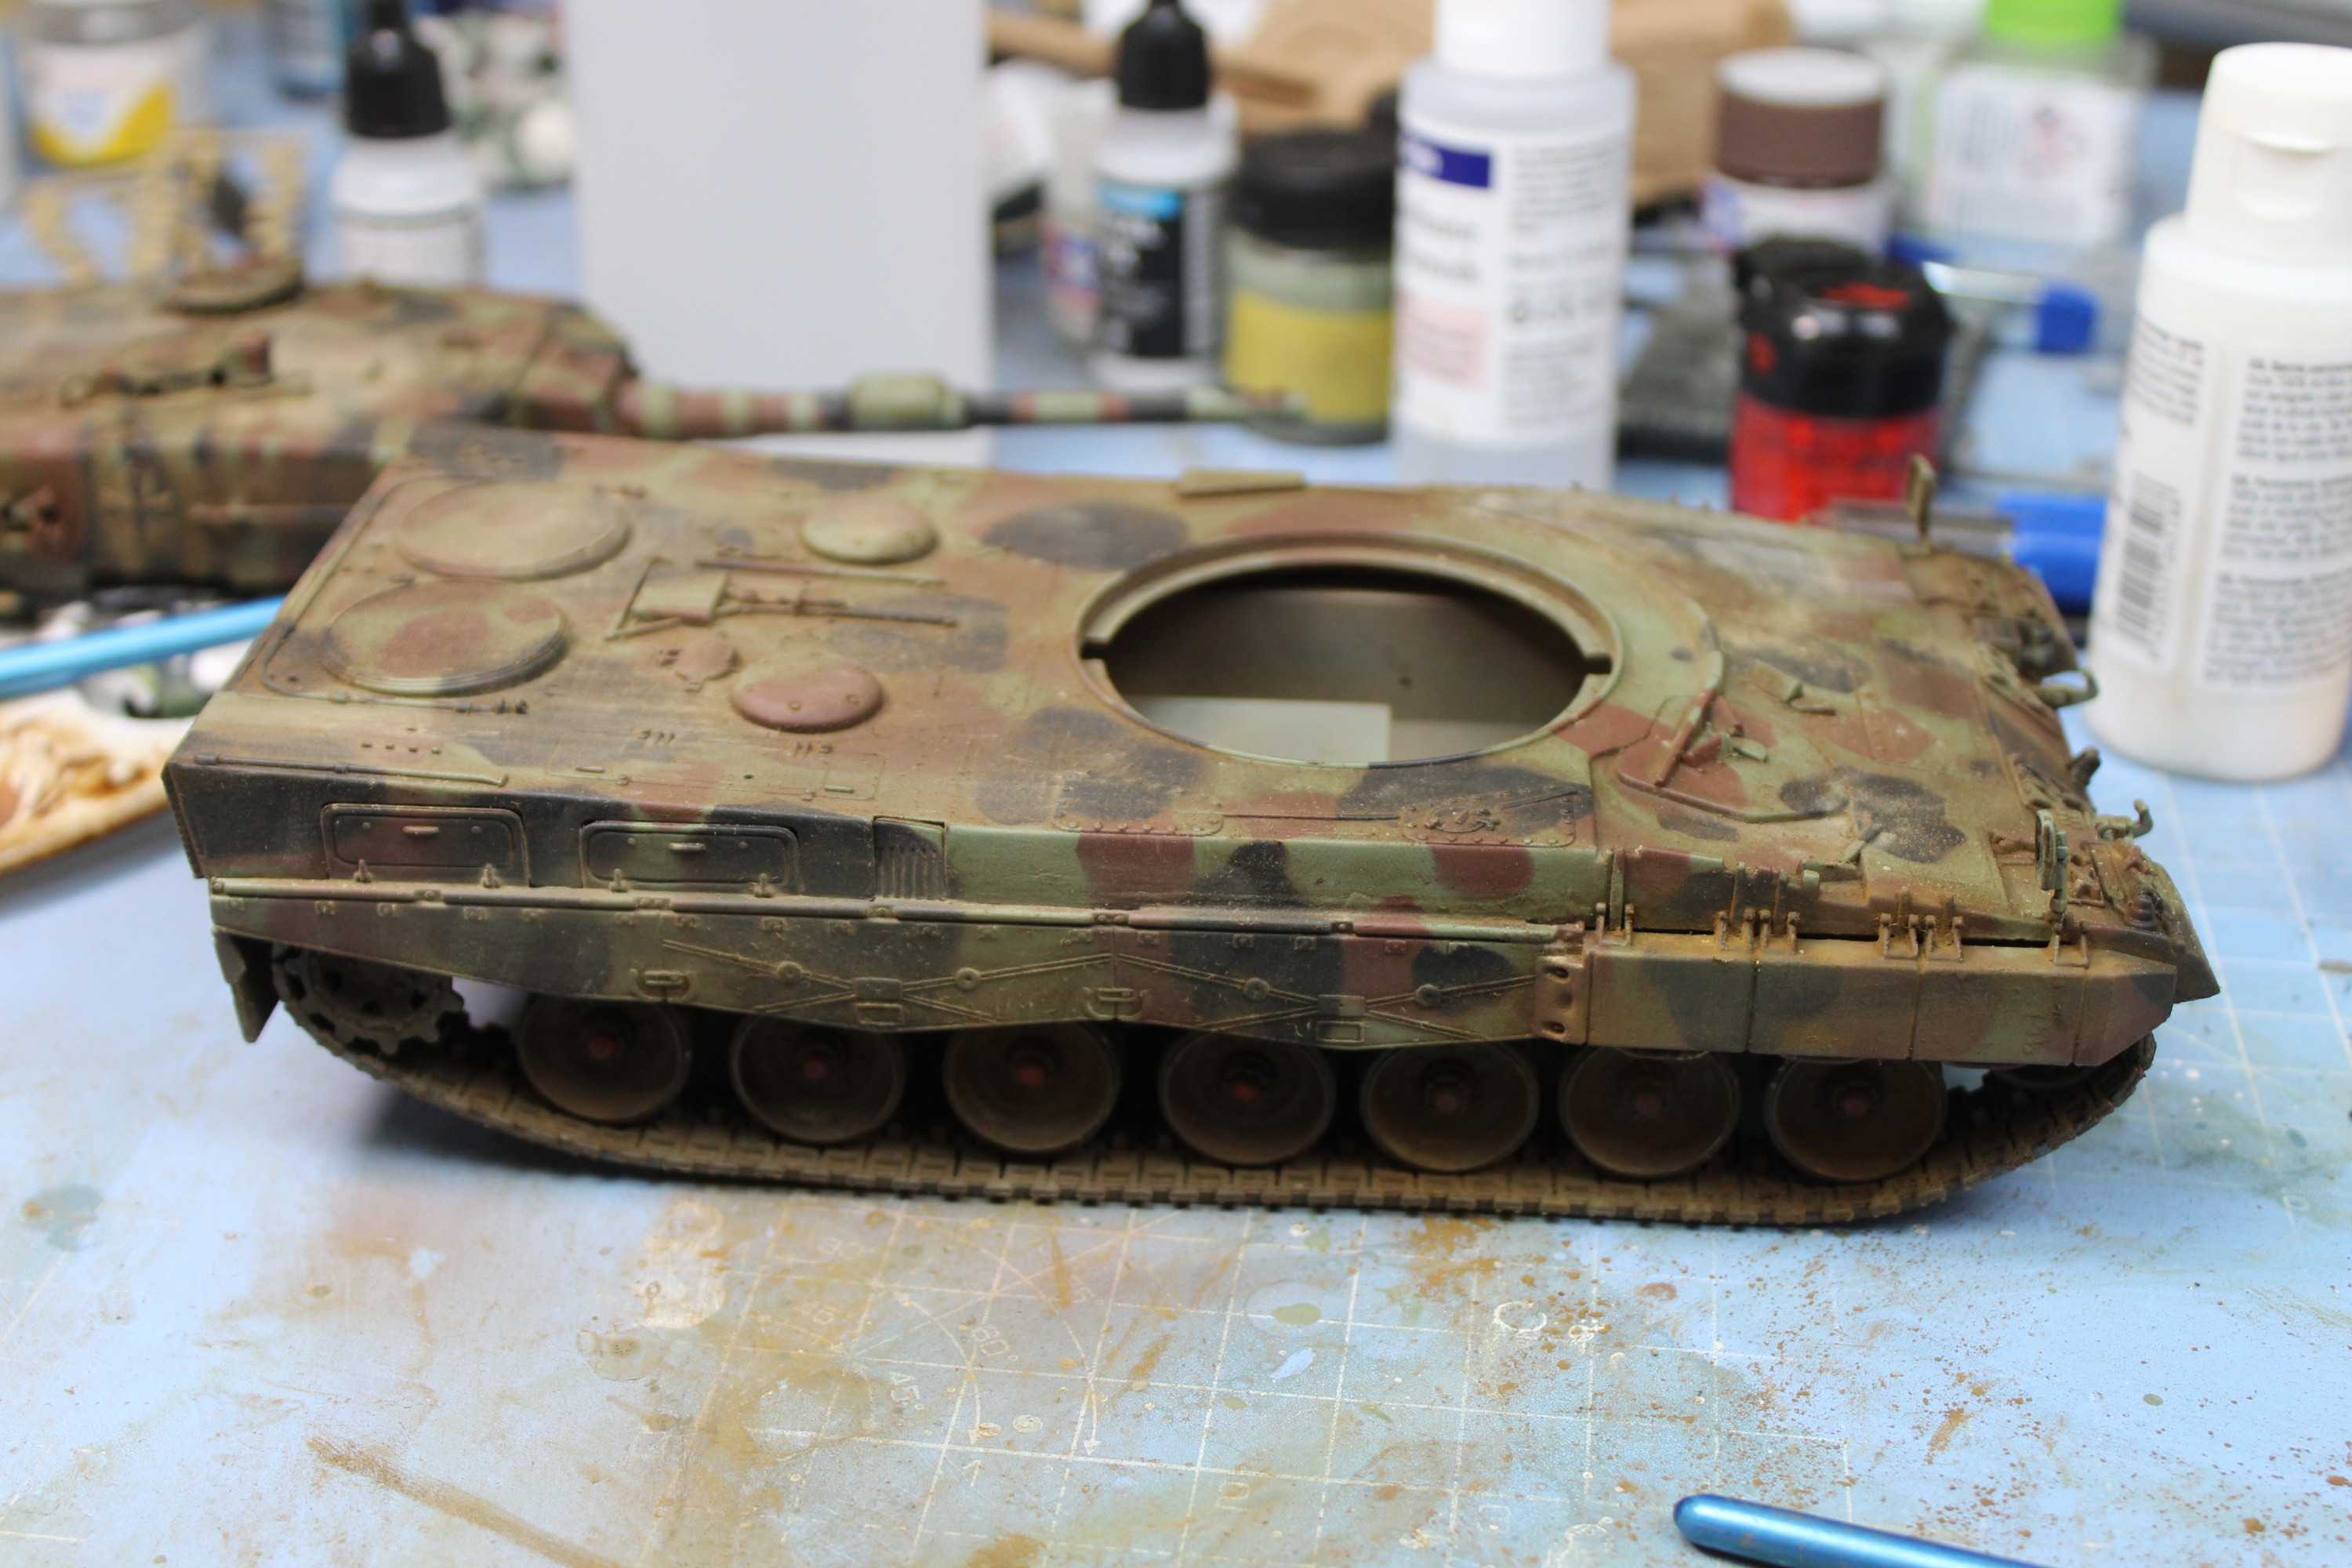
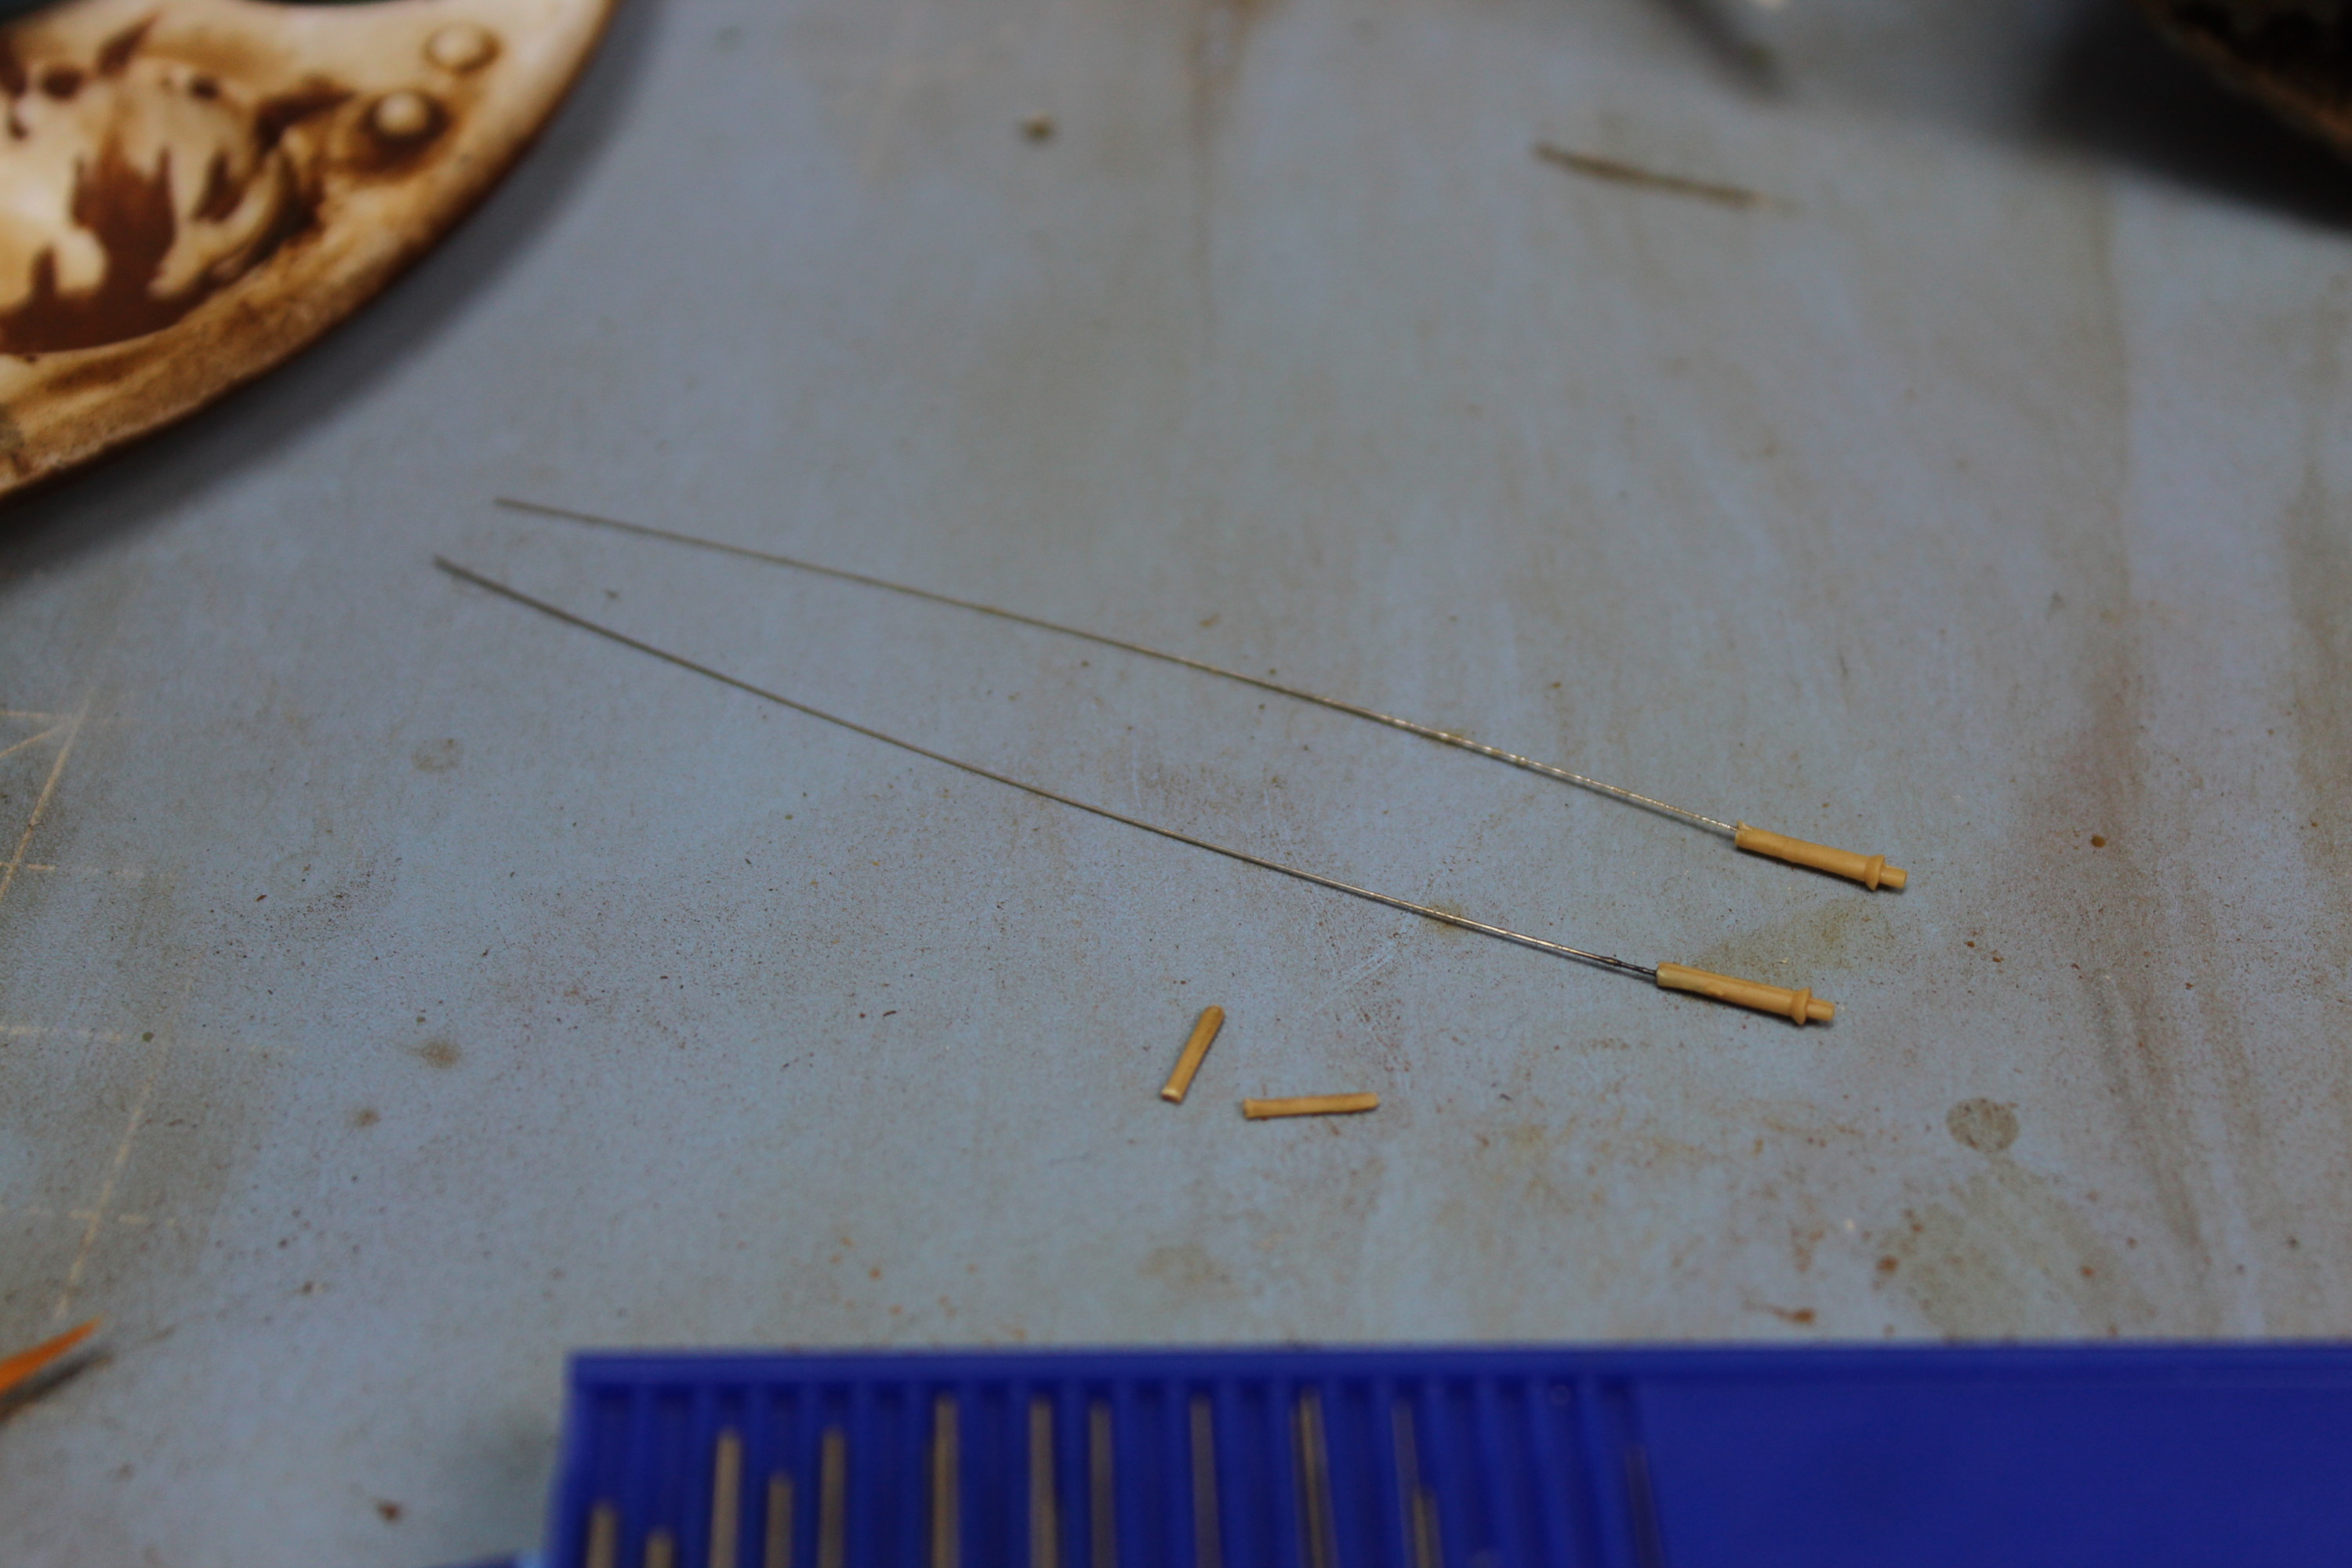
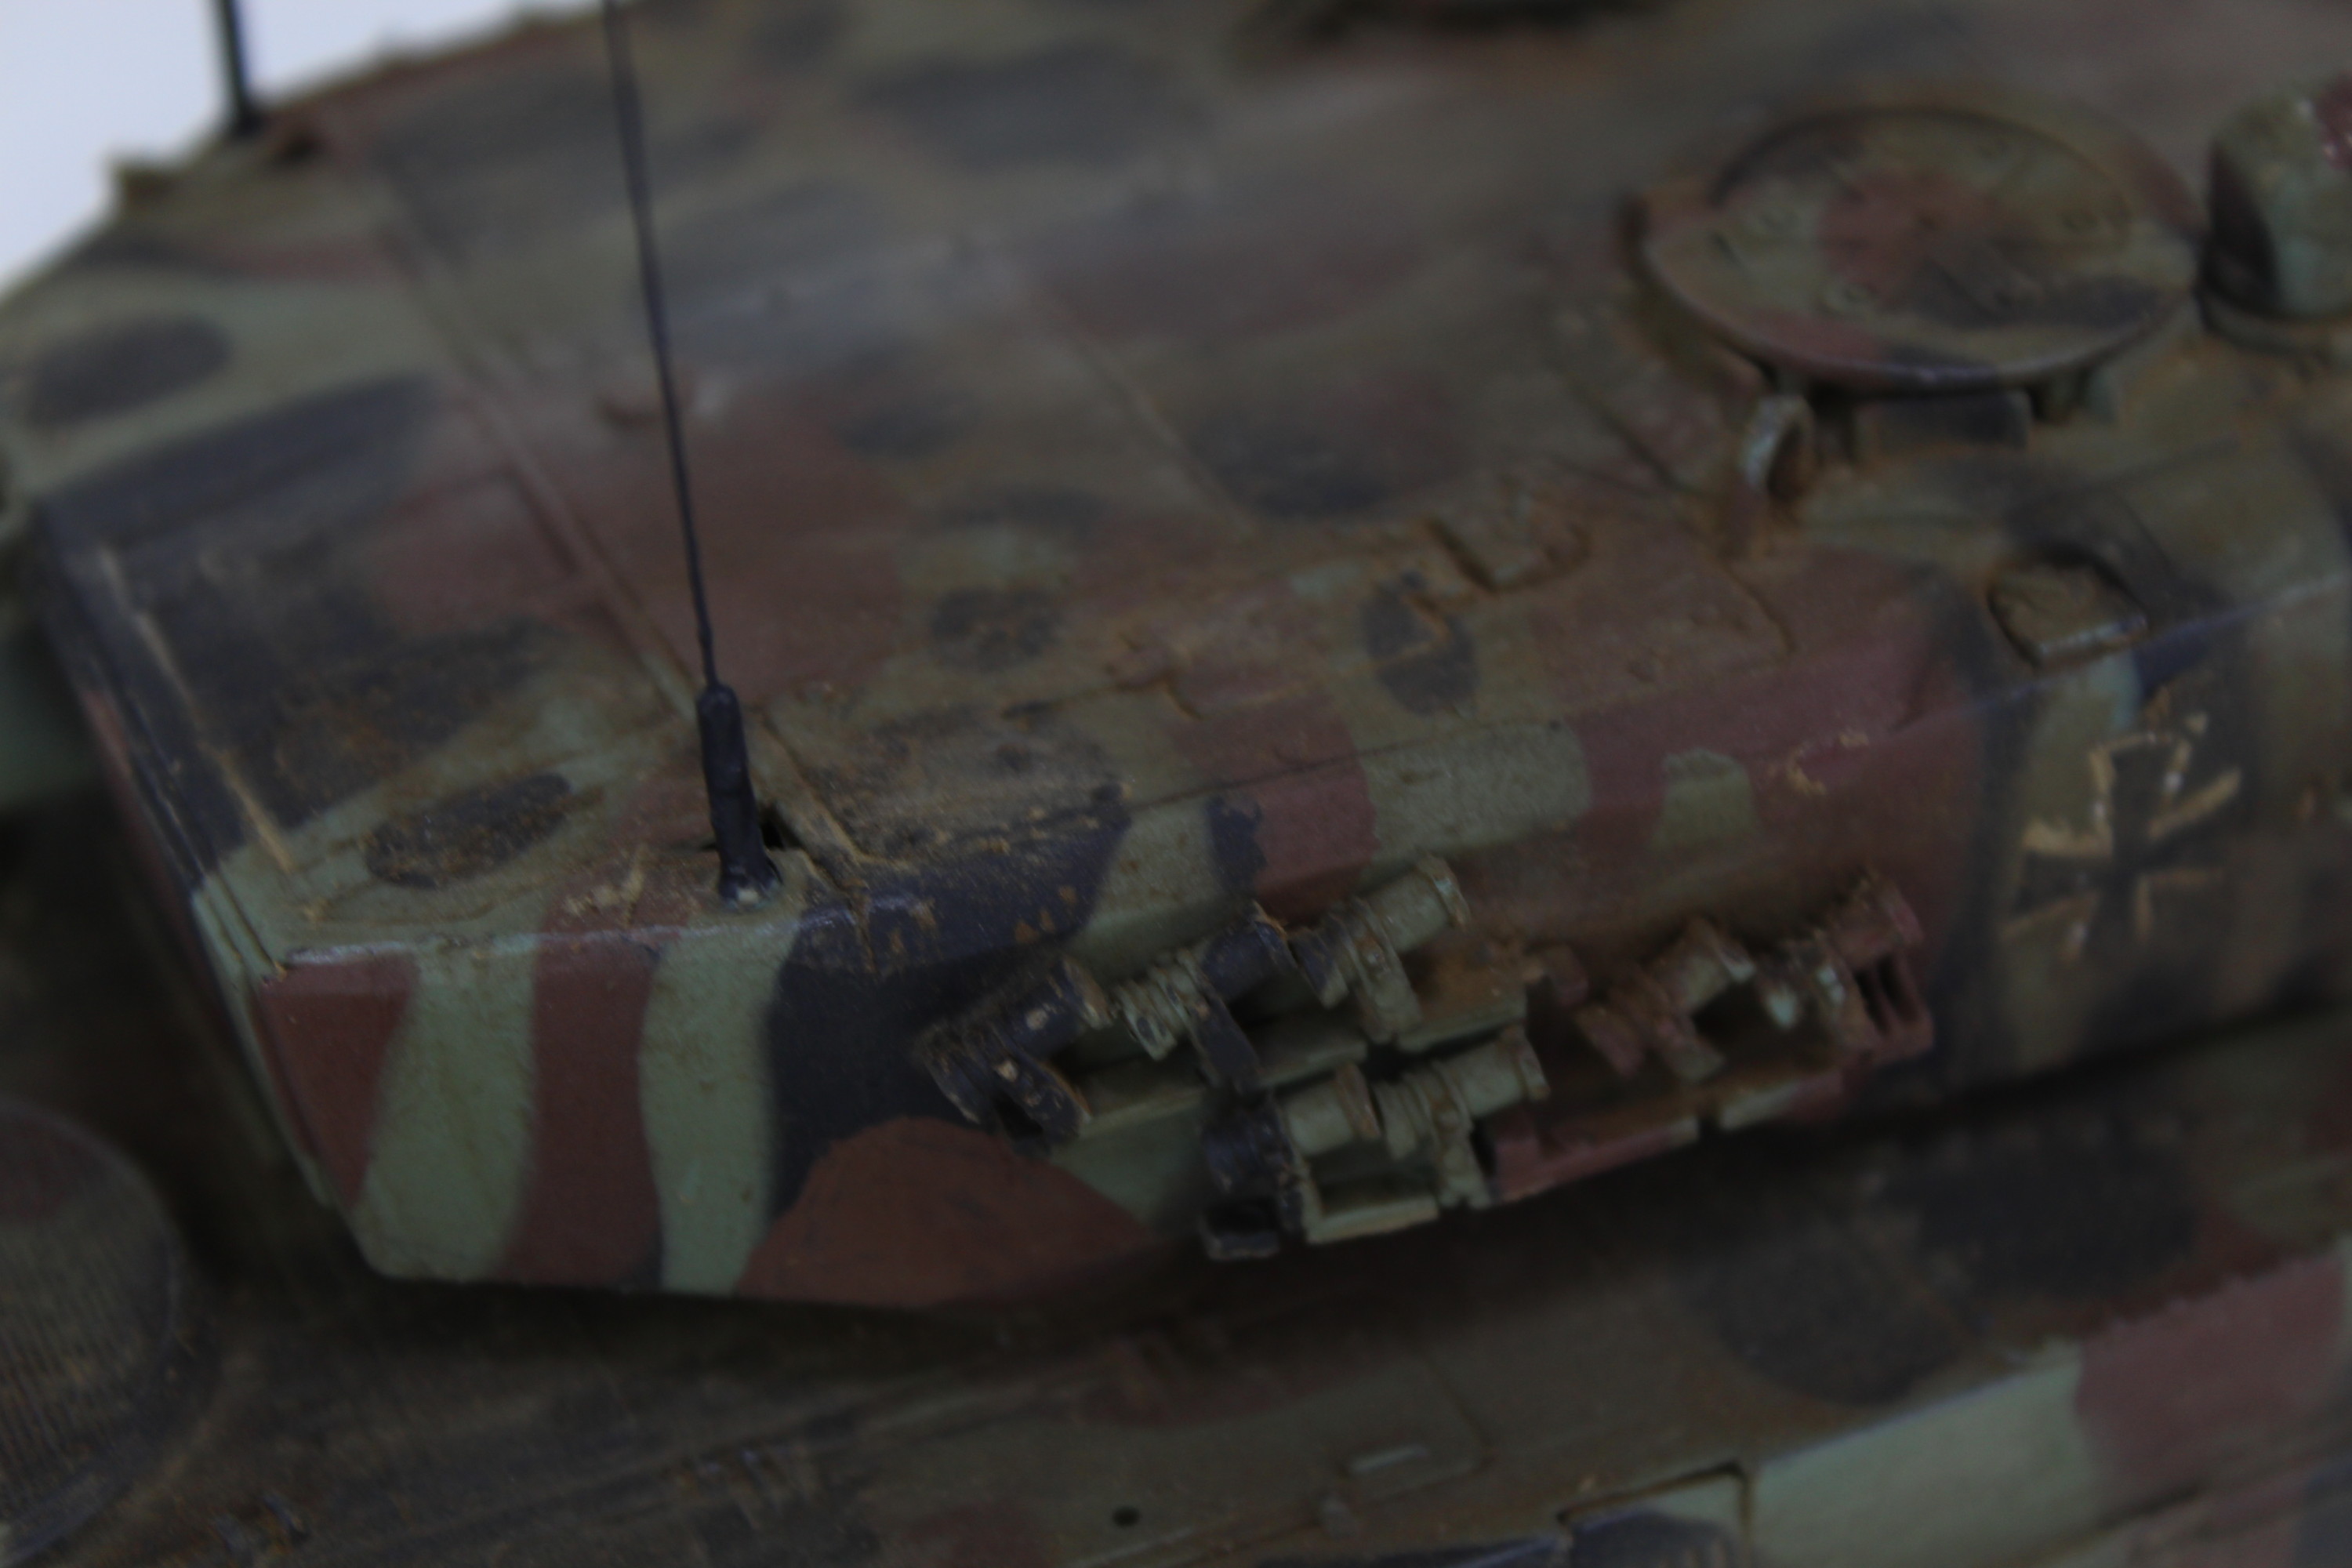
So the pigments have been applied, just want to go the main machine gun and I want to make some new aerials for the turret.

made some new aerials for the leopard 2 scale model tank with guitar wire
The Aerials That Came With The Model Are A Bit Pants So I Have Made Some New Ones With Electric Guitar String.

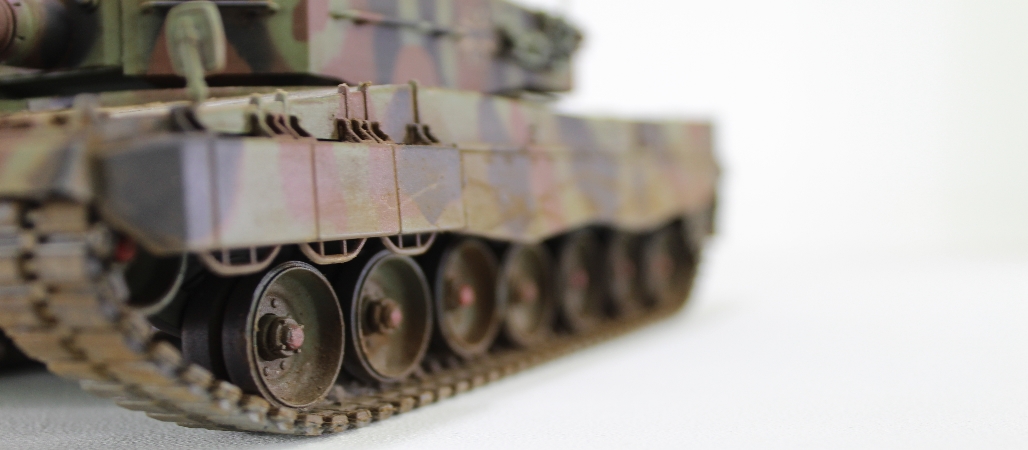
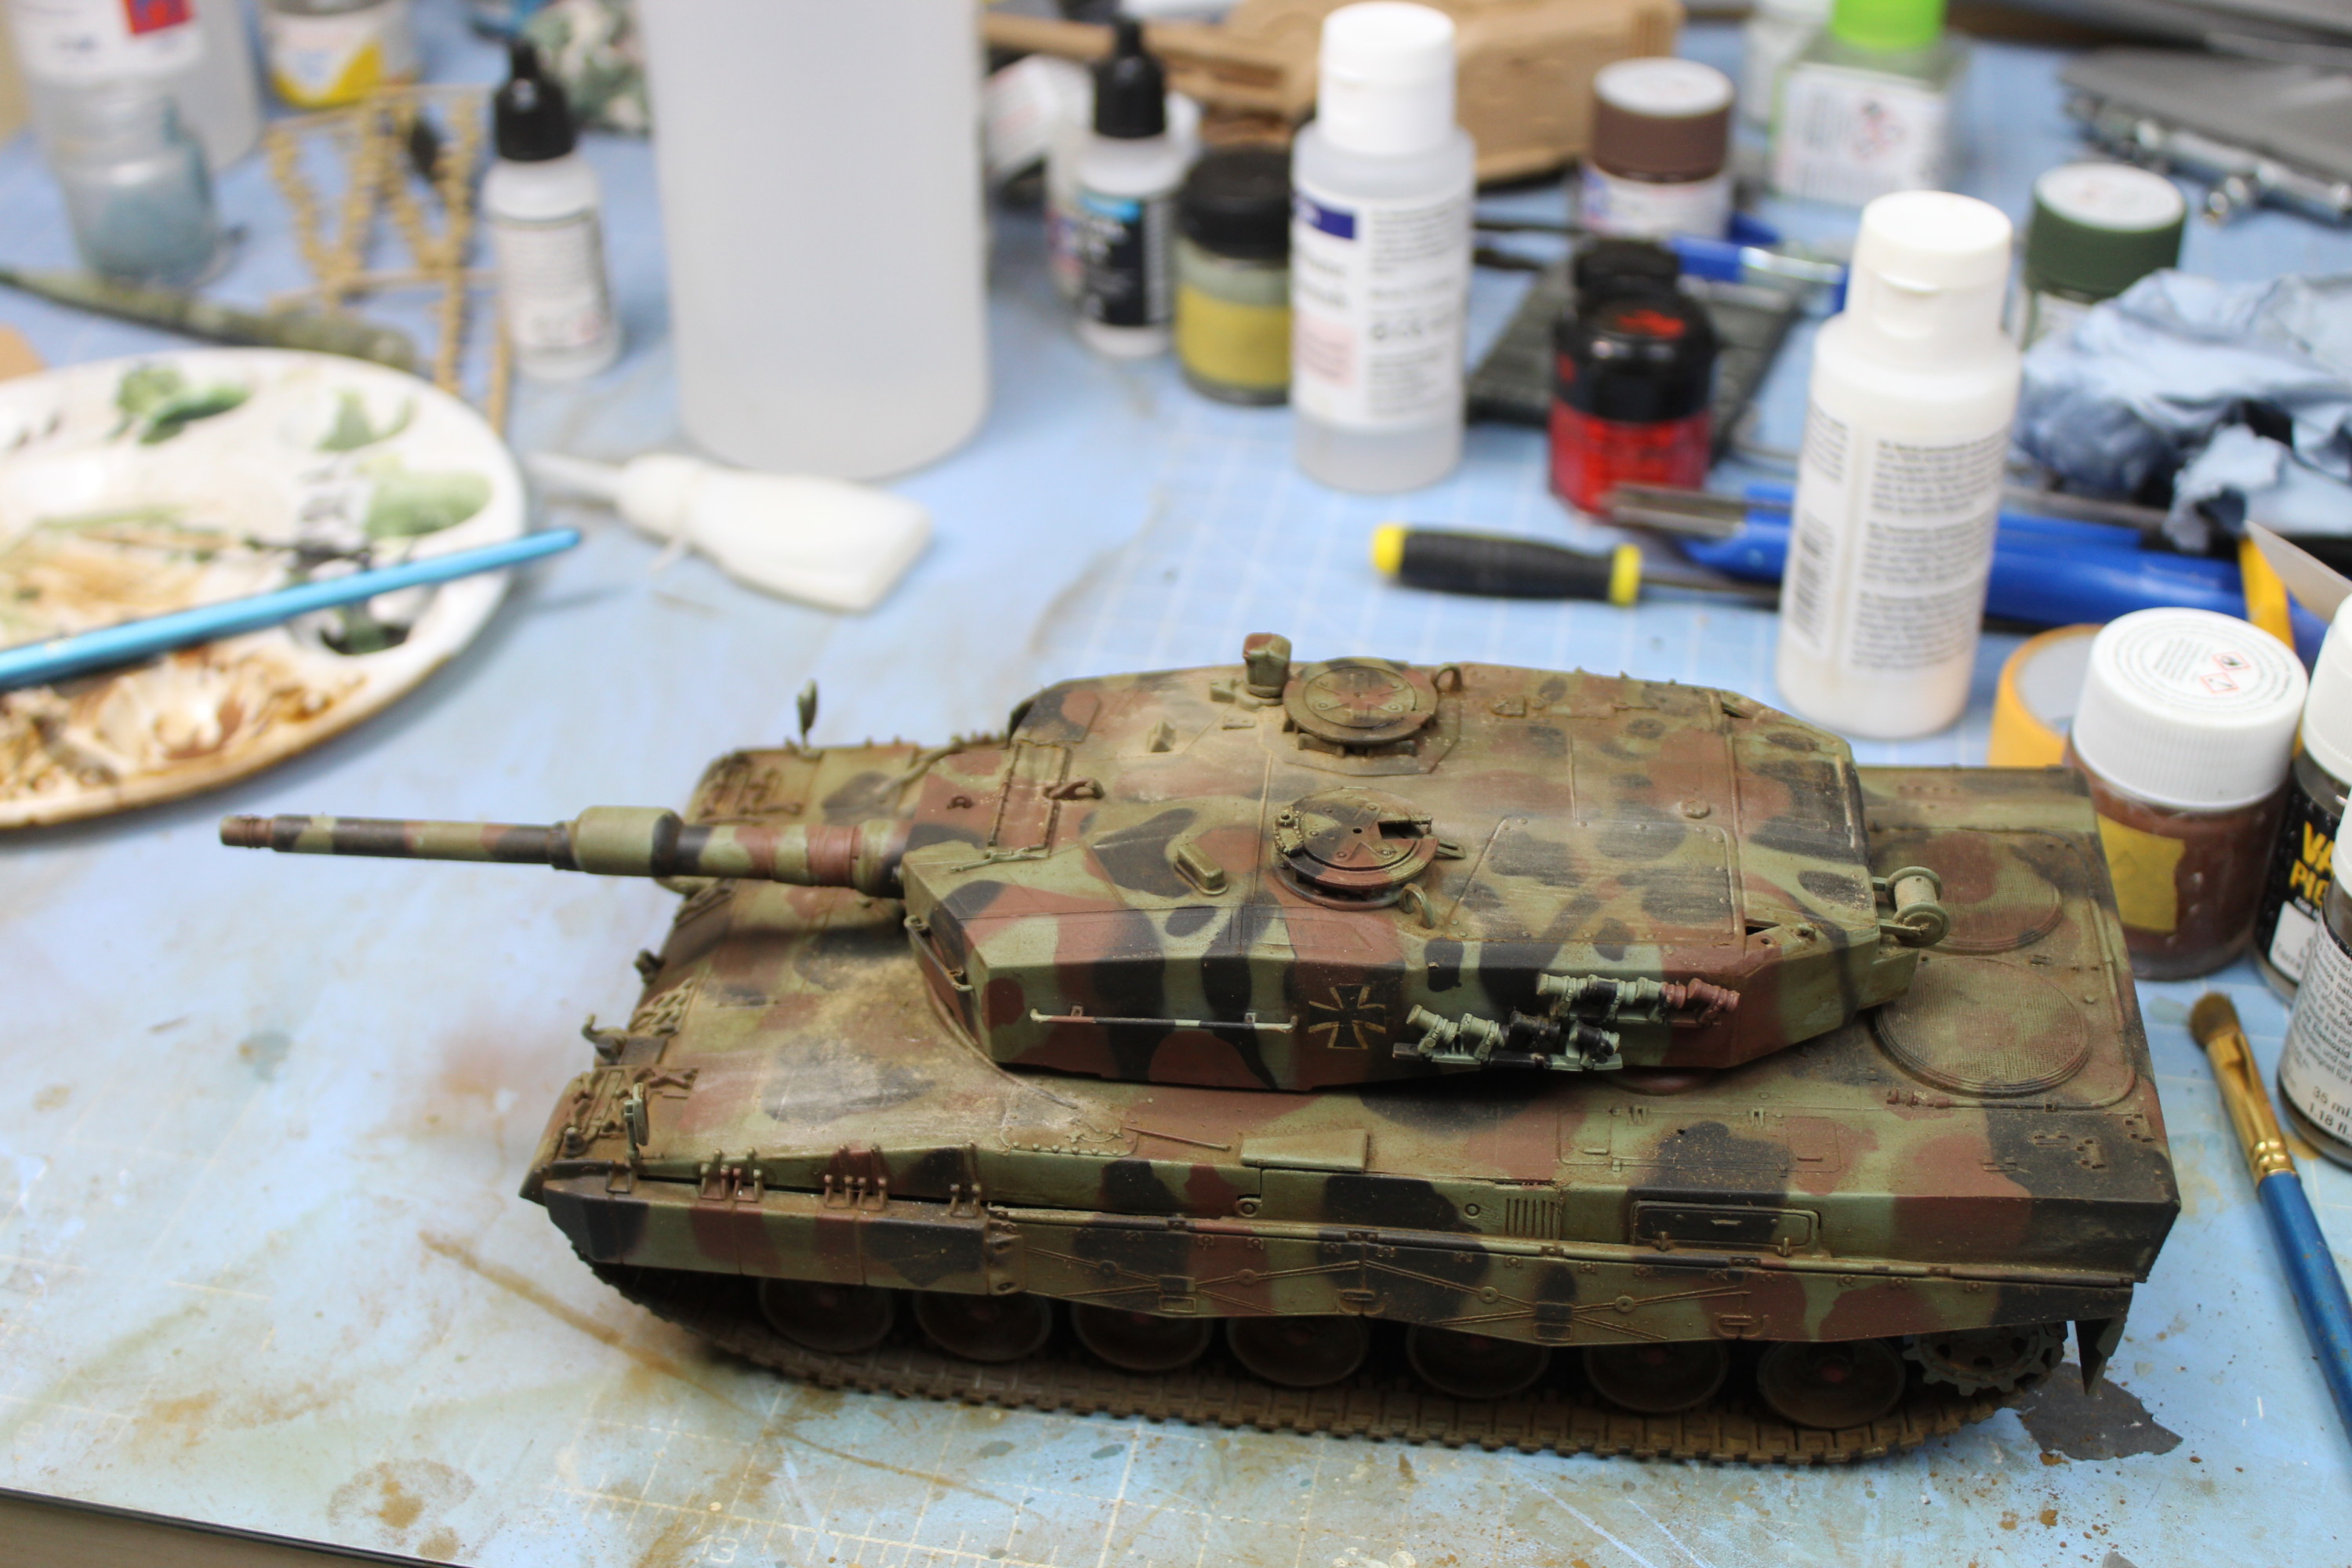
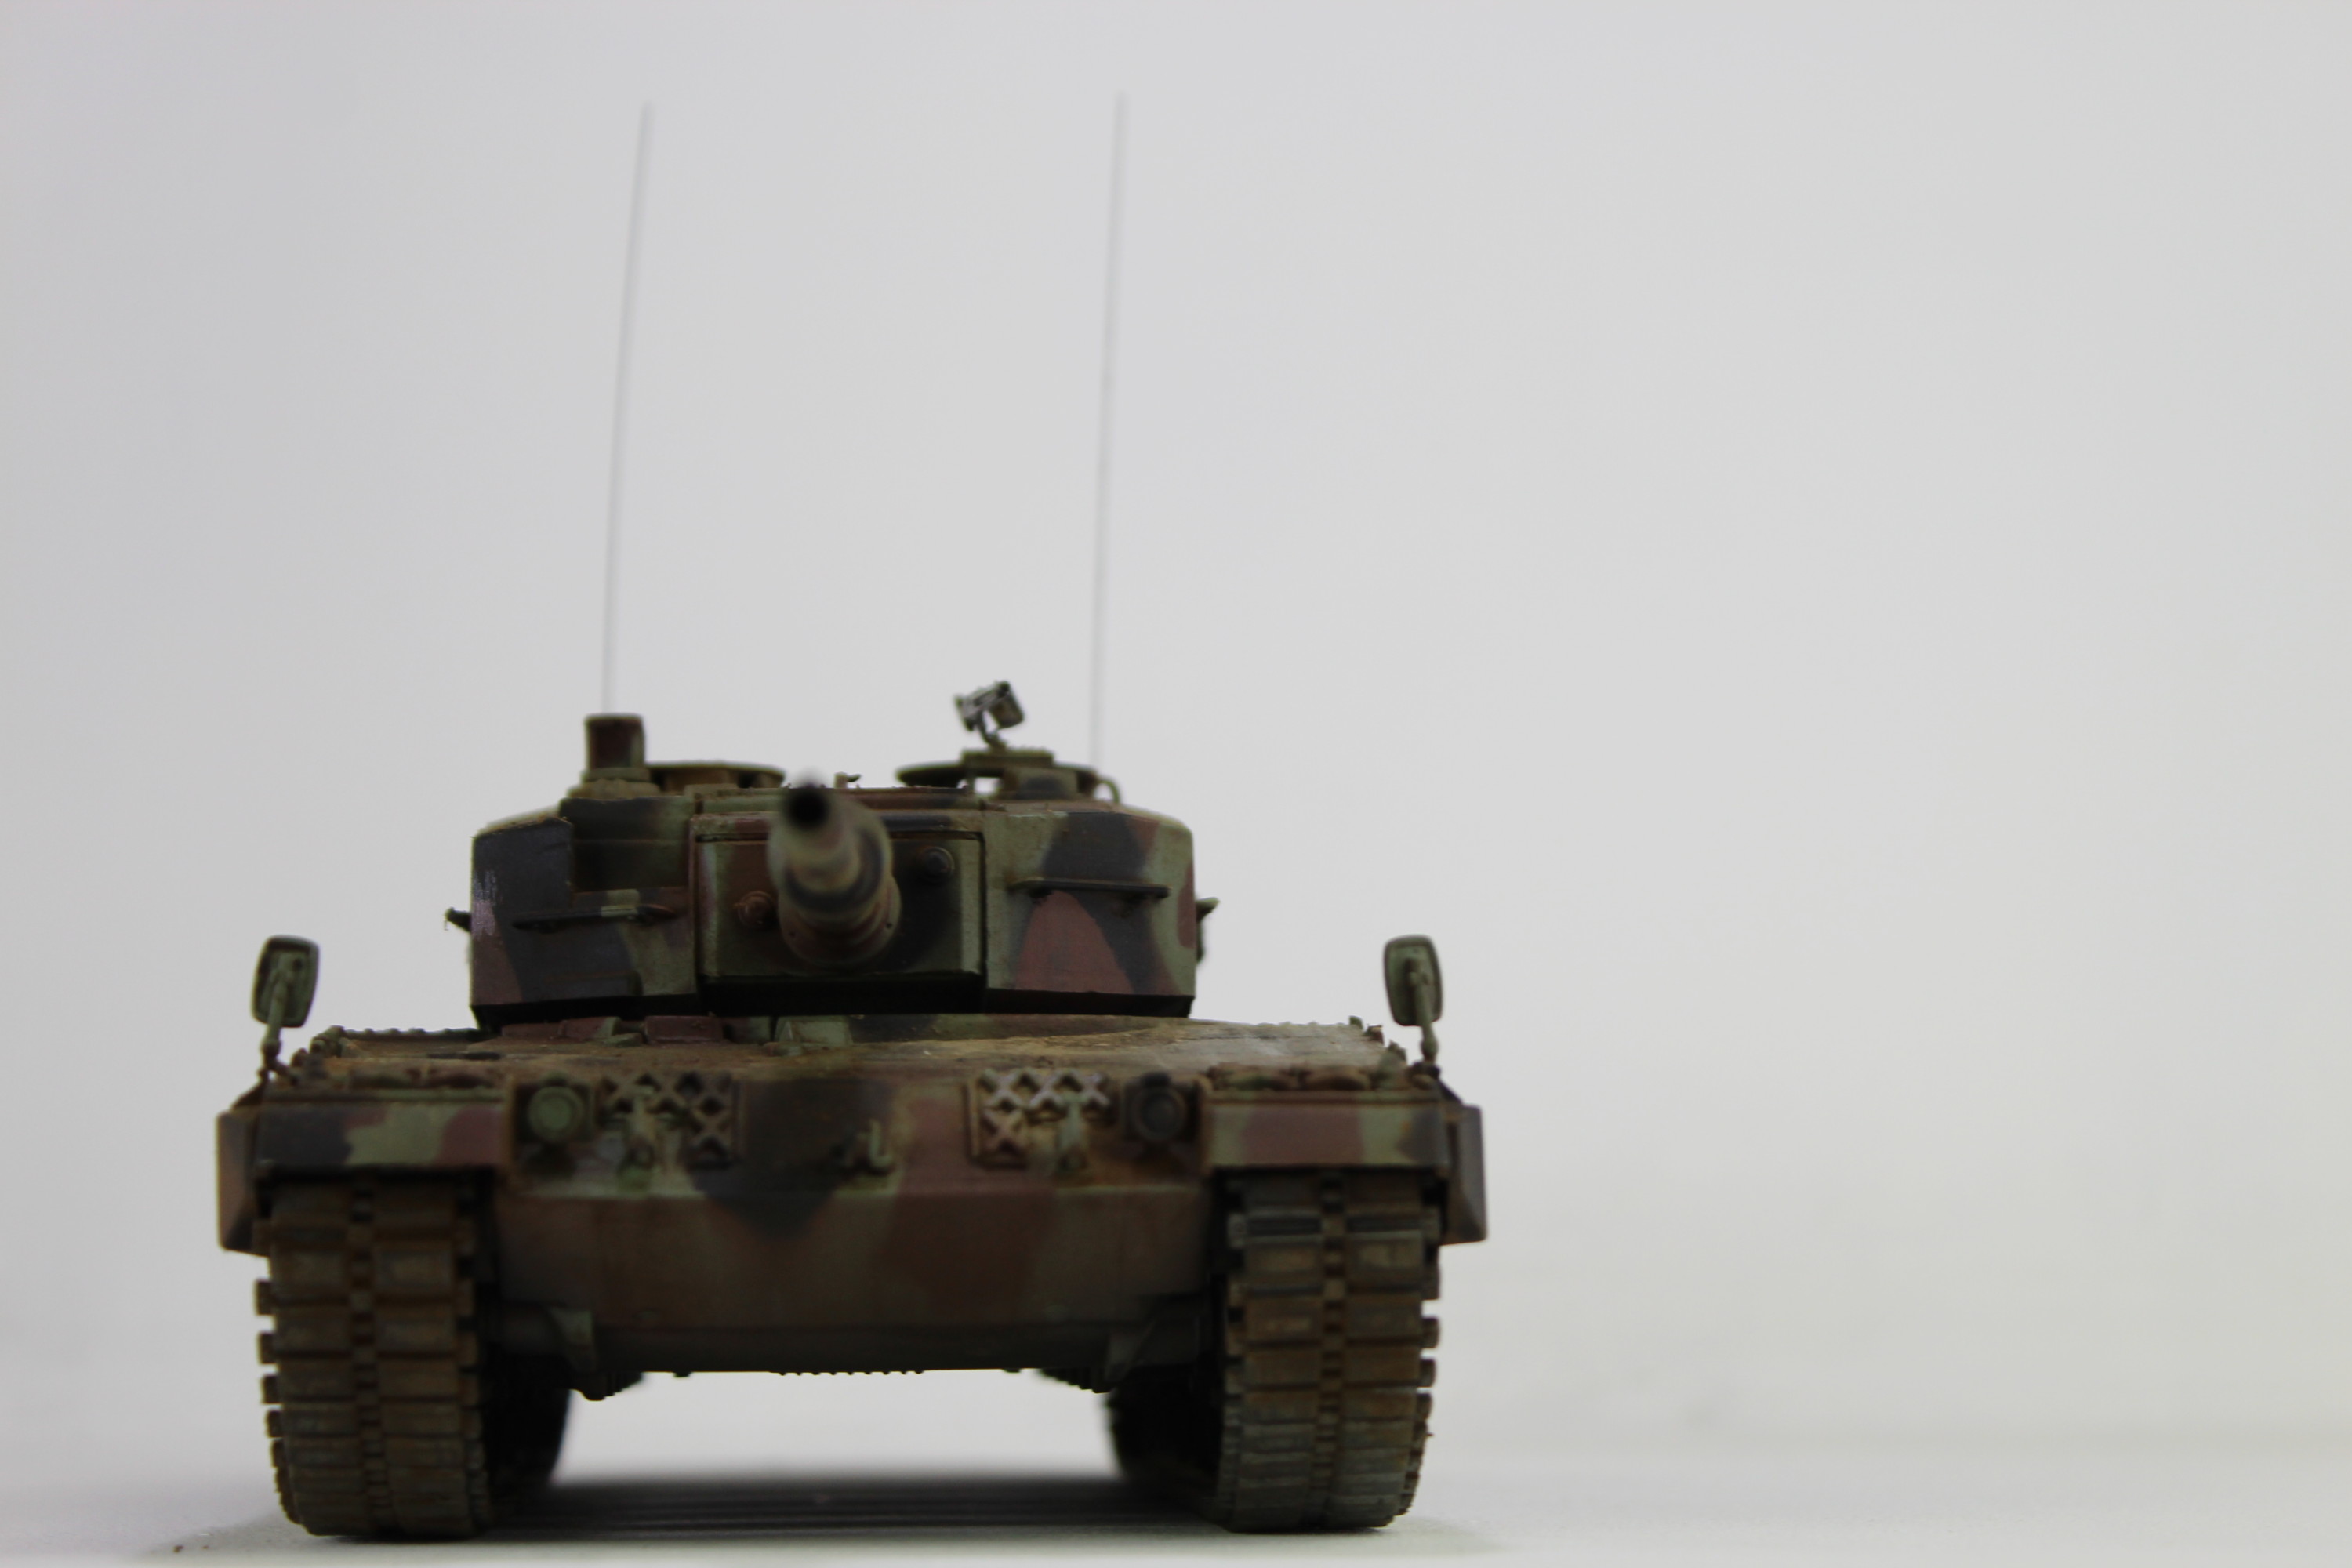
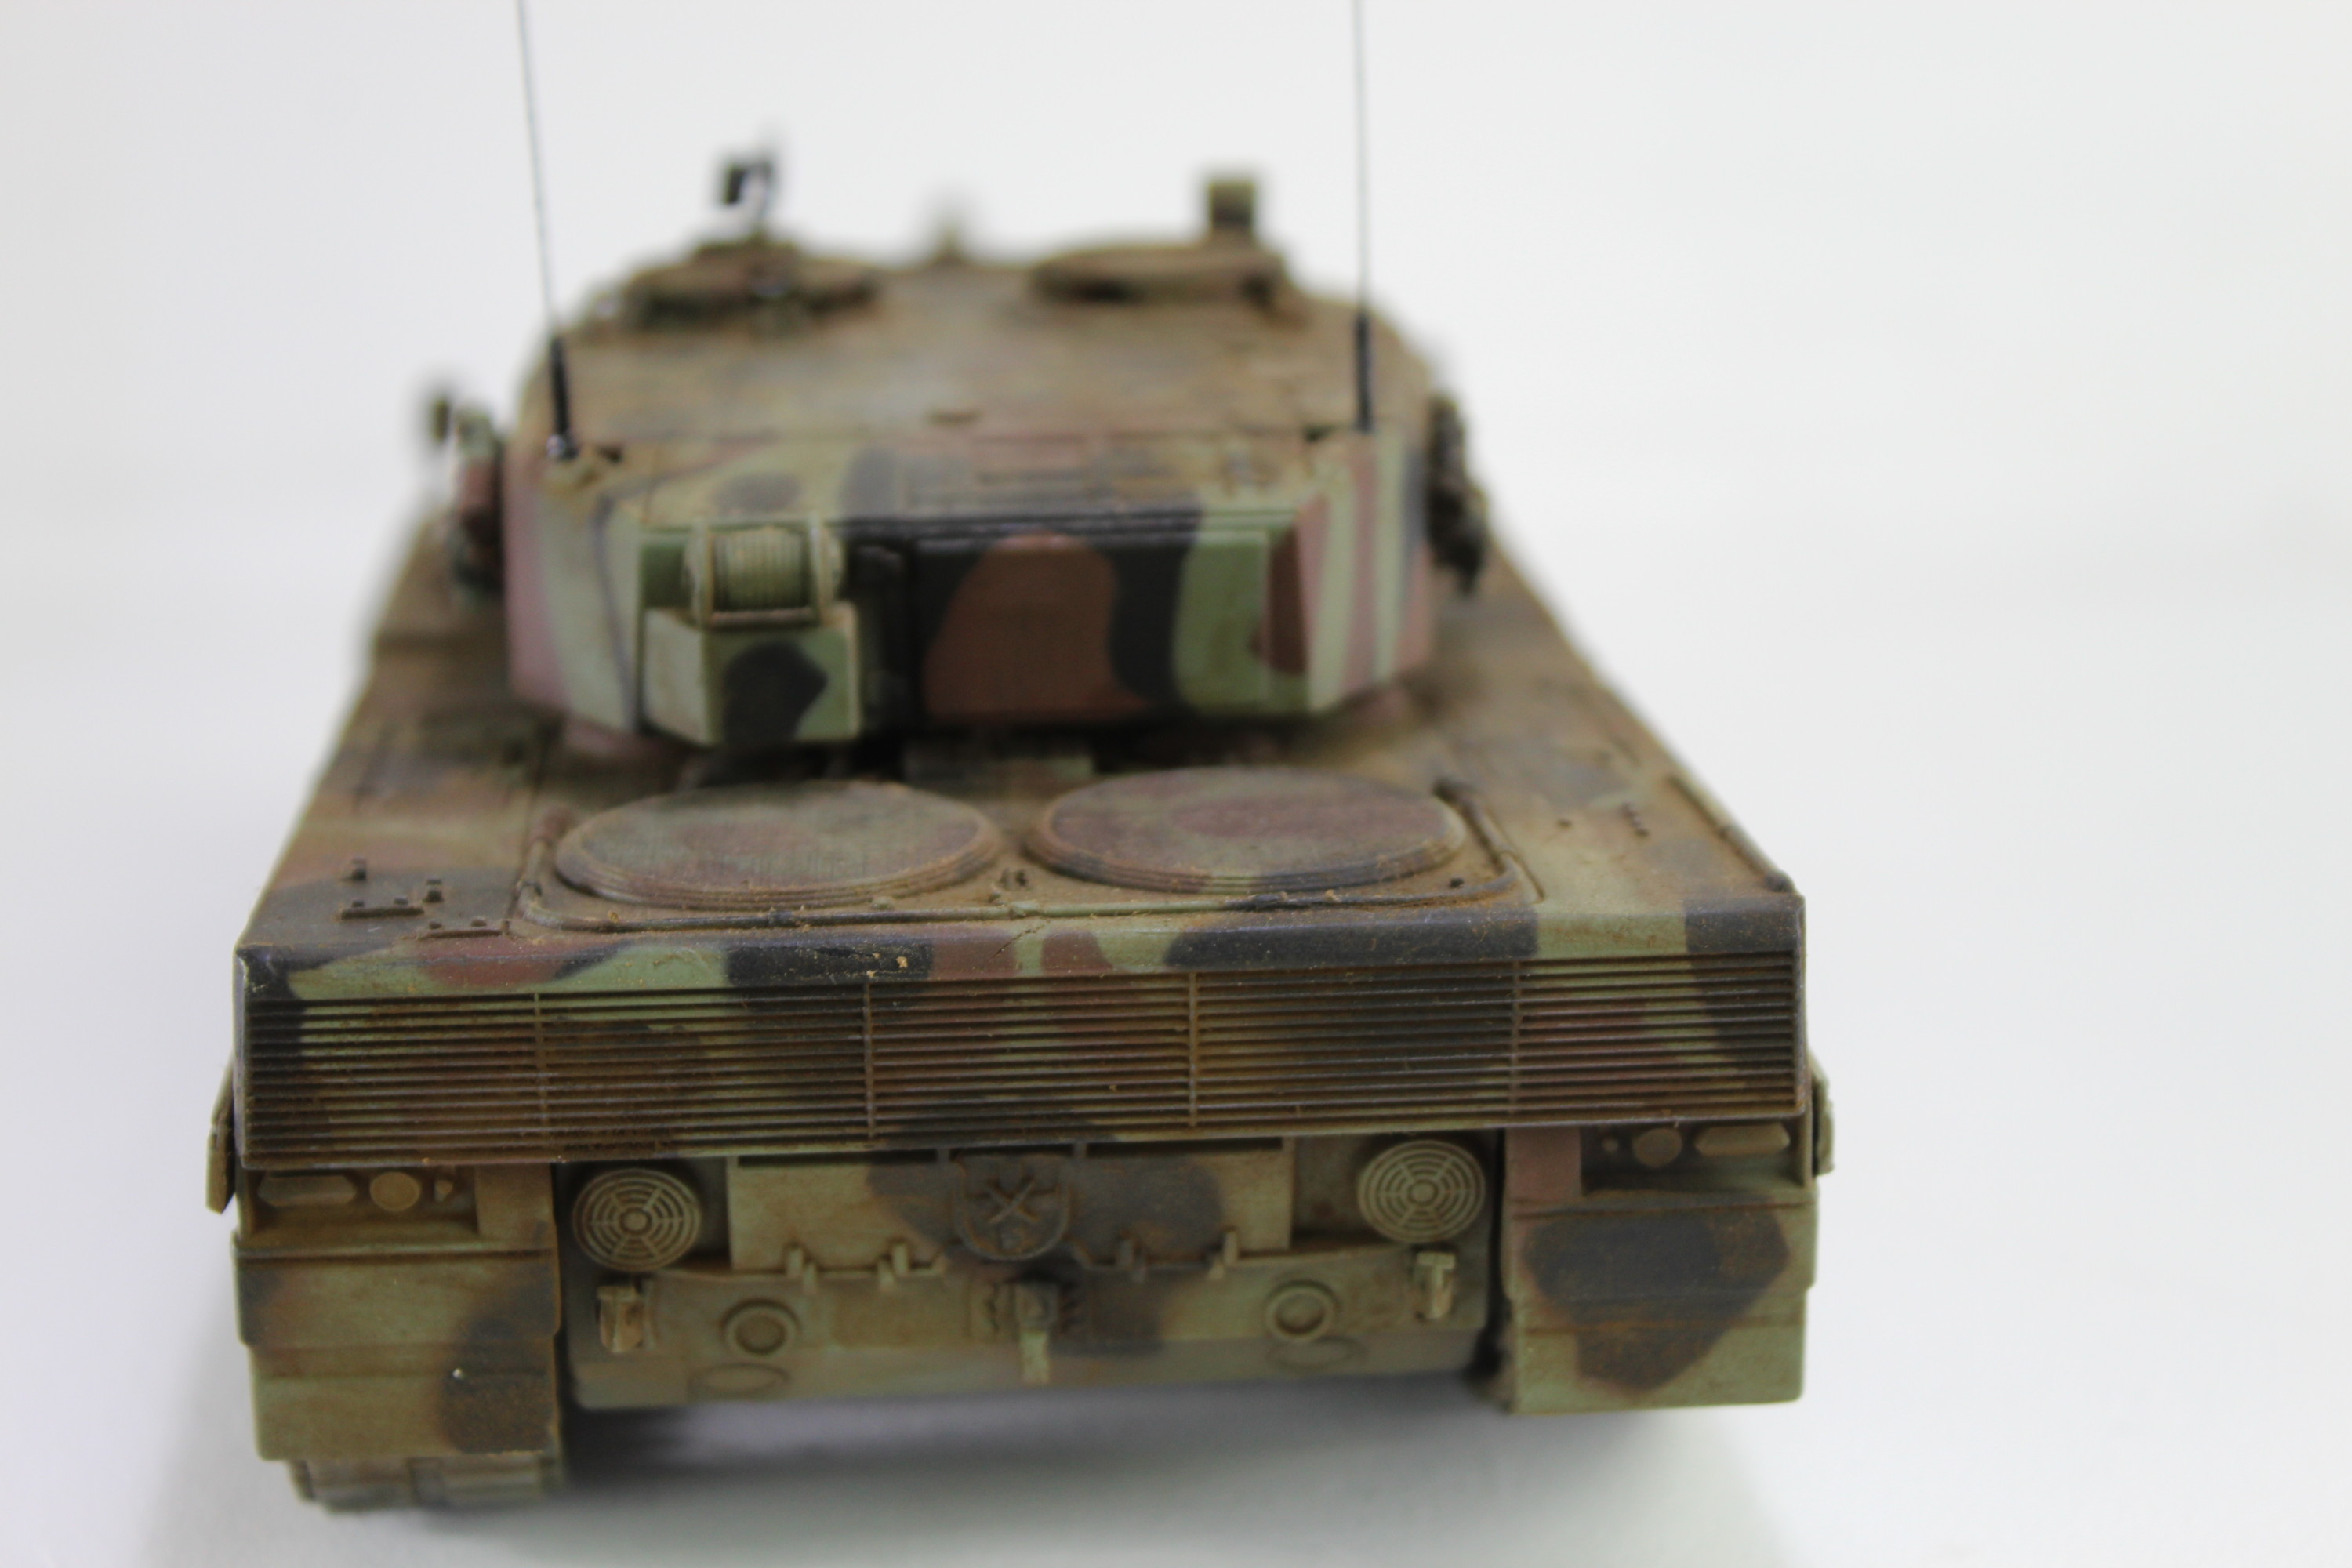
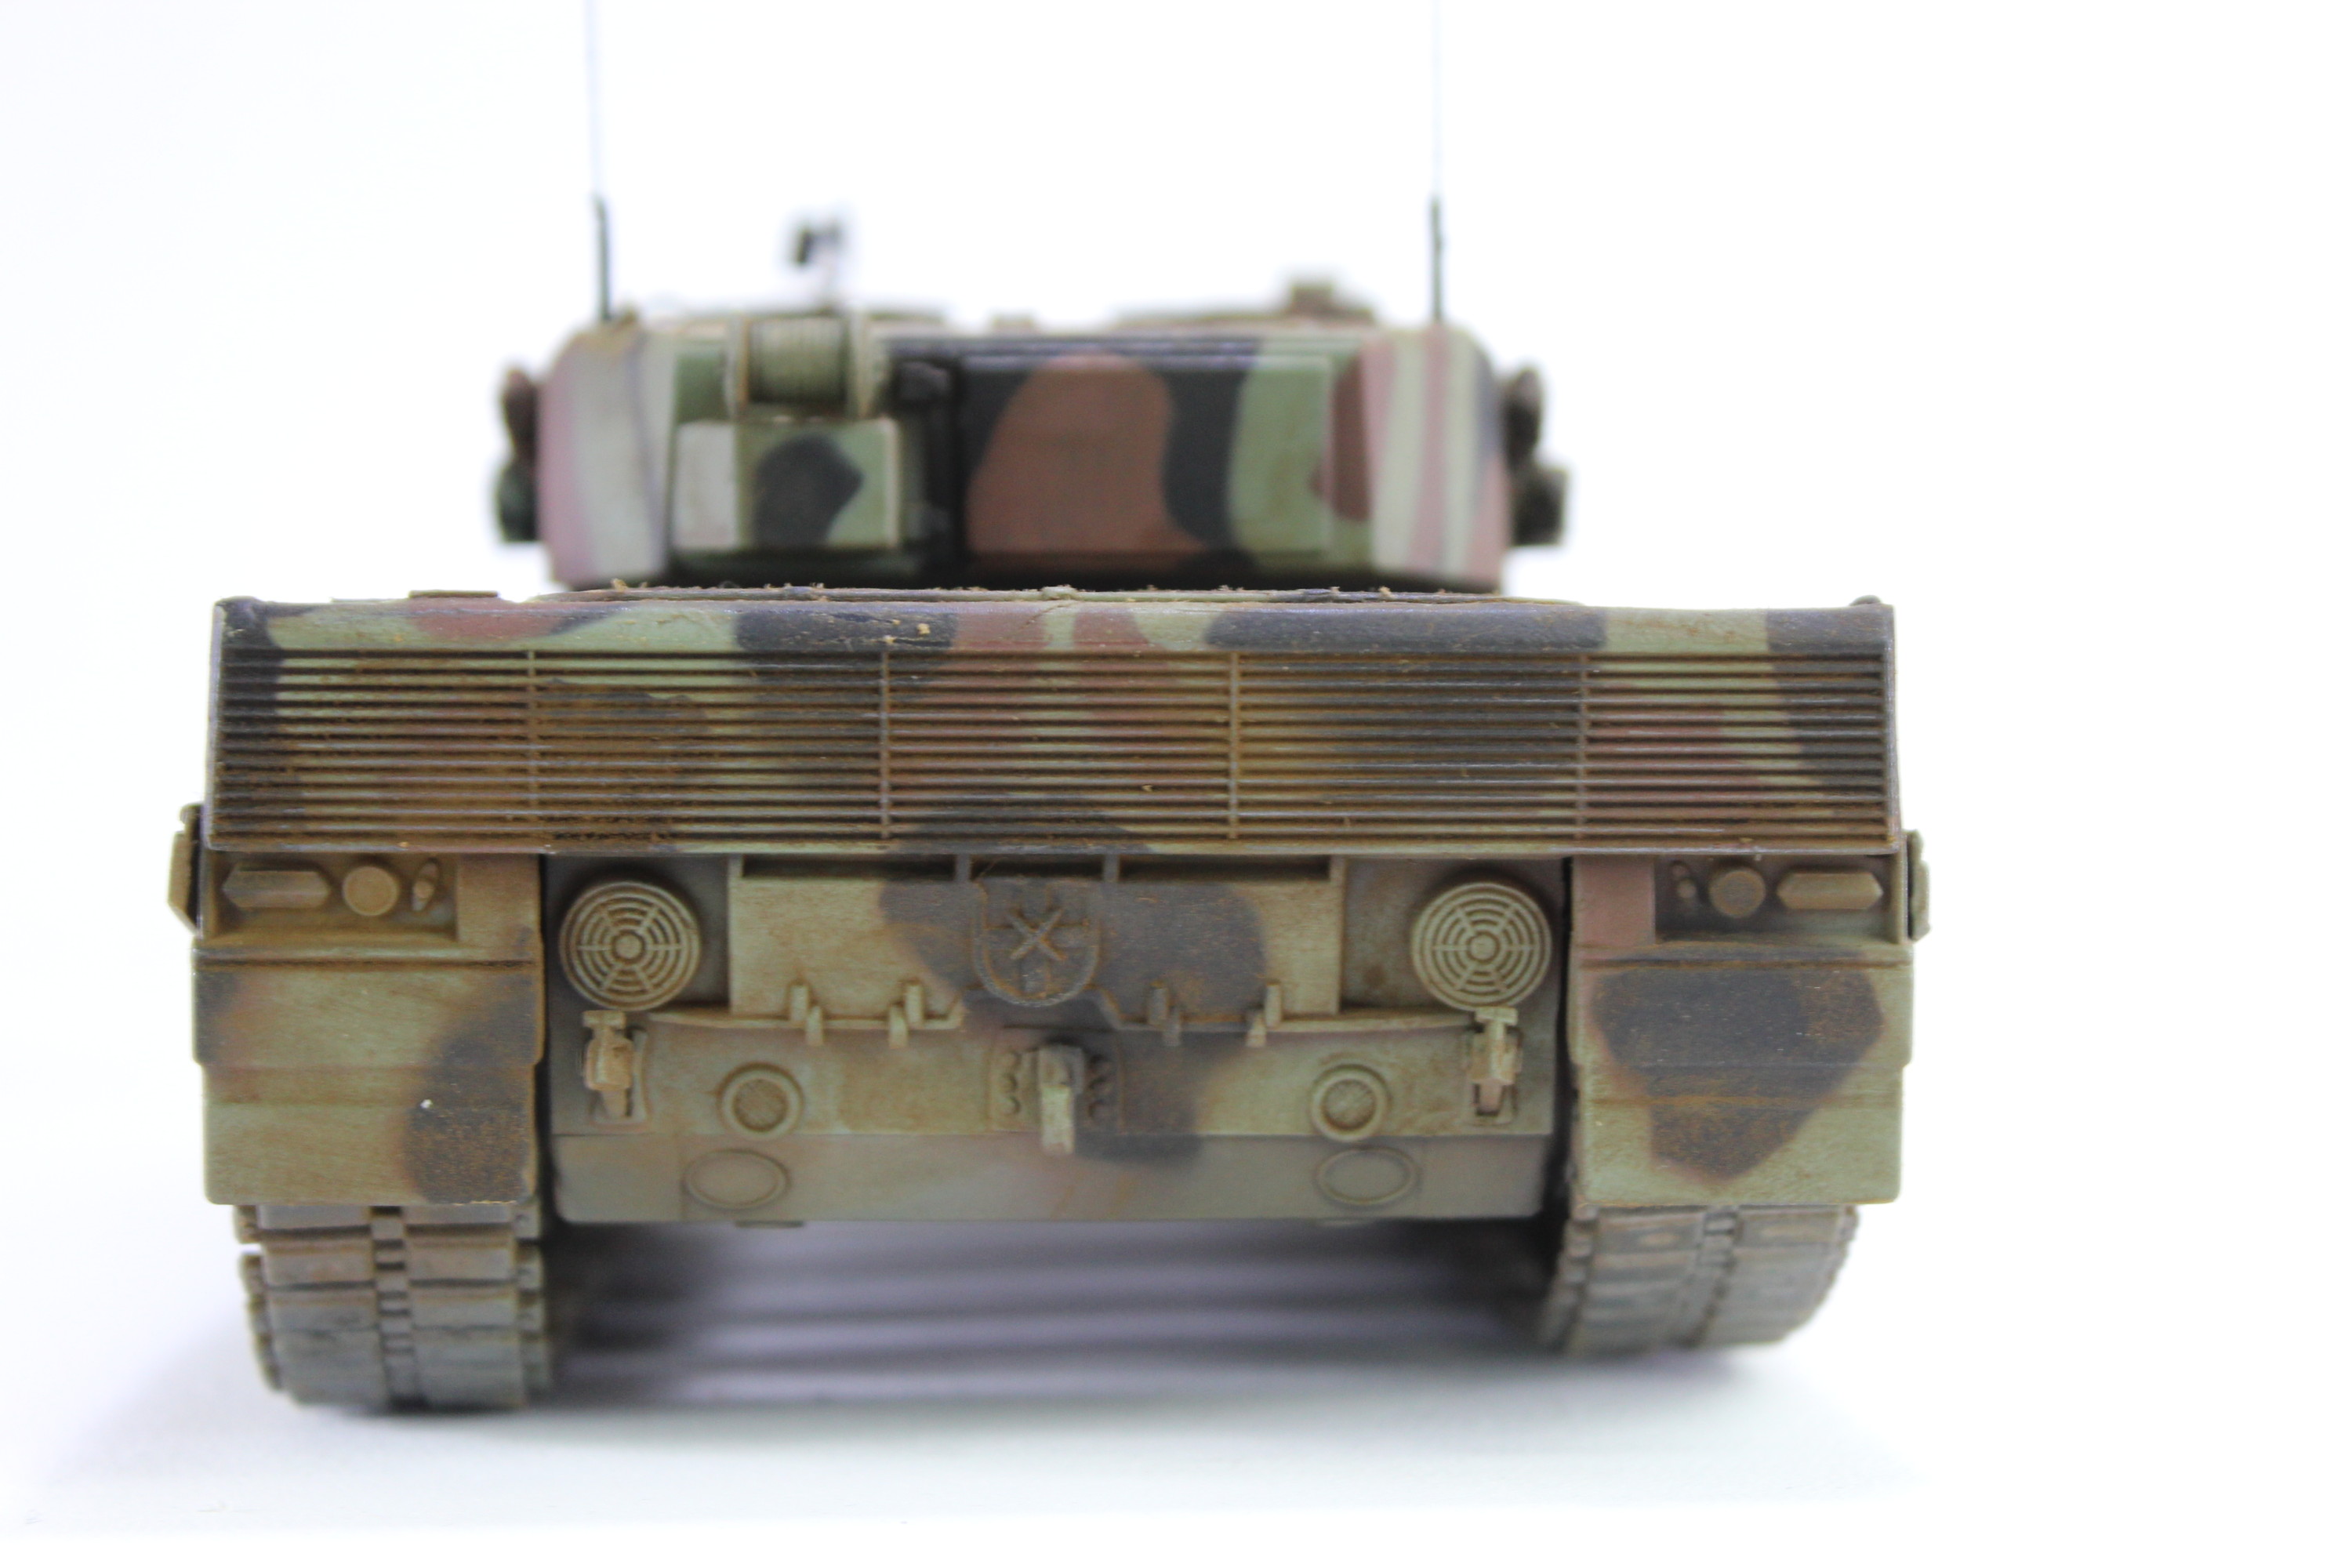
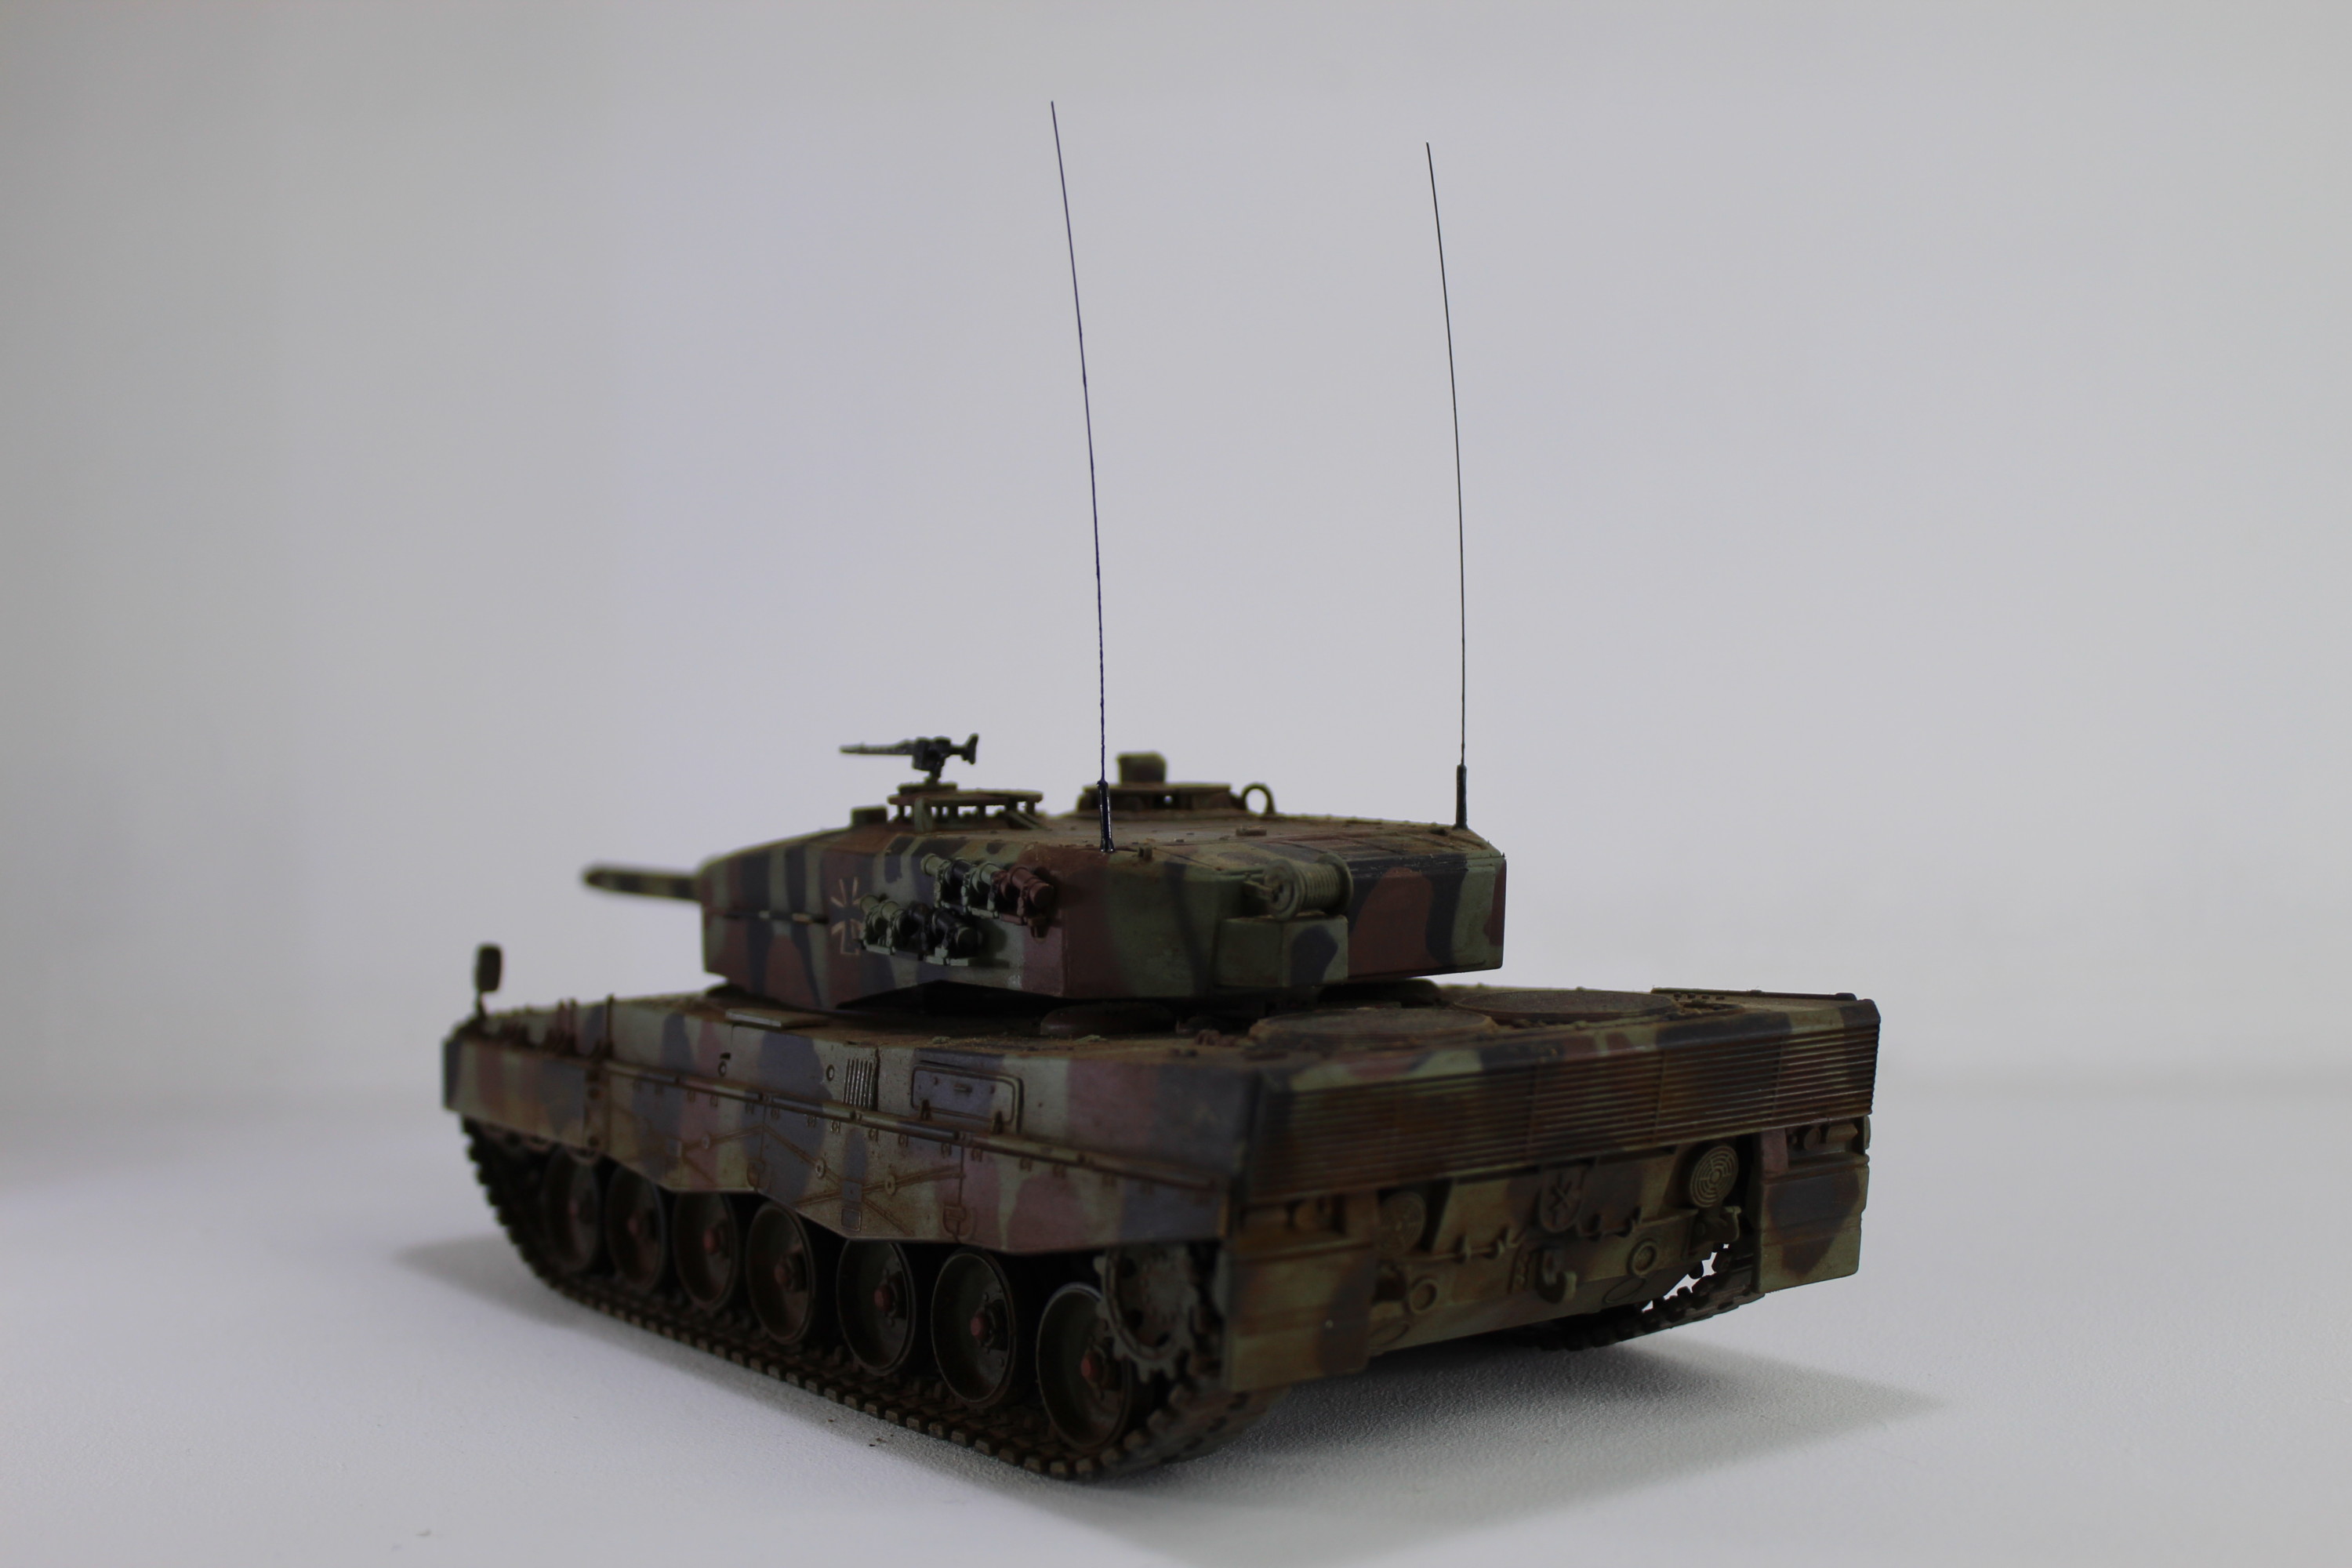
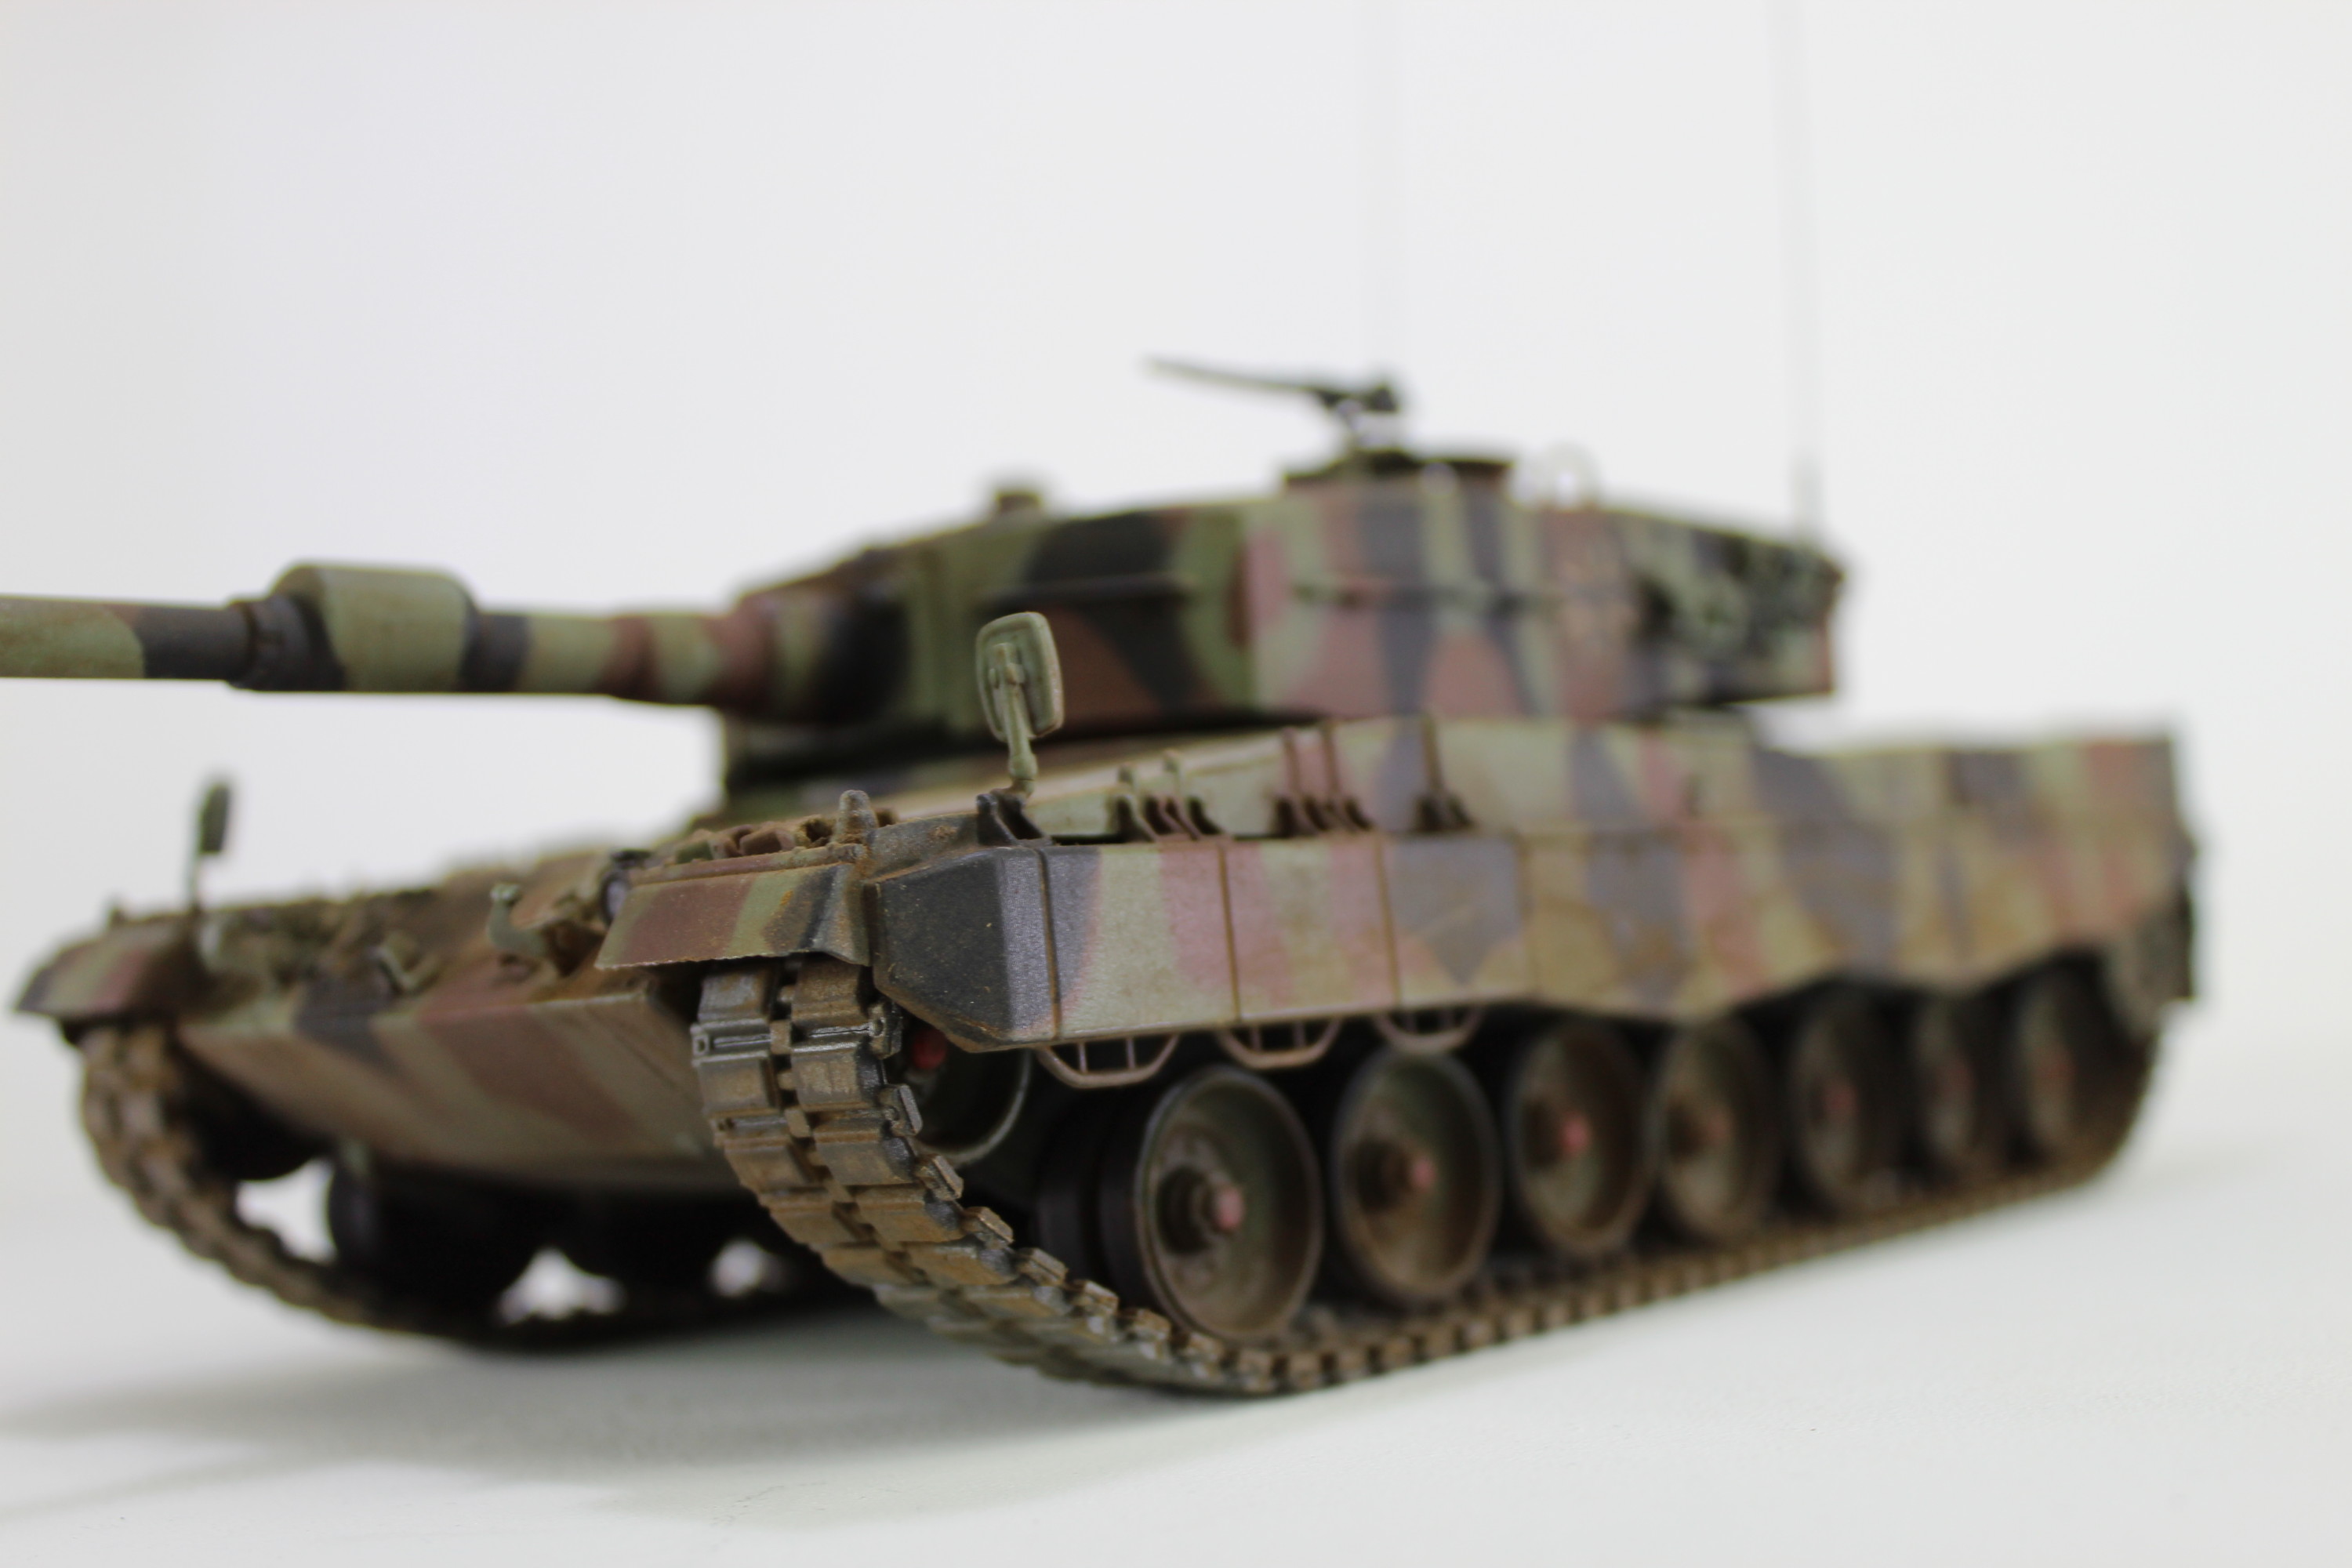
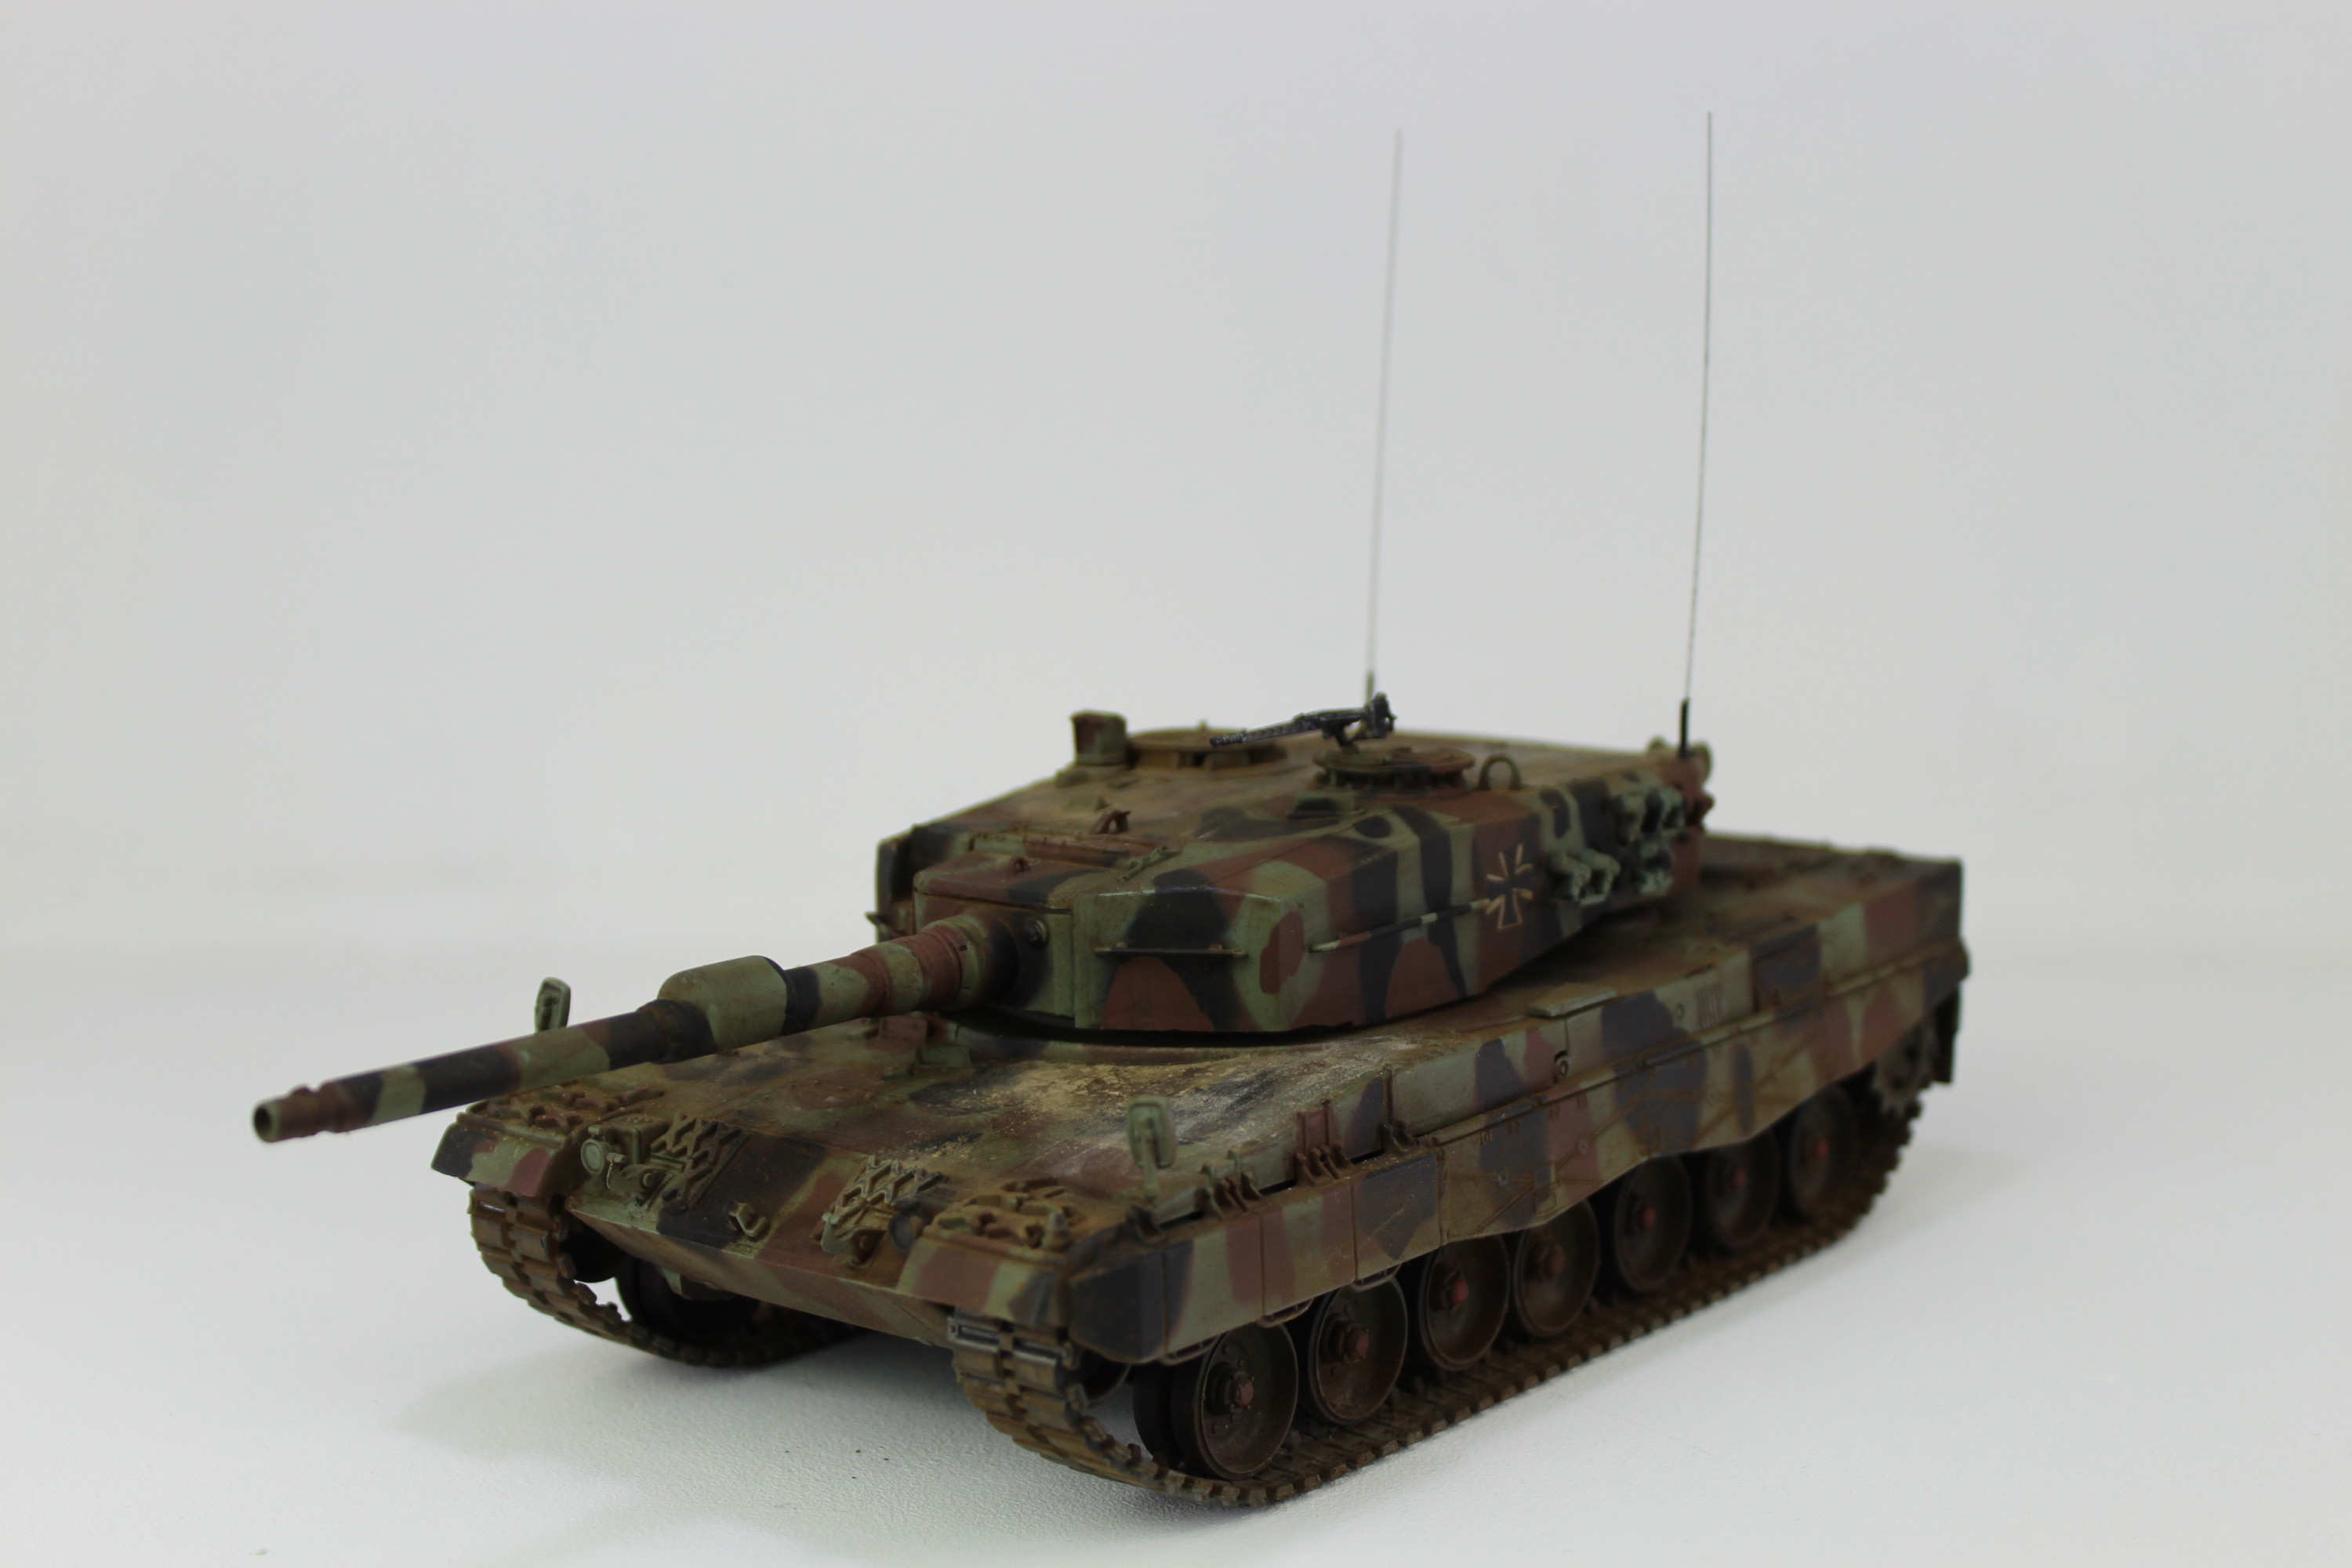
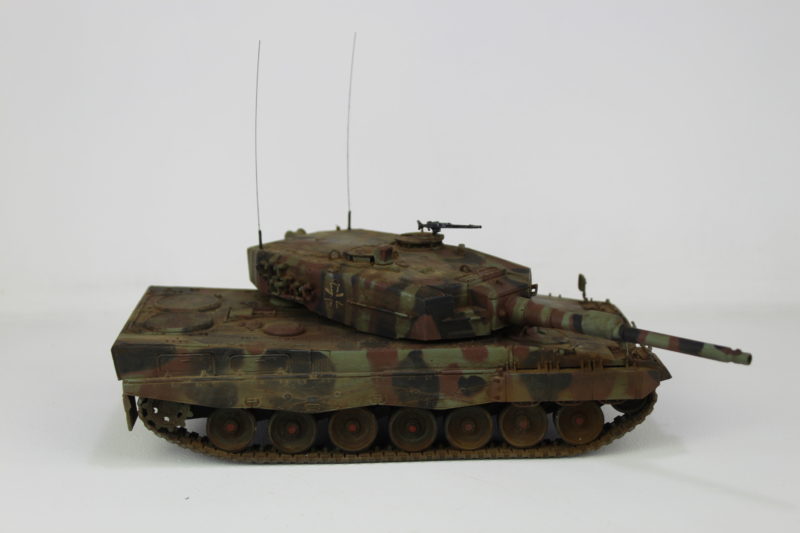
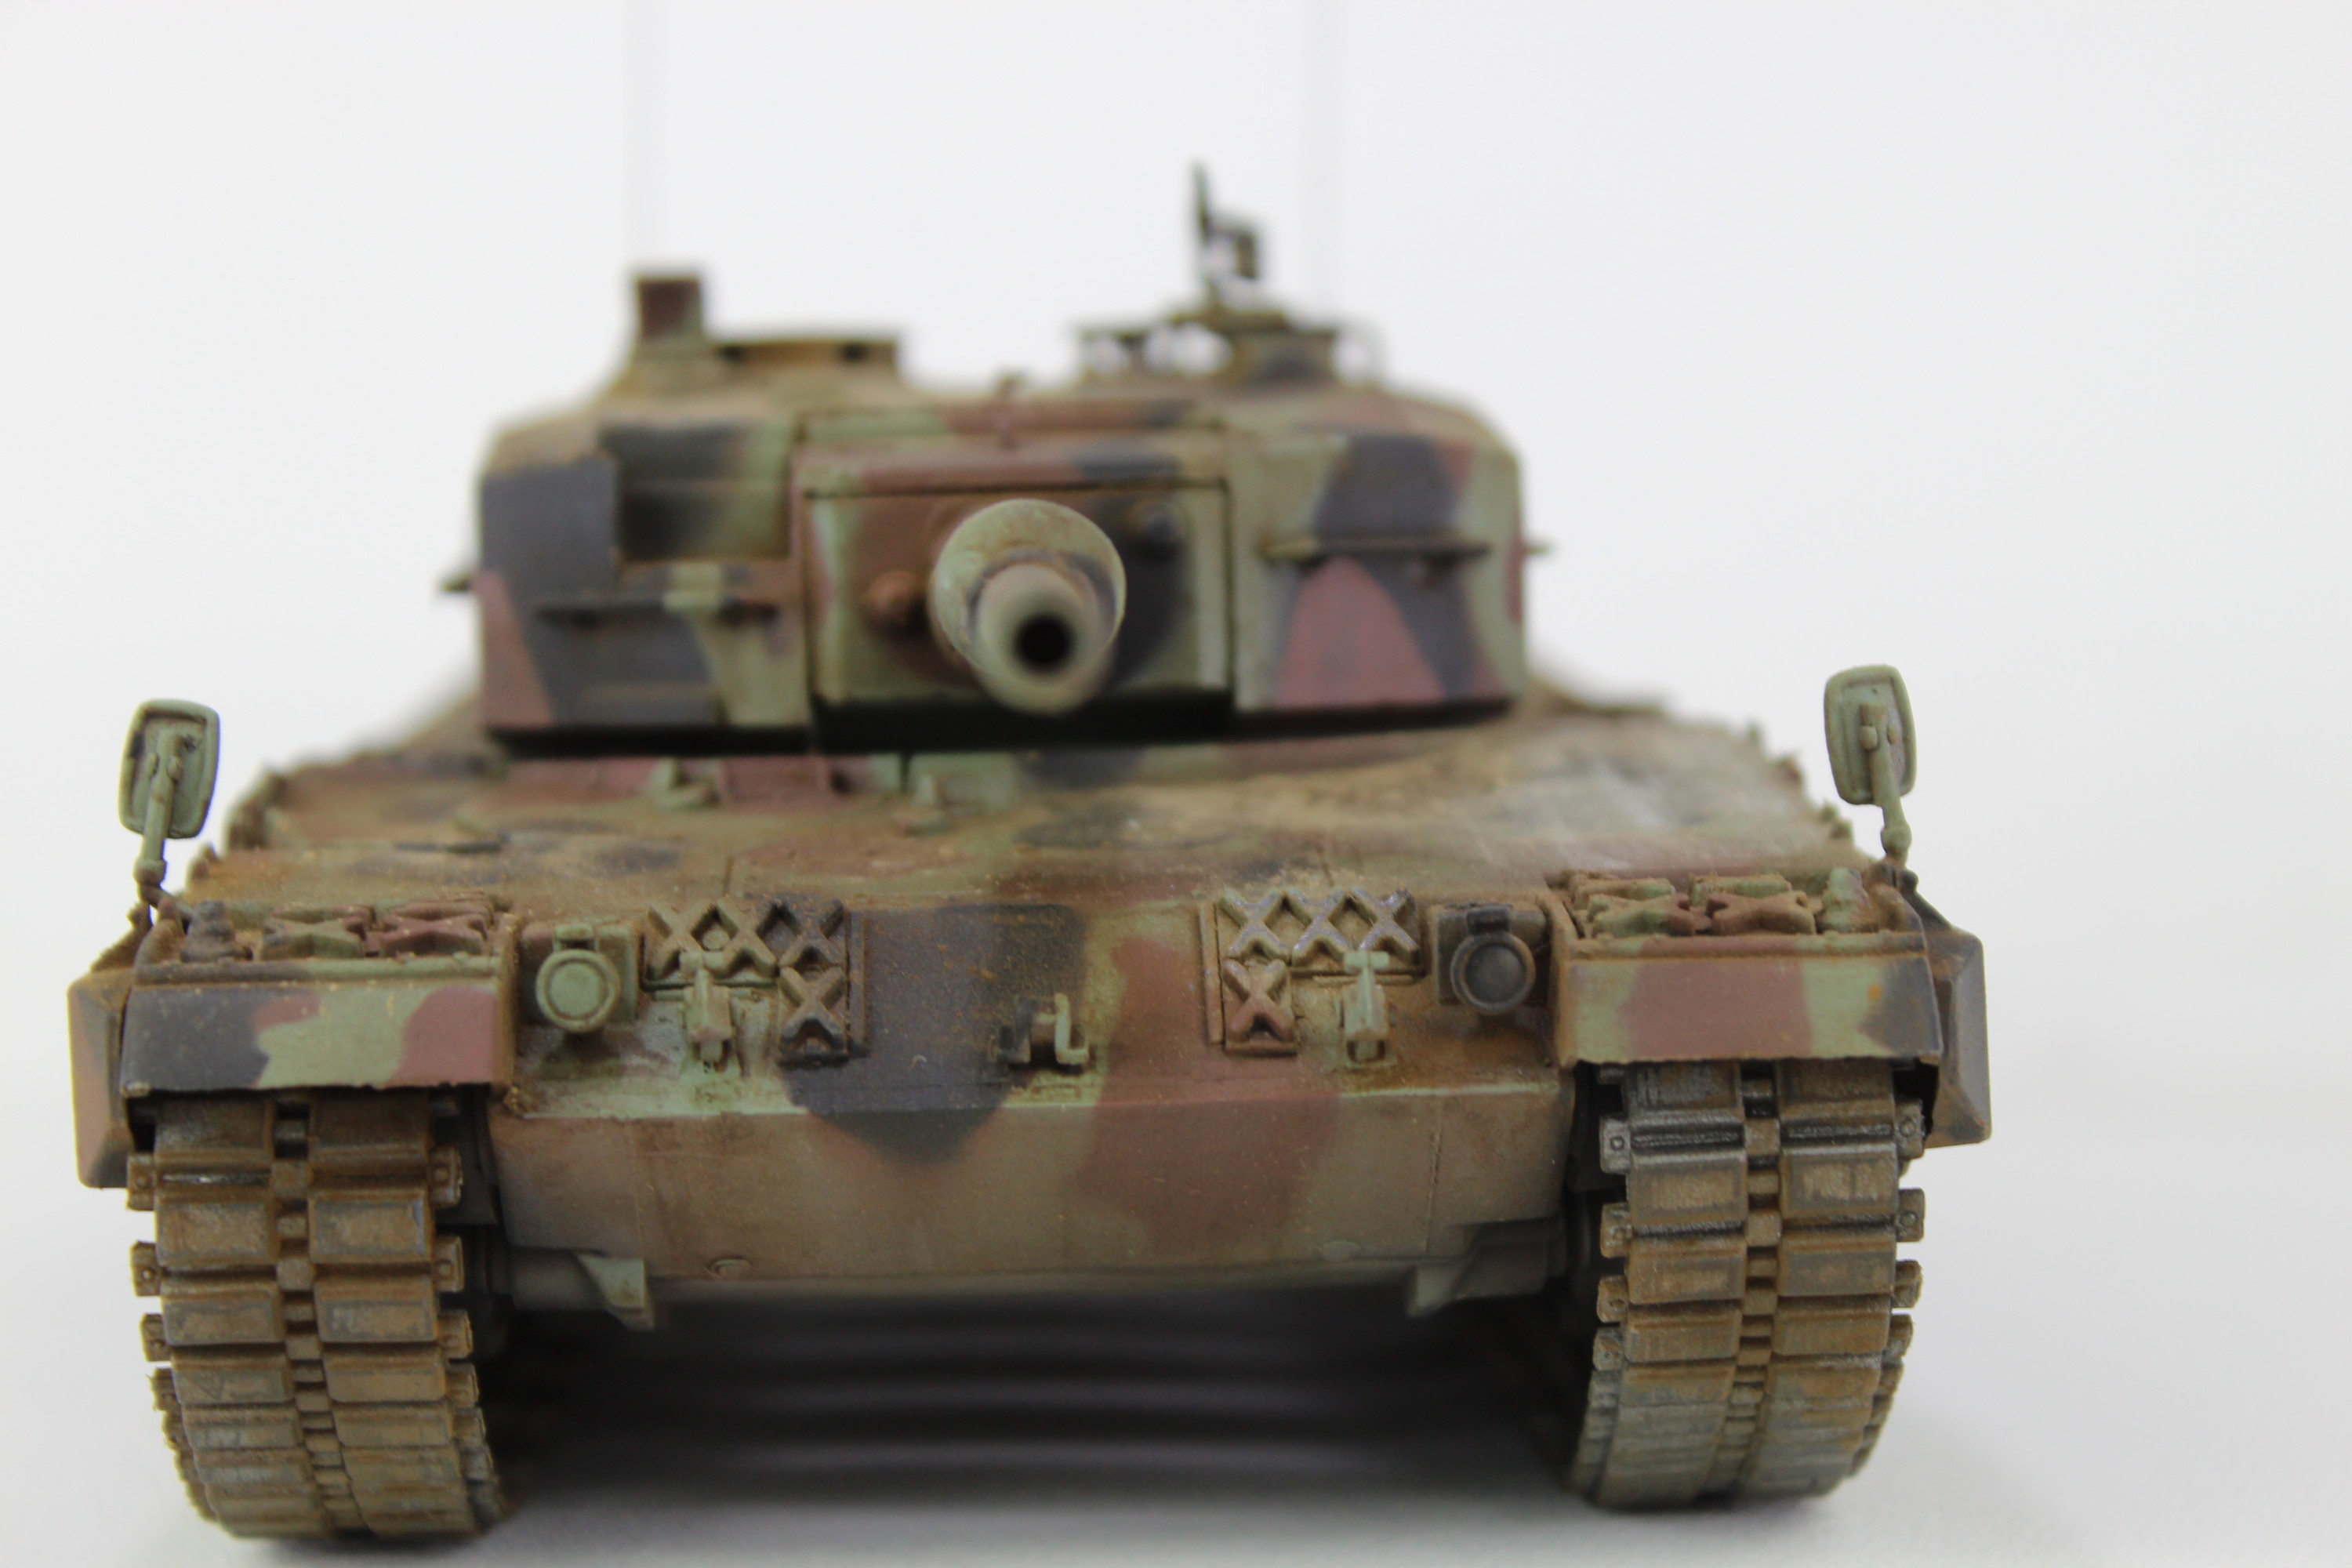
I’m going to call this one complete. Don’t think it looks too bad overall. I just need to practice the camouflage masking and not to put too much white into the colours before spraying. Check out the pictures below of the completed Lee Leopard 2 Tank In 1/35th Scale.

Leopard 2 Model Completed
The Completed Leopard 2 Scale Model.
Rear Of The Leopard 2 Tank Model
Rear Of The Leopard 2 Tank Model.
Close Up Details Of The Rear Of The Leopard 2.
Close Up Details Of The Wheels And Track Of The Leopard 2 Model Tank.
The Top Of The Leopard 2 Scale Model Tank
Top Of The Tank.
The Front Of The Leopard 2 Tank Scale Model
From The Front.
The Rear Of The Leopard 2 Scale Model Tank
From The Rear.
The Leopard 2 Scale Model Tank From The Rear
The Rear Of The Leopard 2.
Completed Scale Model Leopard 2 Tank.
Leopard 2 Tank.
Details On The Rear Of The Leopard 2 Tank 135 Scale Model Tank.
Details On The Rear Of The Leopard 2 Tank.
Side View Of The Leopard 2 Tank
Side View.
Leopard 2 Tank
Leopard 2 Completed 1/35th Scale Model Tank.
Leopard 2 Scale Model Tank.
Side View Of The Leopard 2 Tank In 135th Scale
Side View Of The Leopard 2 Tank.
Completed Model Tank
Front Of The Leopard 2 Scale Model Tank
Front Of The Leopard 2 Model Tank.
The Leopard 2 Tank From The Top
The Leopard 2 Tank From The Top.
Close Up Detail On The Leopard 2 Turret
Close Up Detail On The Leopard 2 Turret.
Close Up Of The Turret On The Leopard 2 Model Tank
Close Up Of The Turret On The Leopard 2 Model Tank.
Close Up Of The Details On The Rear Of The Hull Leopard 2 Tank
Close Up Of The Details On The Rear Of The Hull.

Here is a little video of the completed Leopard 2 Model Tank, for your viewing pleasure.

CLICK HERE TO BUY THE LEE LEOPARD 2 MBT

Facebook Comments

Comments are closed.