Apache AH-64A 148th Model By Academy Step By Step Full Build

Scale Model Apache Longbow

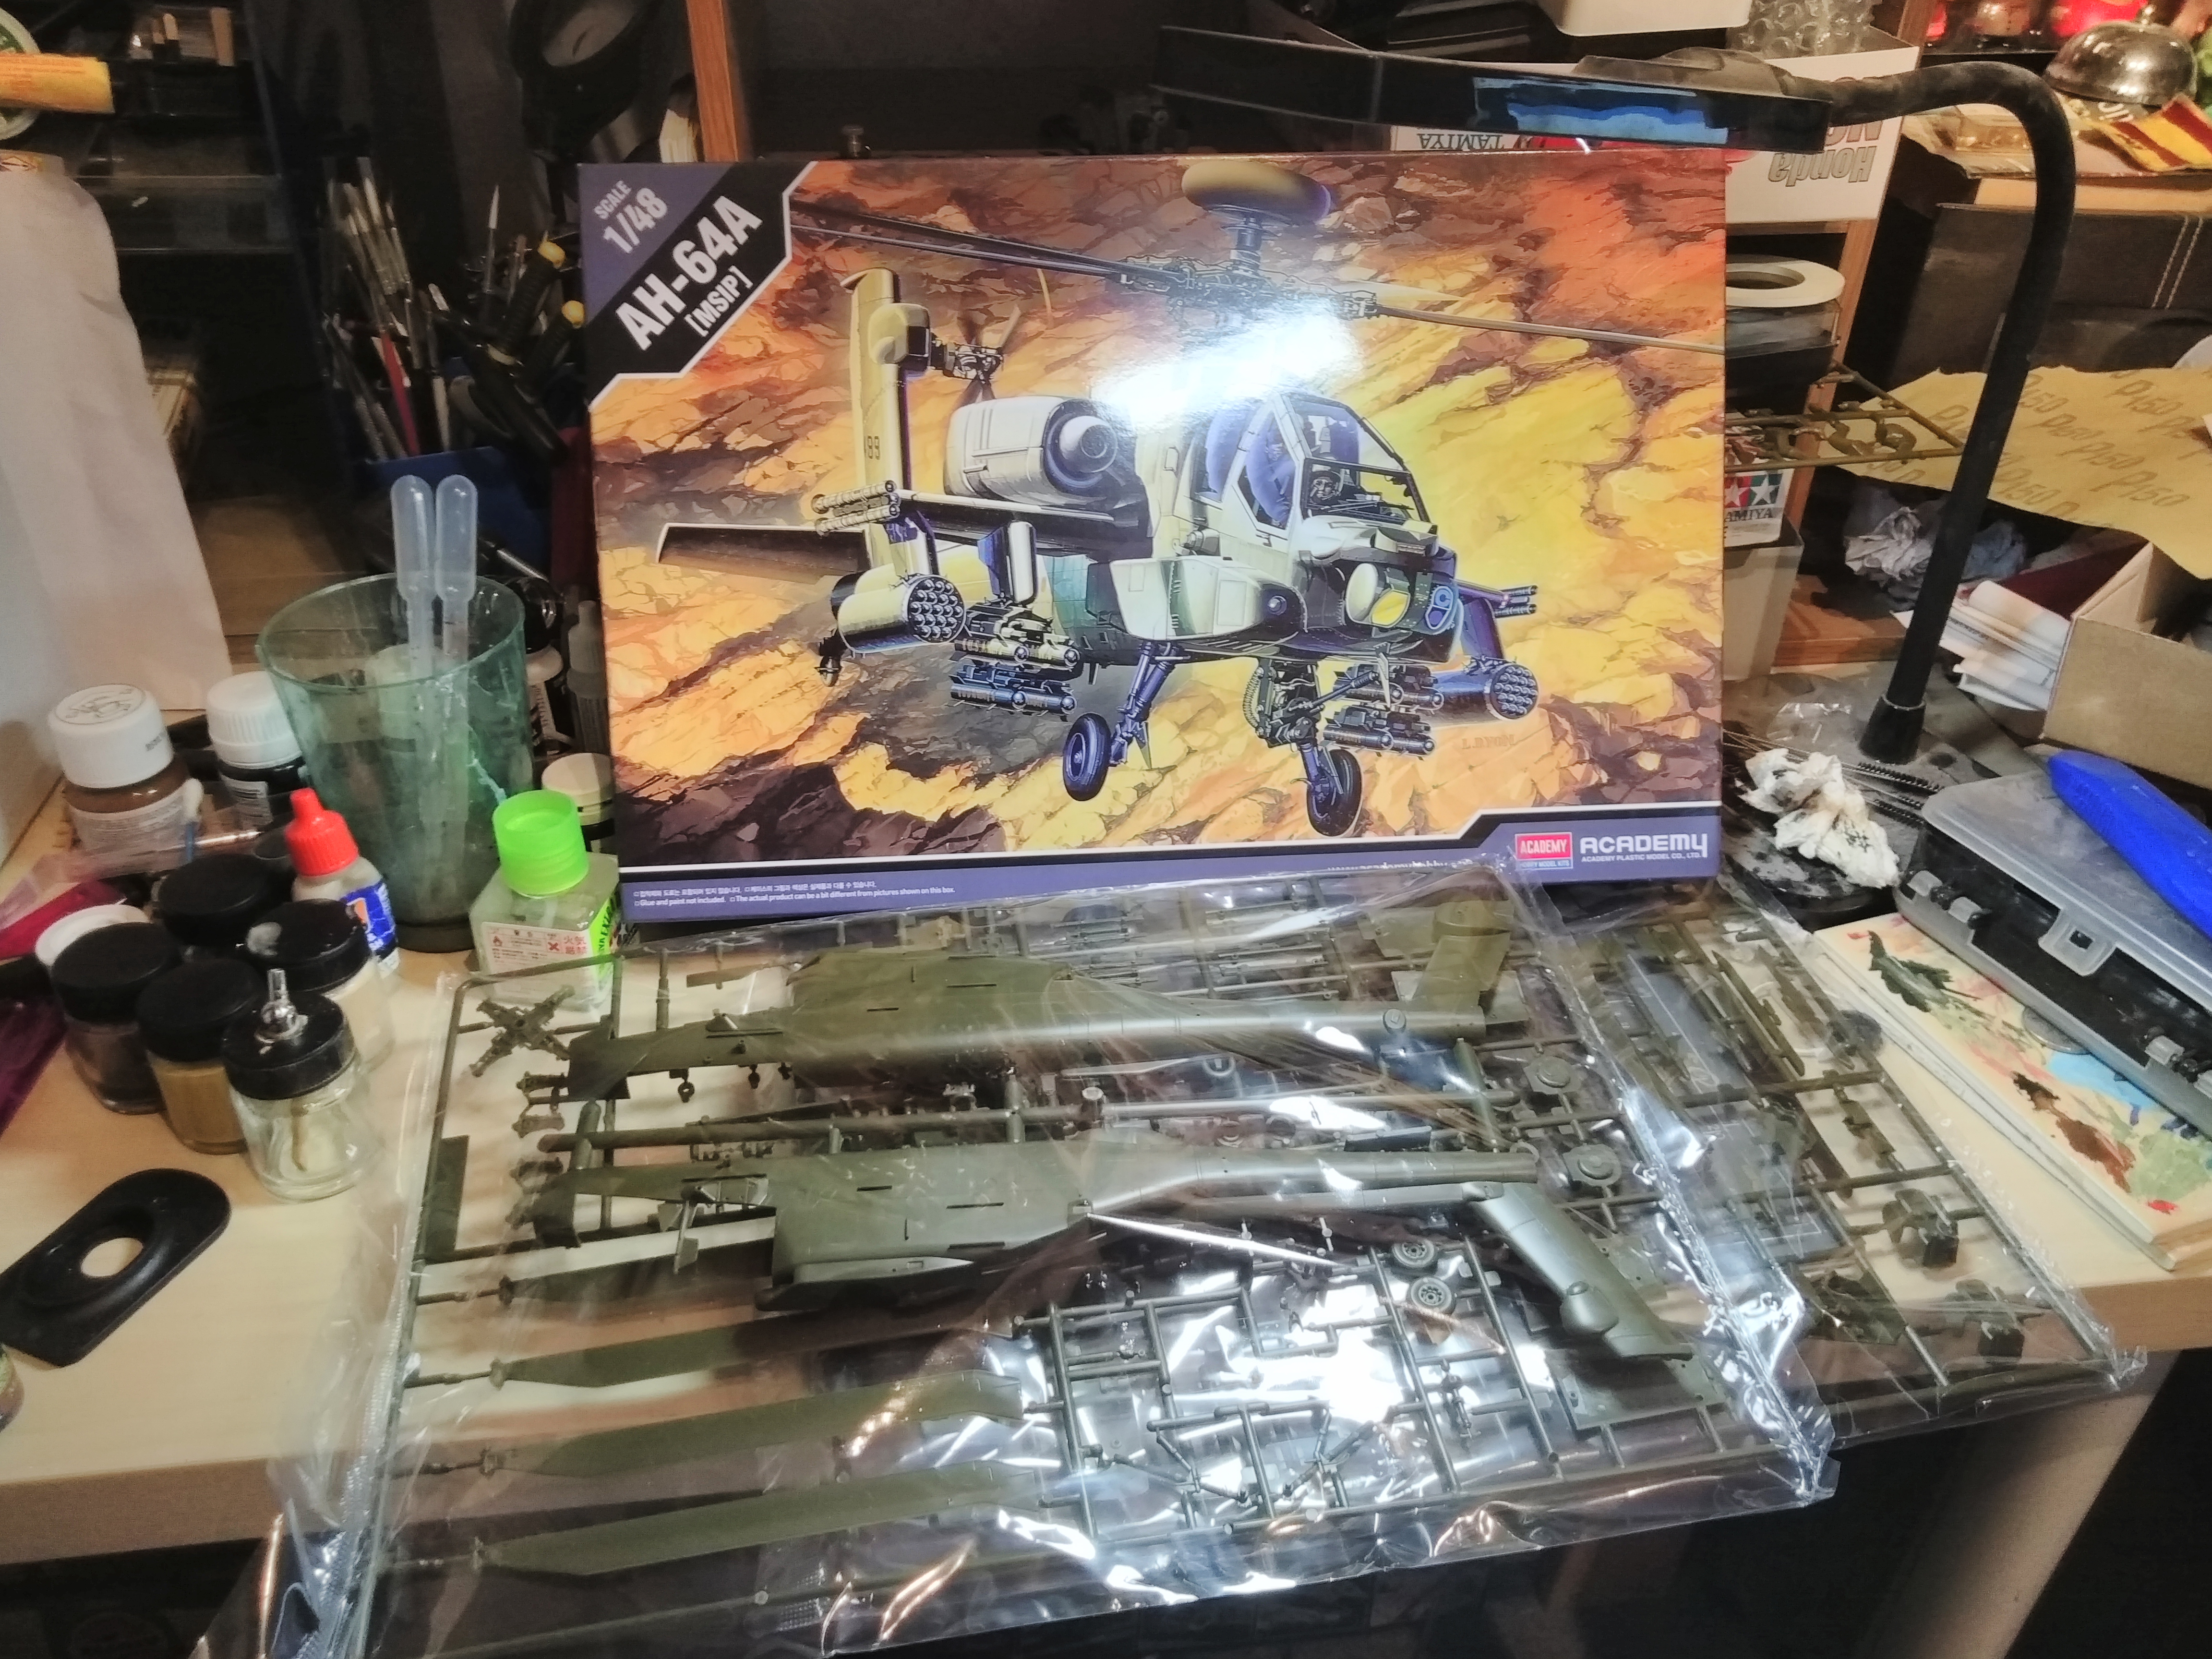
So the first thing about the model is the size of the parts that make it a lot easier to deal with. To be honest, when this is built I have no idea where to put it as it will be pretty big.

Apache AH-64A Academy Model
Apache AH-64A Academy Model Full Build With Step By Step Pictures.
Apache AH-64A Academy Model Cockpit
Apache AH-64A 1/48 Cockpit Started Seats, Ejector Handle And Foot Pedals Fitted.

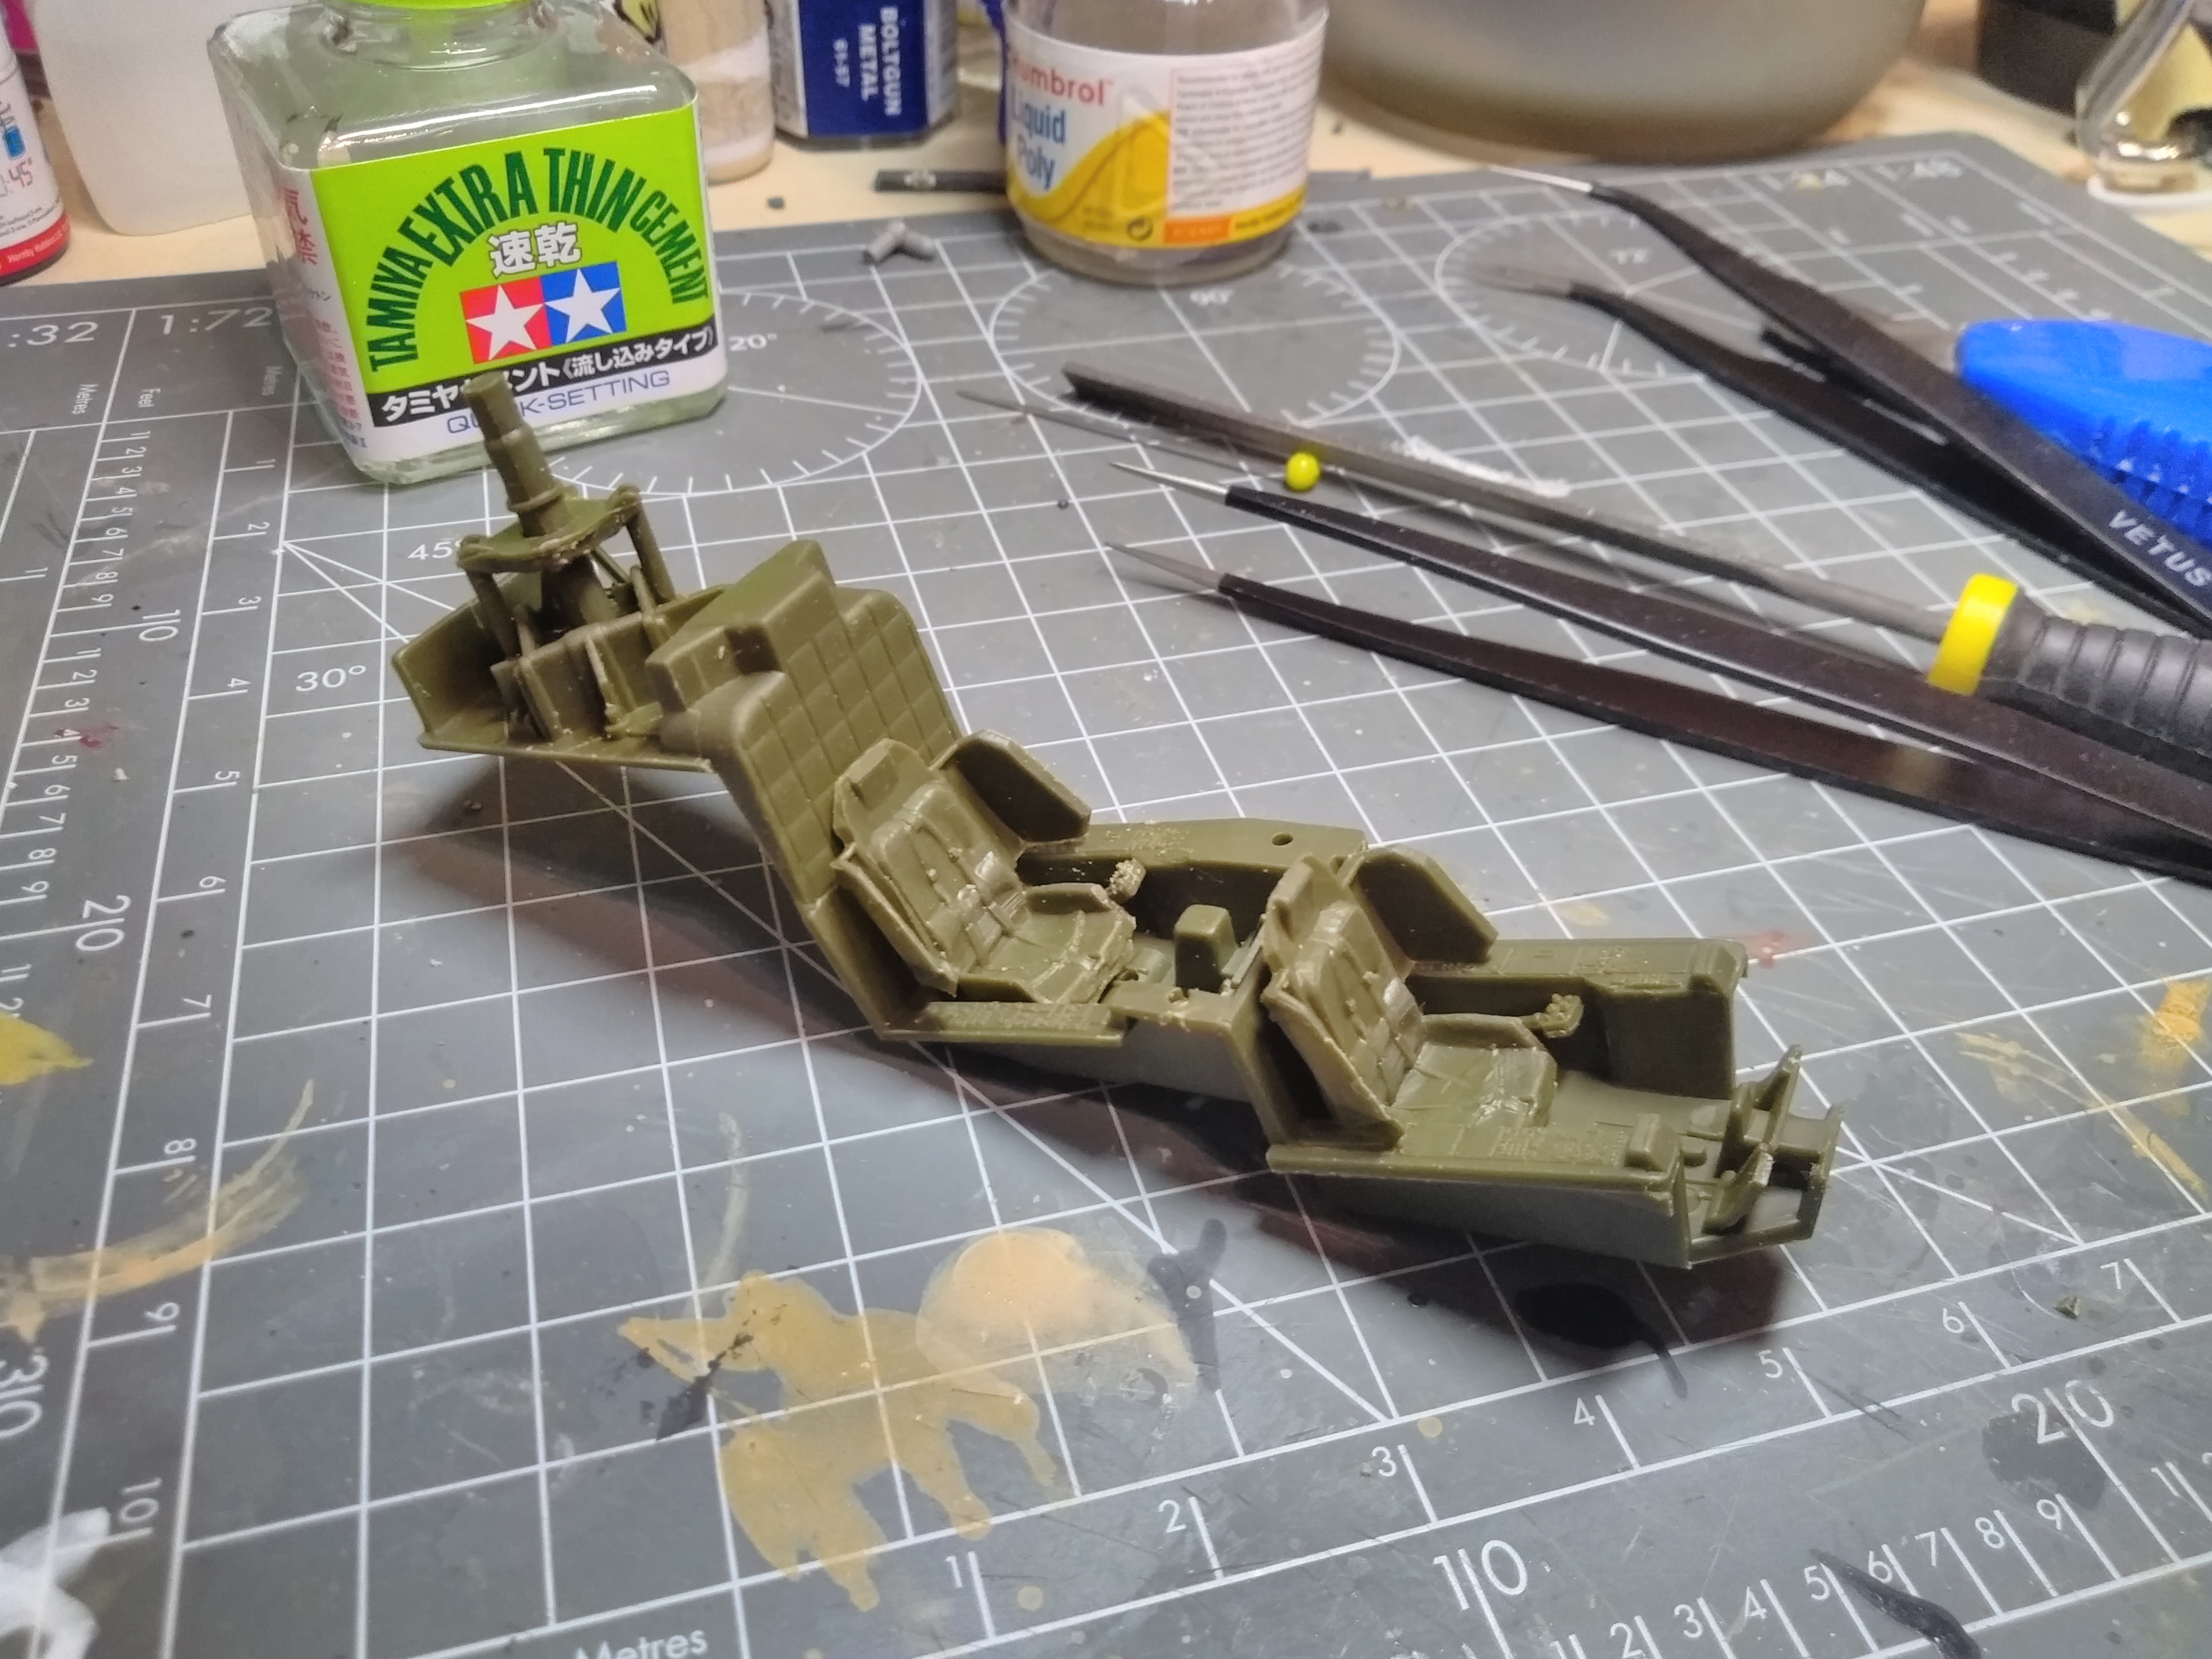
I know with aircraft models you need to complete the cockpit, as well as getting it painted before moving on. So here is the first stage putting the seats and flight controls together and giving then an undercoat in black. I also sprayed the inside of the body shell where the cockpit is located.

Apache AH-64A 1/48 Model Body Fitted With Cockpit Painted
Cockpit Fitted Seats Painted And Instruments Dry Brushed With Aluminium.

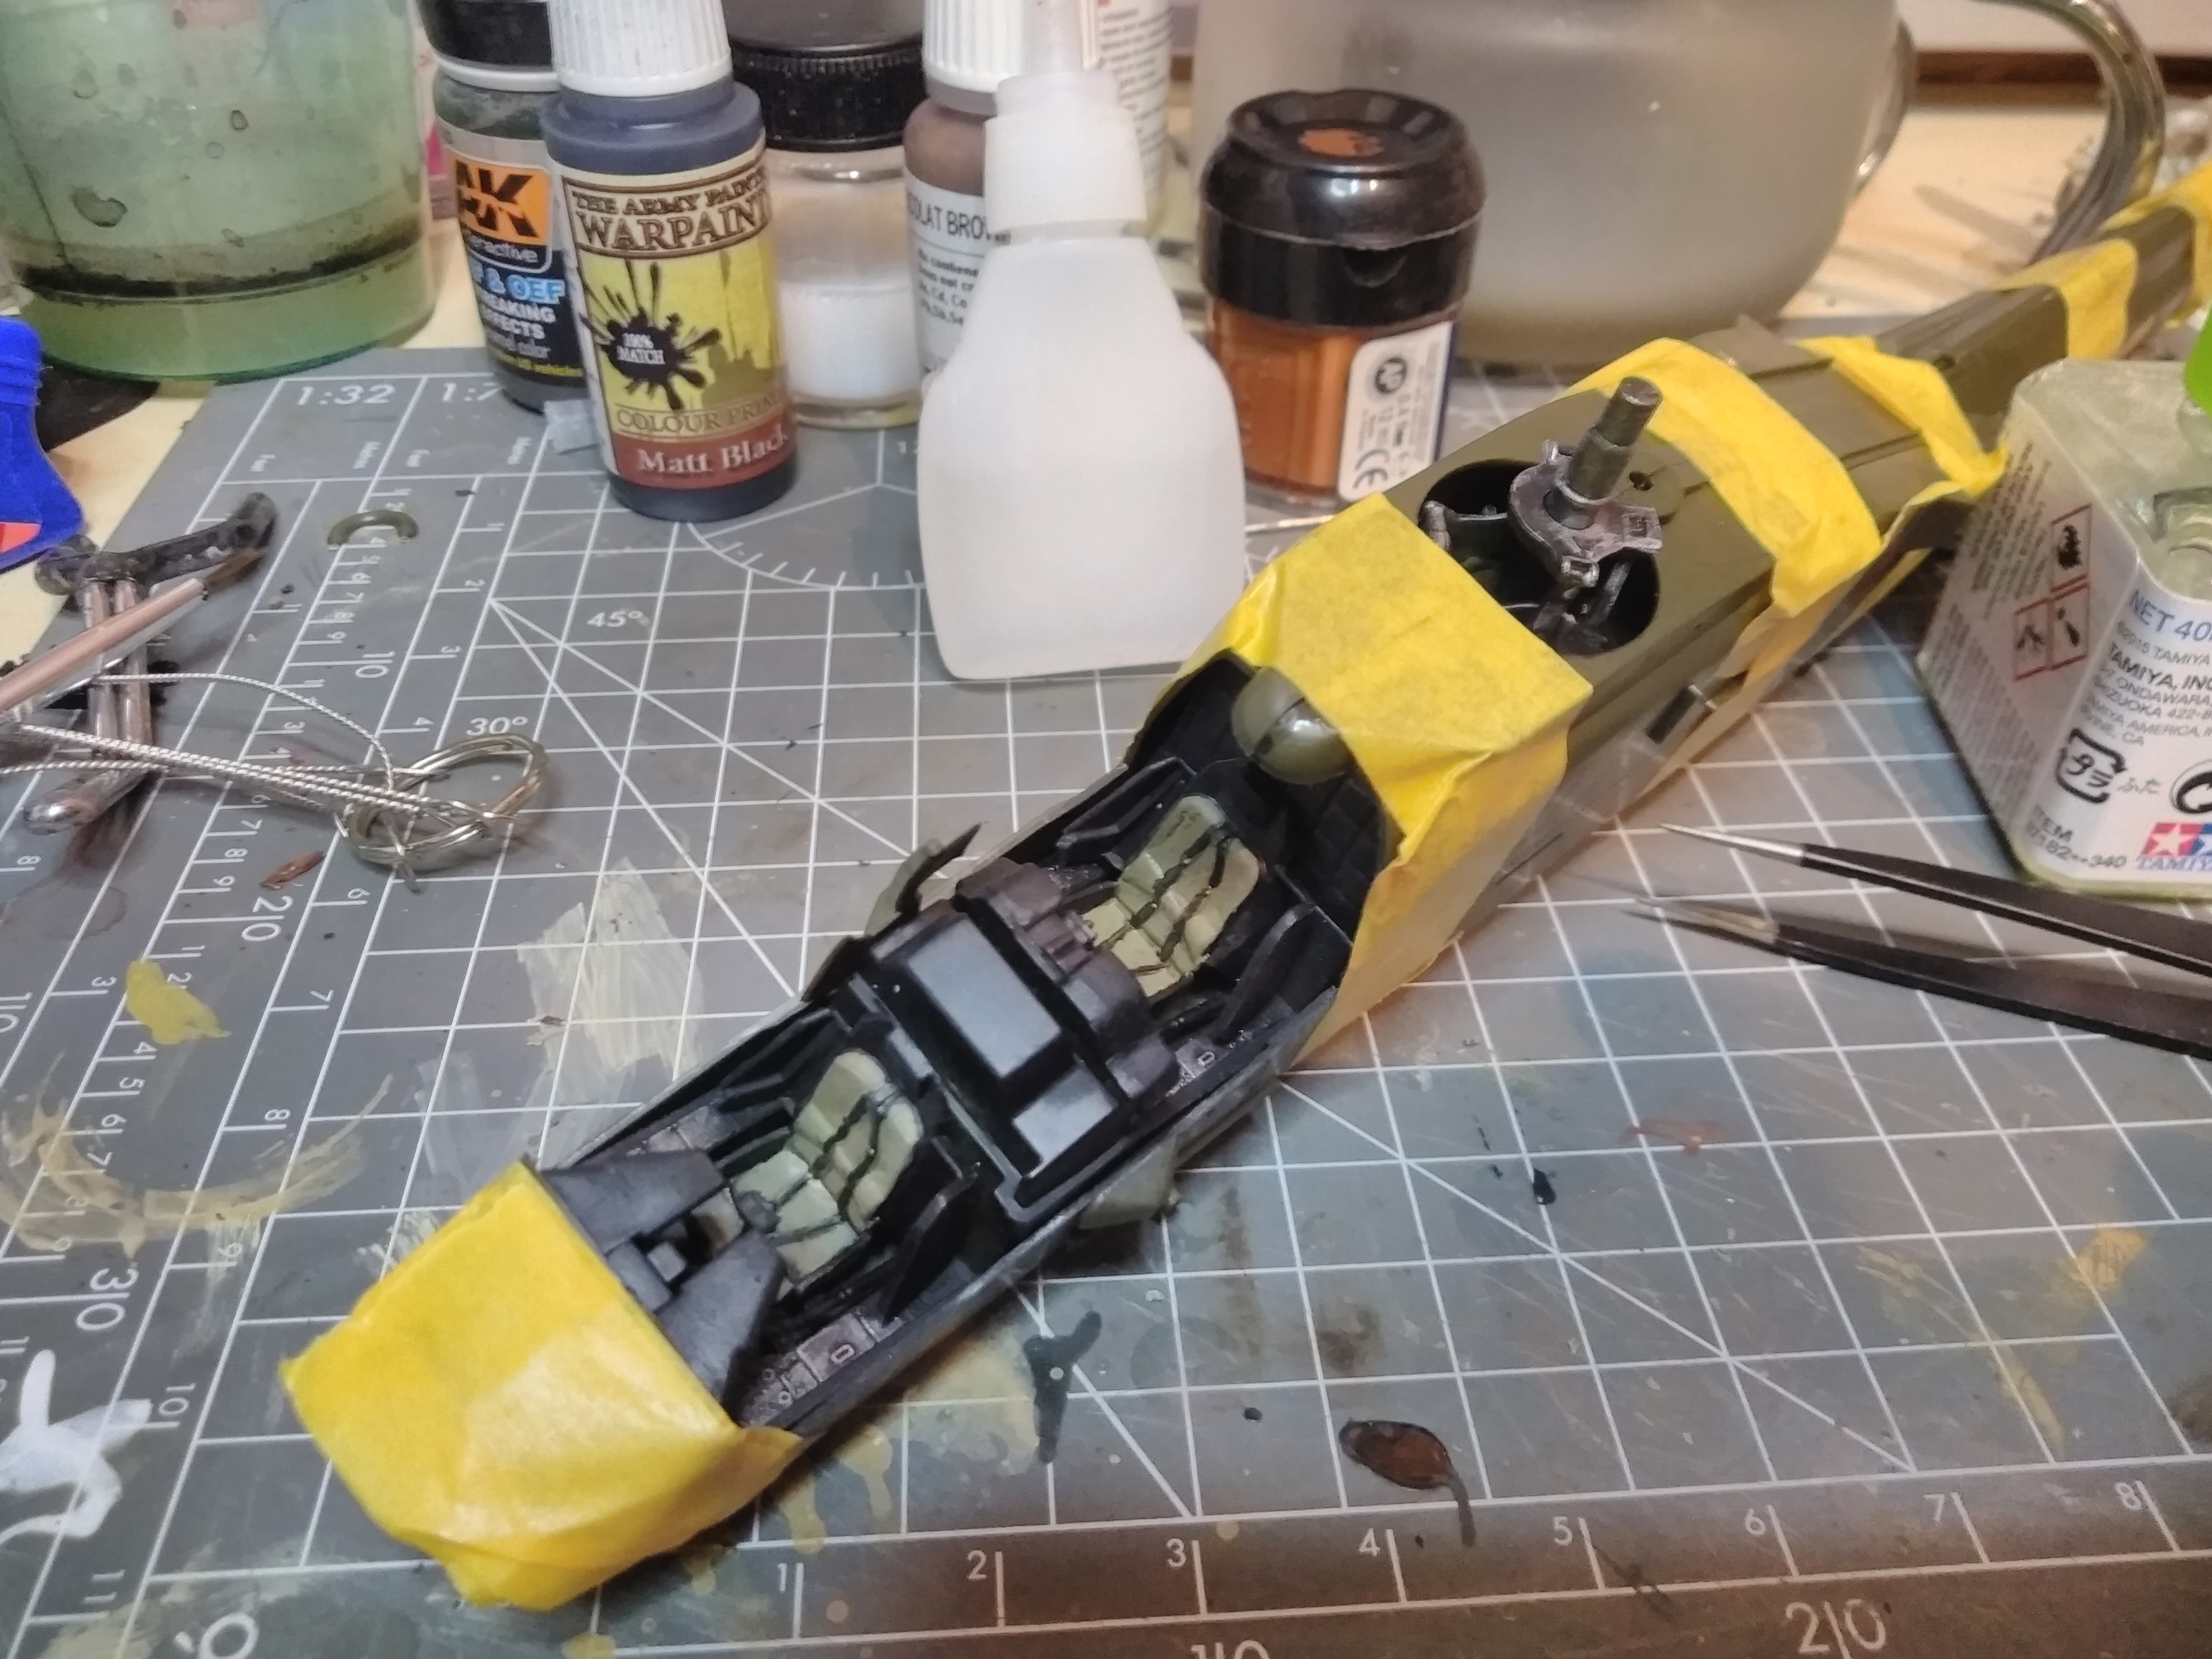
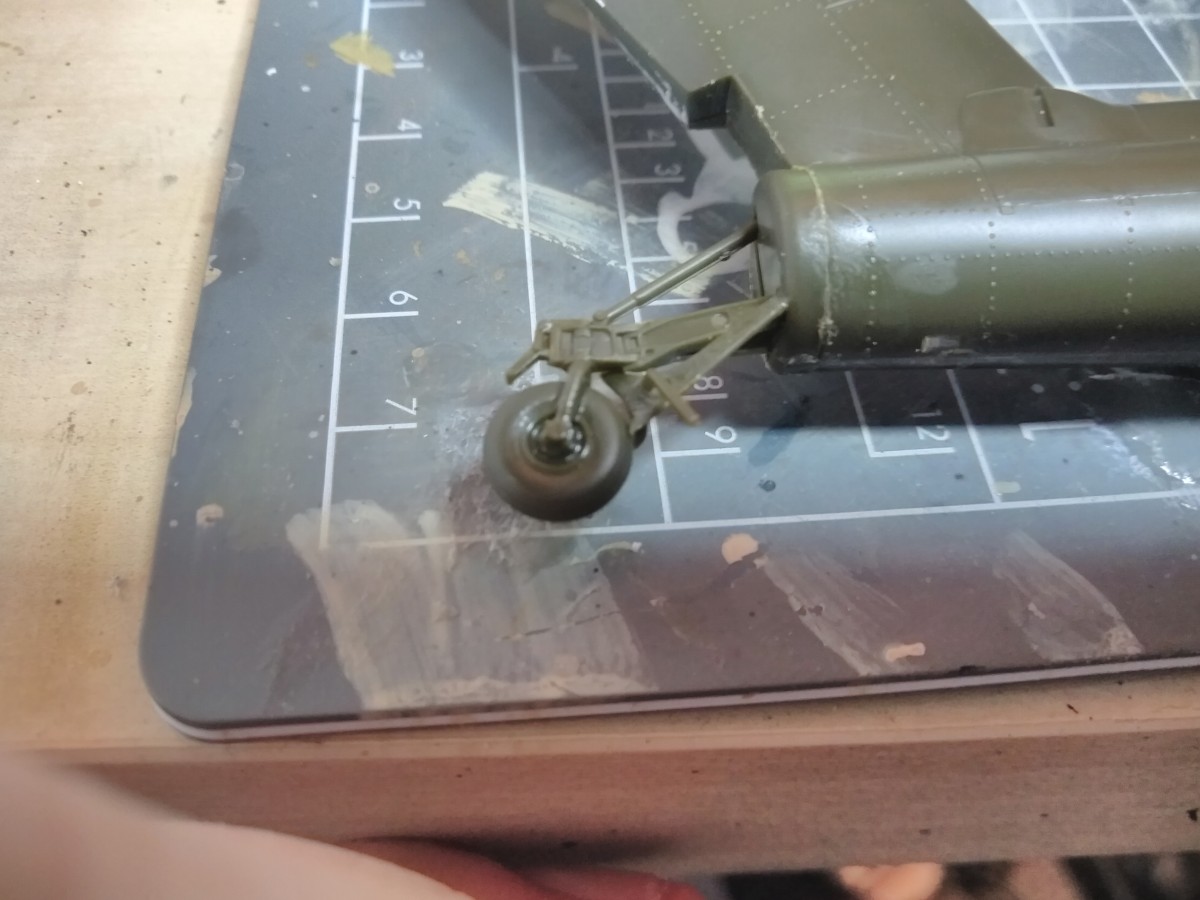
So next I painted in the seats and did a dry brush of aluminium over the instrument panels to pull out the detail. Then made the first parts of the tail rotor assembly and glued it in place. Lastly, I lined up the body and glued the outer shell together, with a little bit of masking tape to hold it while the glue sets.

Apache AH-64A Academy Model Body Glued Together And Taped Until Set
Shell Glued Together and Taped Until Set. I Think There With Be A Bit Of Sanding And Filling To Do.
Sanding Down The Join Lines On The Model Apache Helicopter
Gone Around The Model And Sanded All The Lines Where The Two Halves Meet. I have a Got a little Bit Of The Detail Doing This.

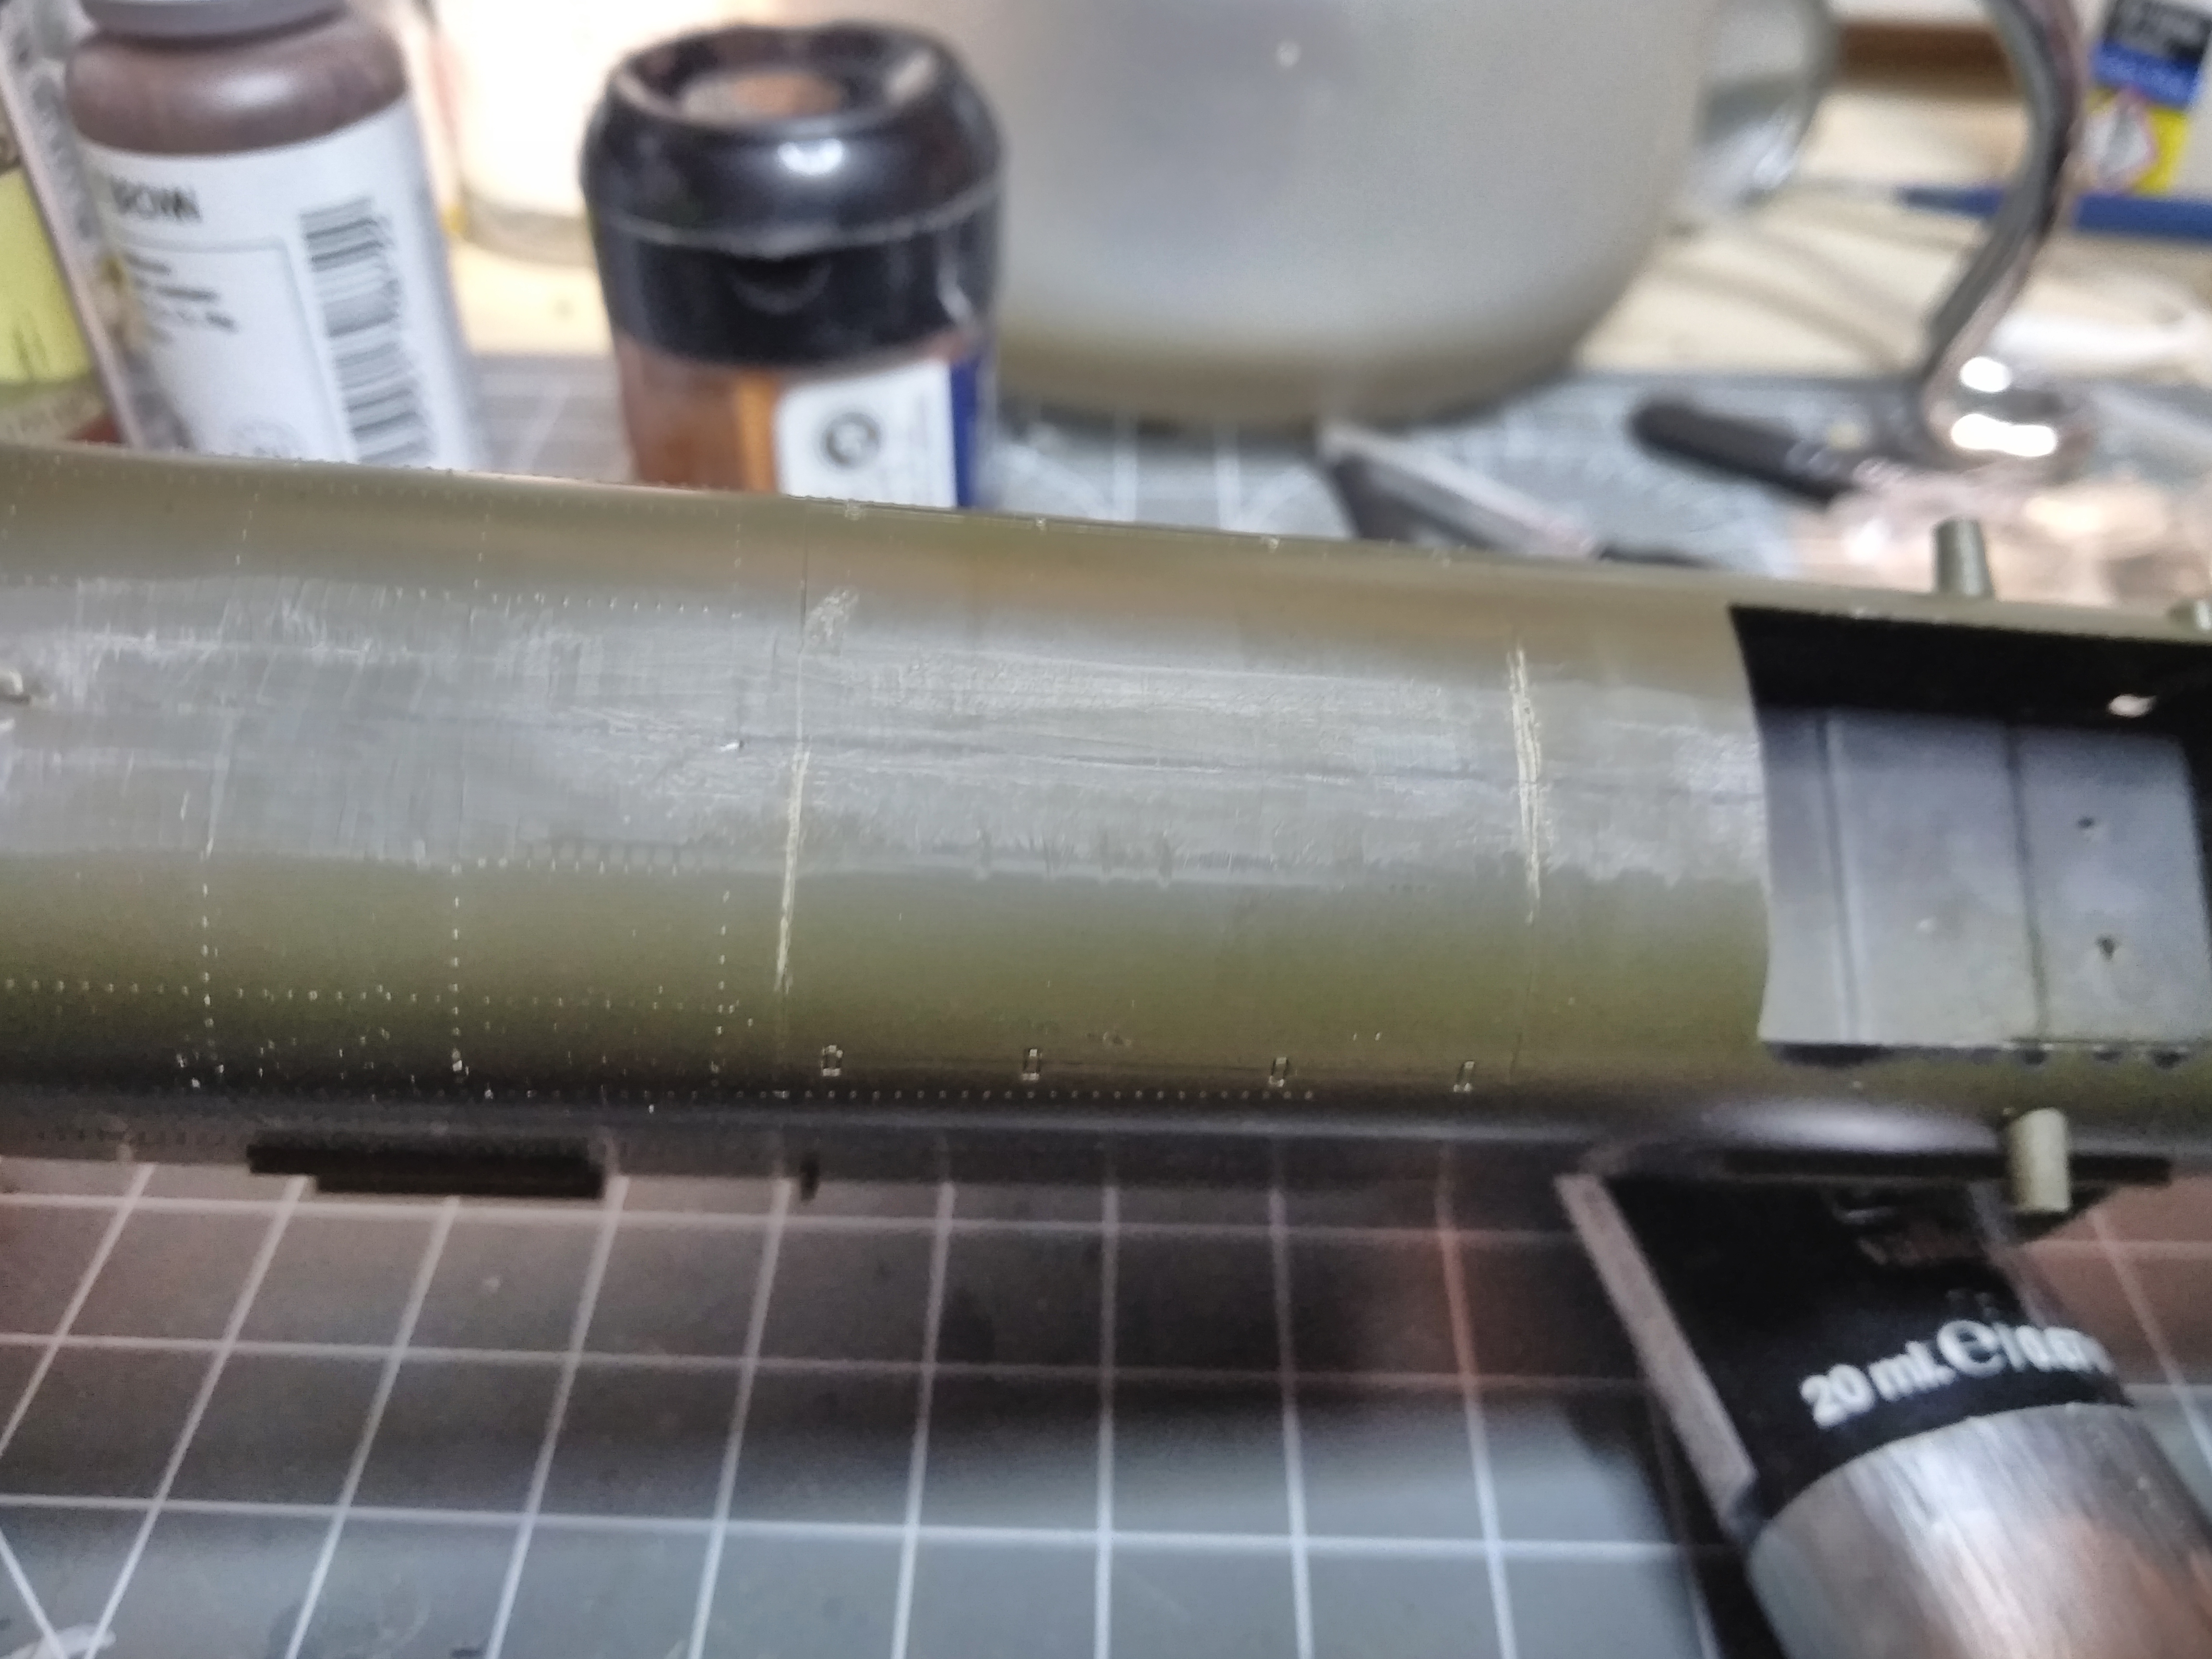
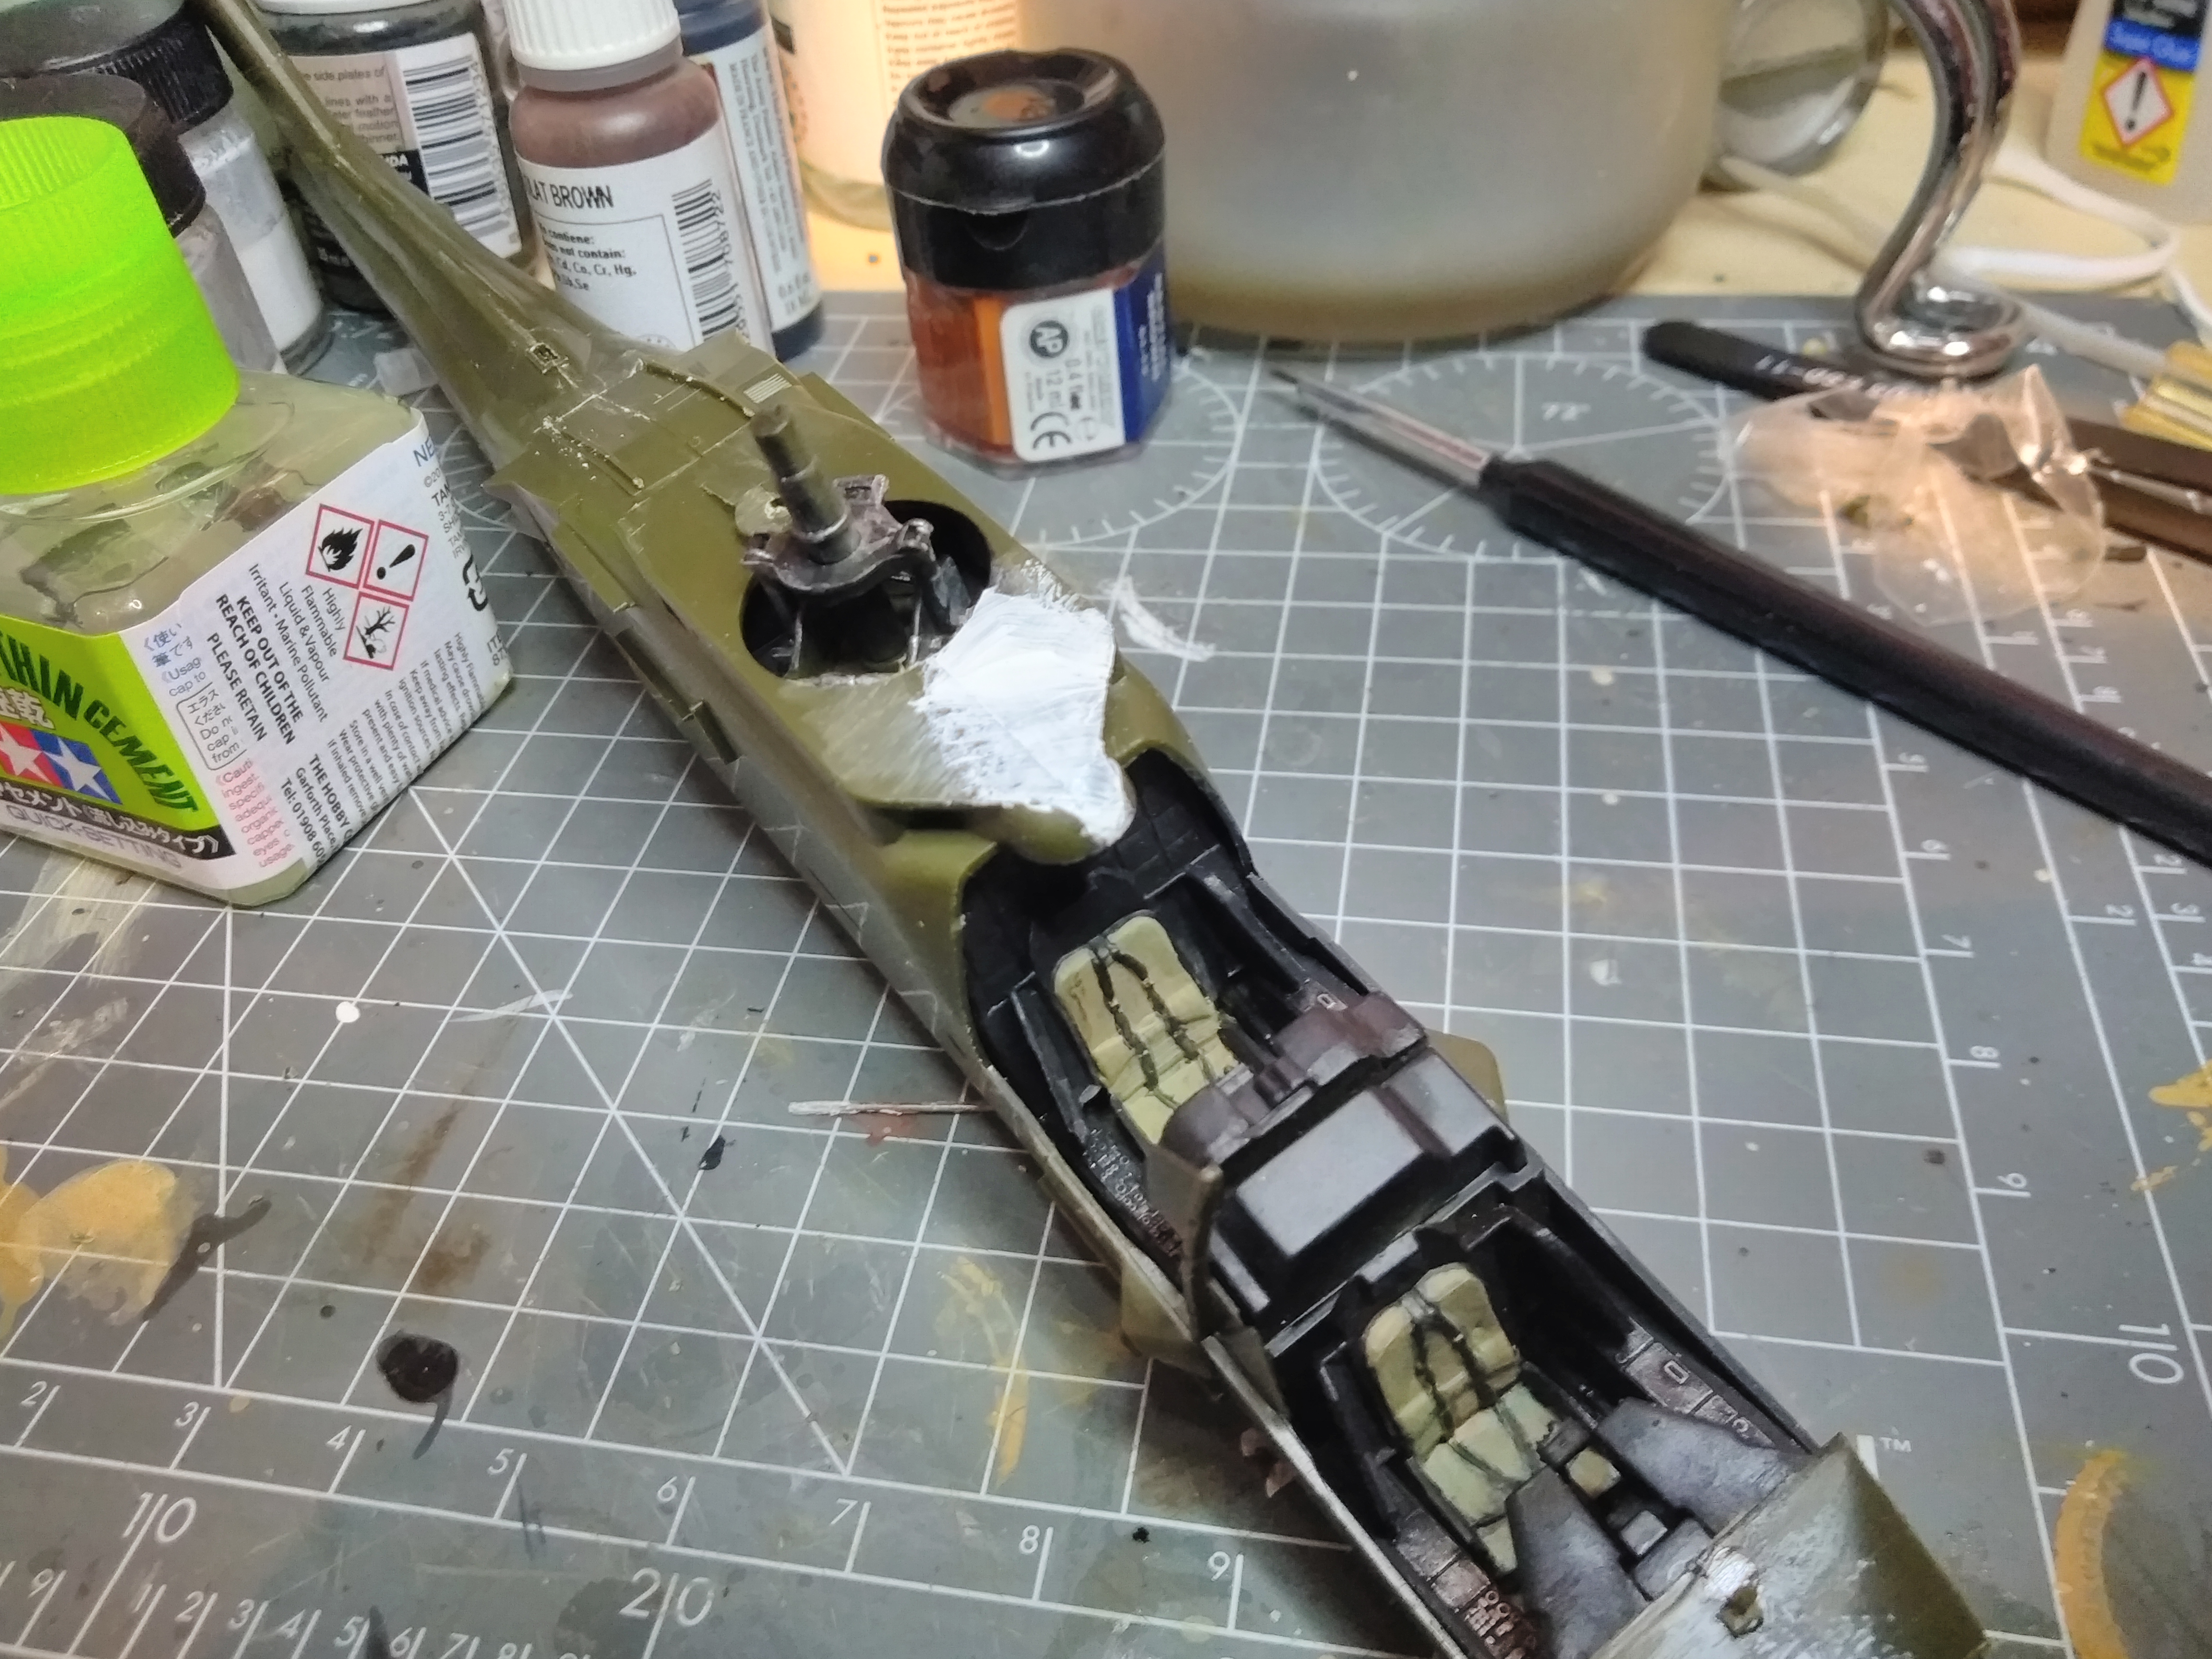
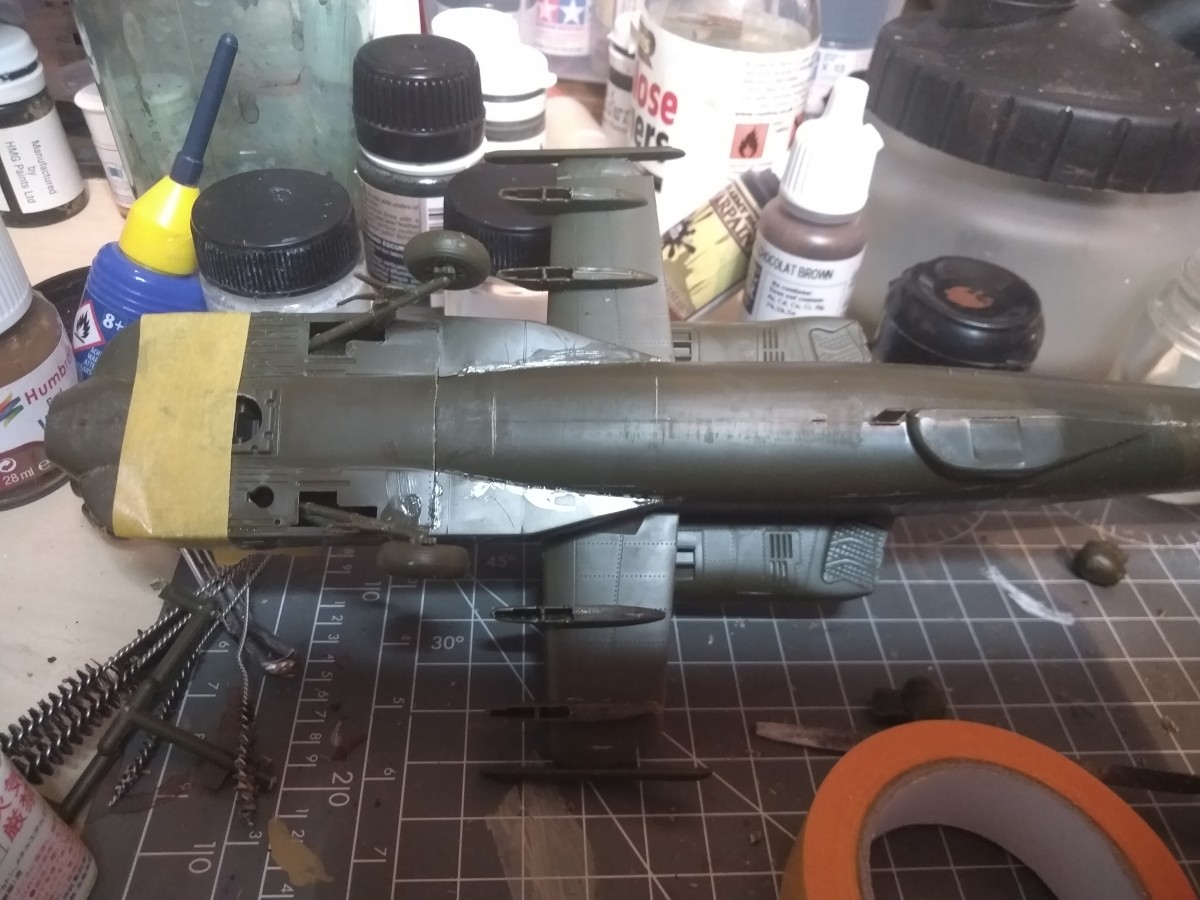
So when the tape came off there was quite a ridge where the two halves joined. I sanded that with a file and used a craft knife on it to get rid of it. I have lost some of the details of the panel lines and rivets. These I will have to add back later. Also above the cockpit, the join is very uneven. So I have used a little bit of filler for that. Going to let that dry overnight and clean it up tomorrow.

More Detail Work On The Academy Apache Model, Sanding The Joints And Filling Gaps
Cleaned Up The Join Lines With Some Rough Sanding And Added Some Filler To The Gaps And The Piece Above The Cockpit Where The Joins Are Off.

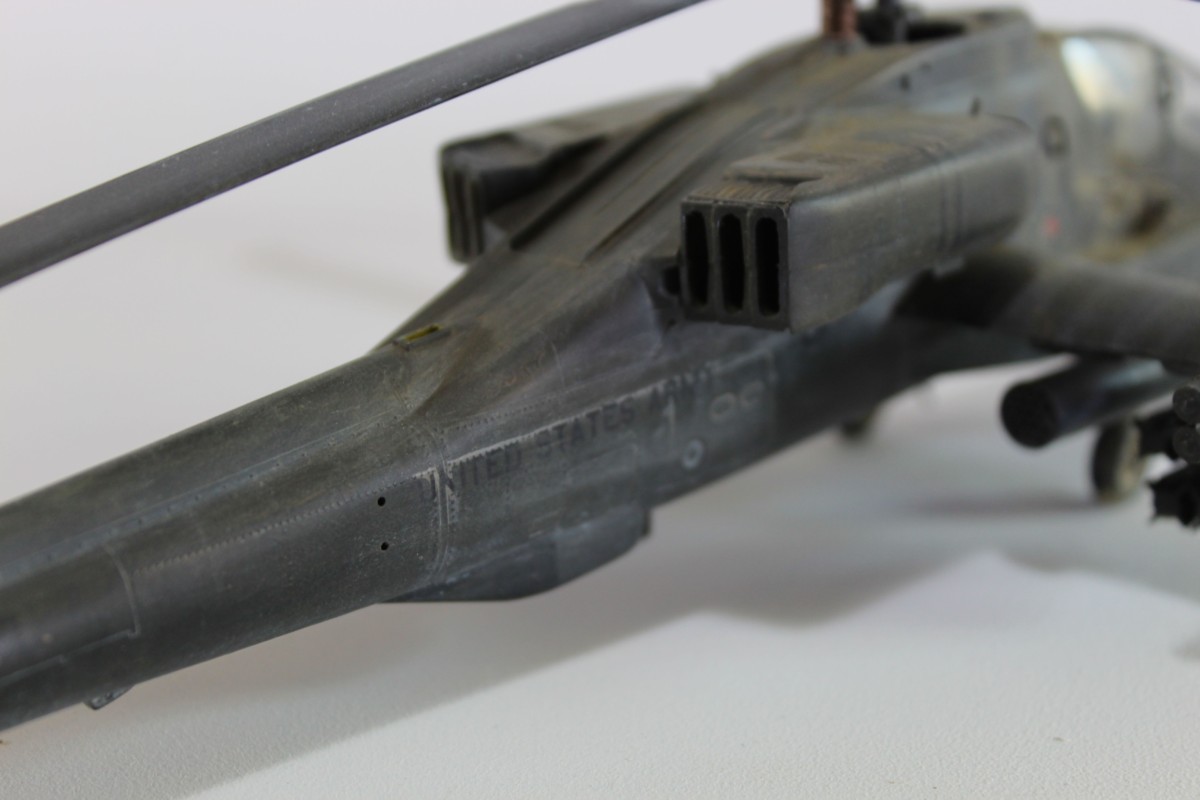
I stopped off at my local model shop and picked up some olive Humbrol paint and some white matt enamel paint for weathering. Been looking at a few reference shots and the weathering/staining of the Apache AH-64A seems to be white. In the meantime, the build continues.

Apache Ah-64 1/48 Academy Wings And Weapon Mounts
Apache Ah-64 Wings Completed With Weapon Mounts Fitted. Be Careful As The Weapon Mounts Are Slightly Different Sizes.
Fitted The Rear Wheel Assembly To The Apache Ah-64 Scale Model
The Rear Wheel Assembly Completed Now To Add The Tail Wing.

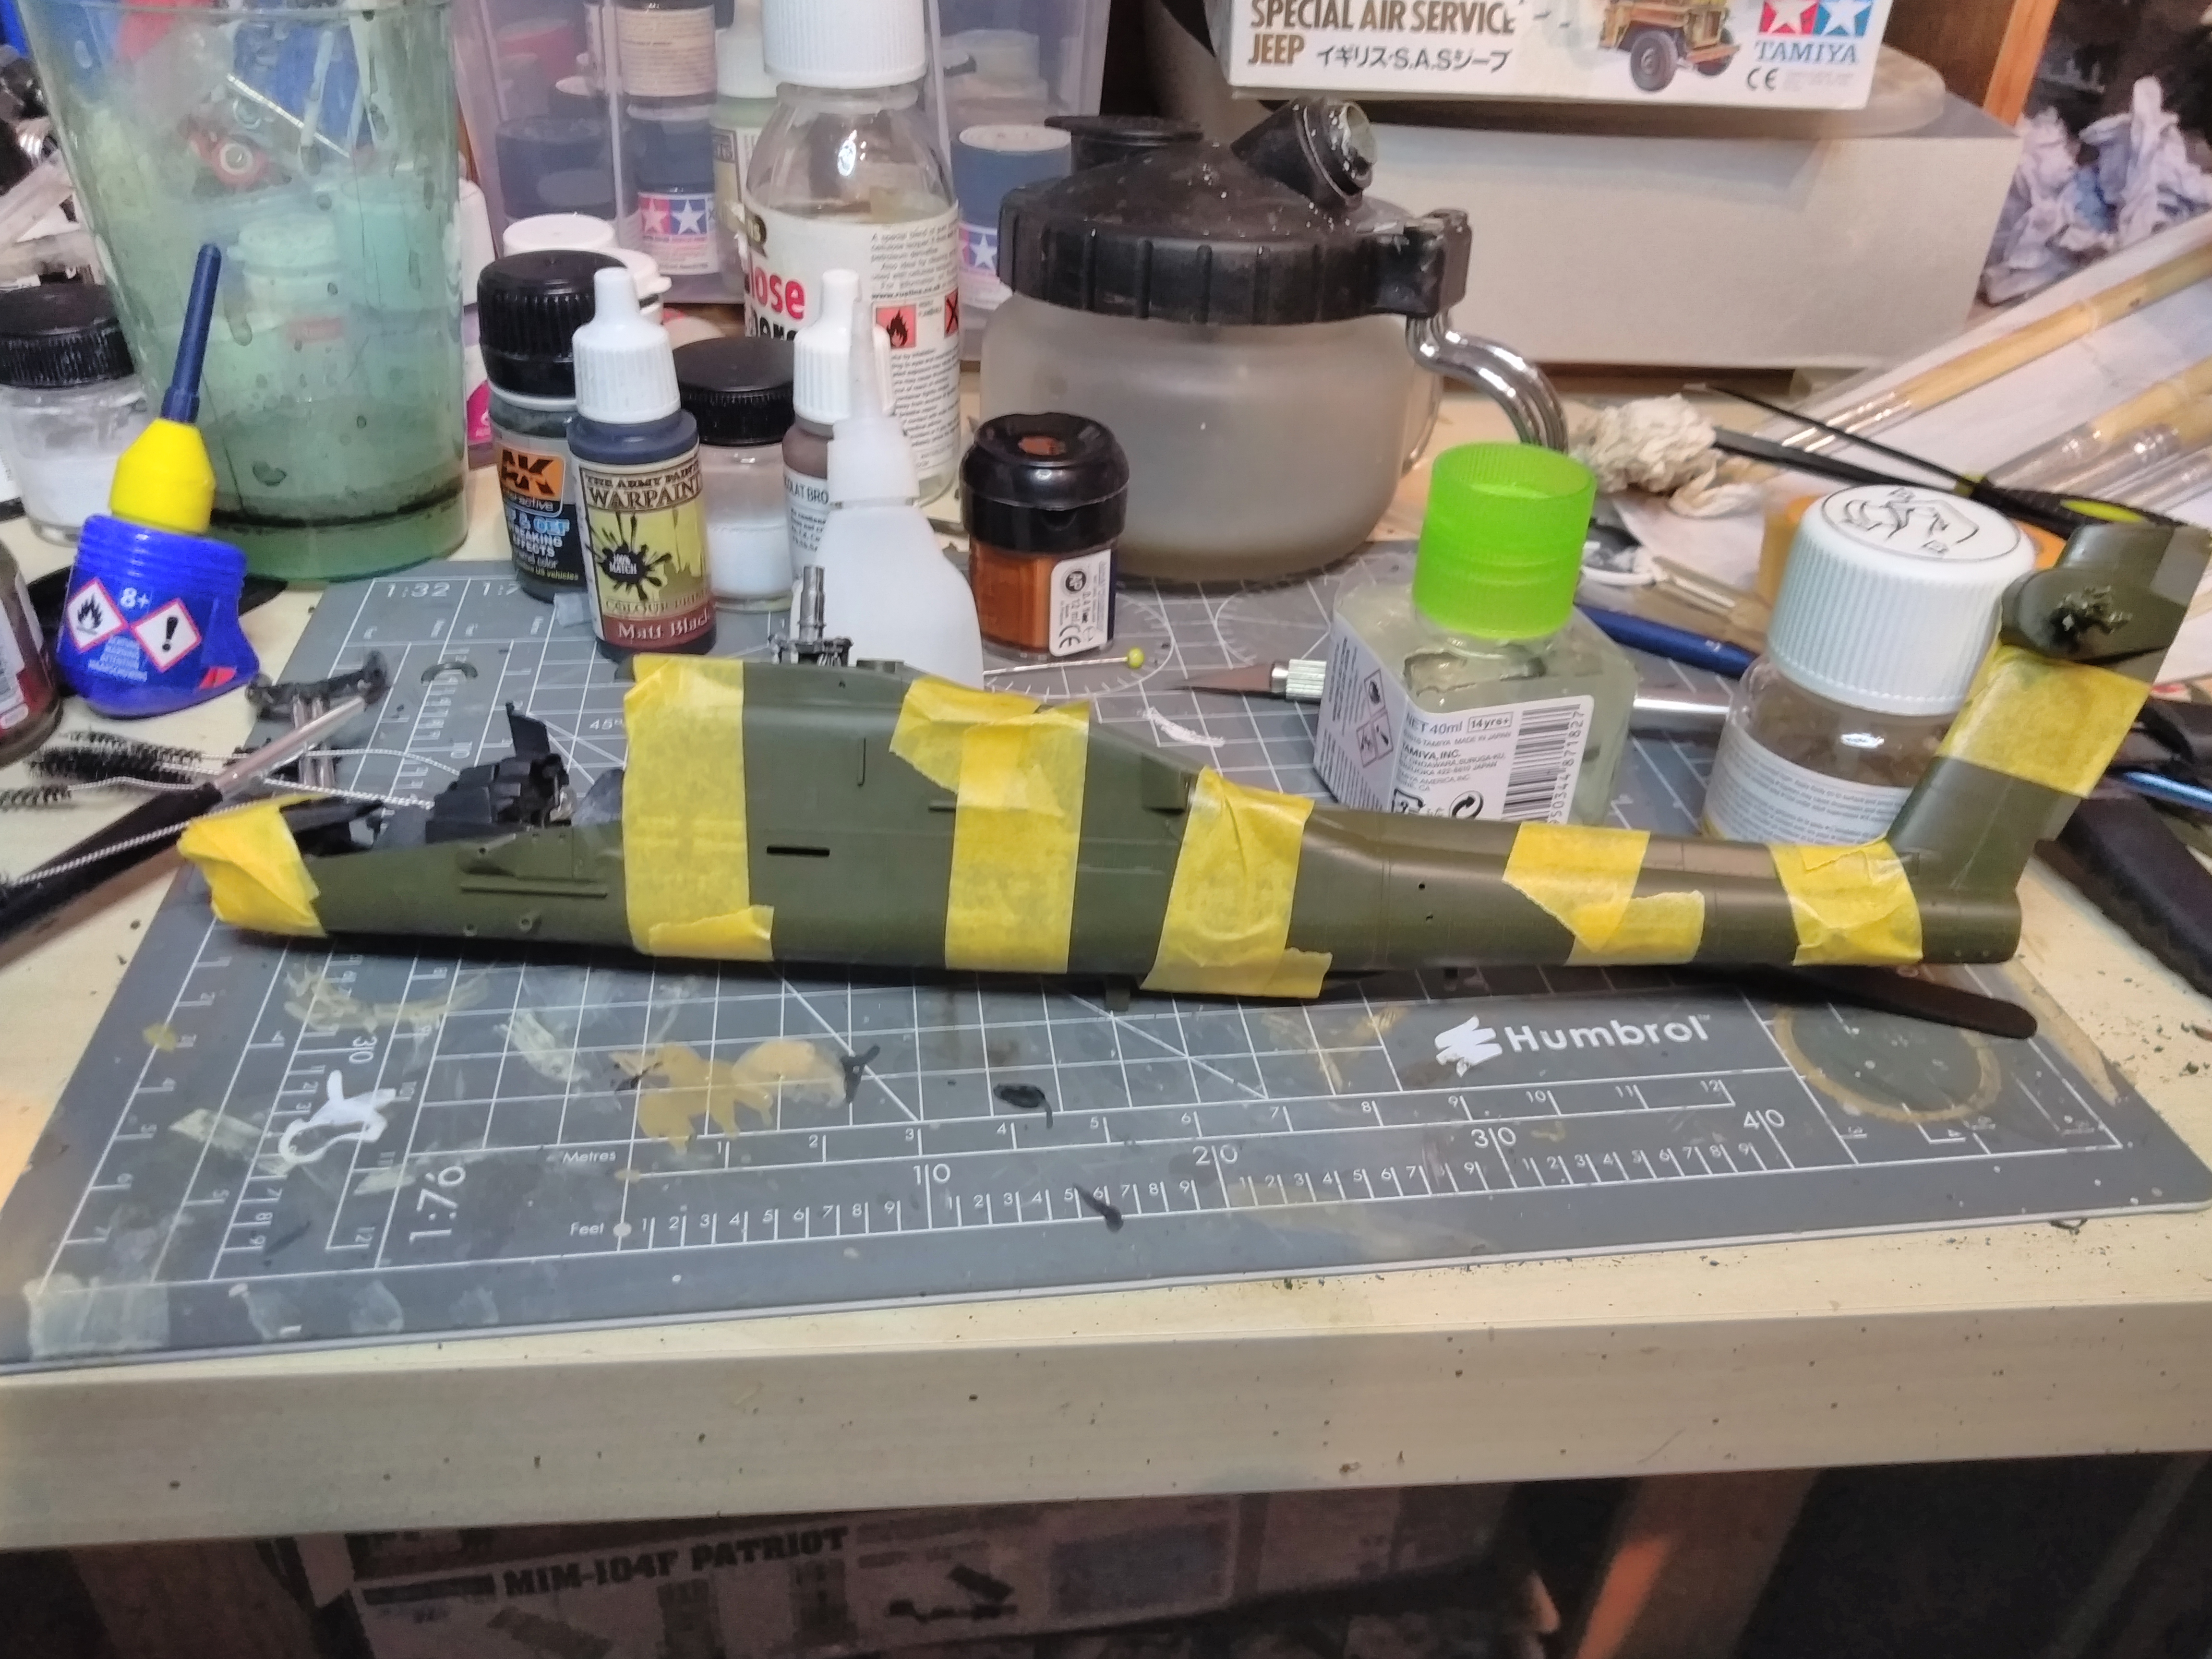
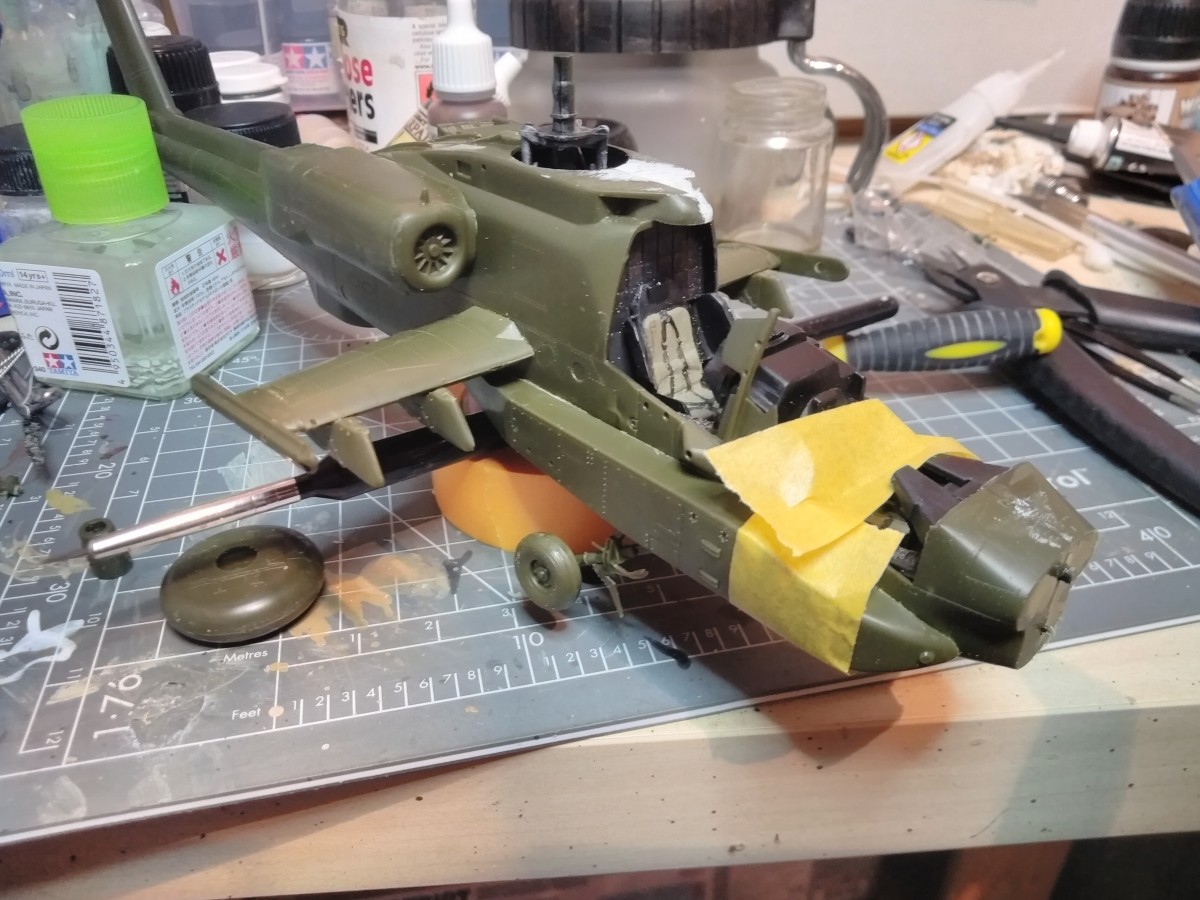
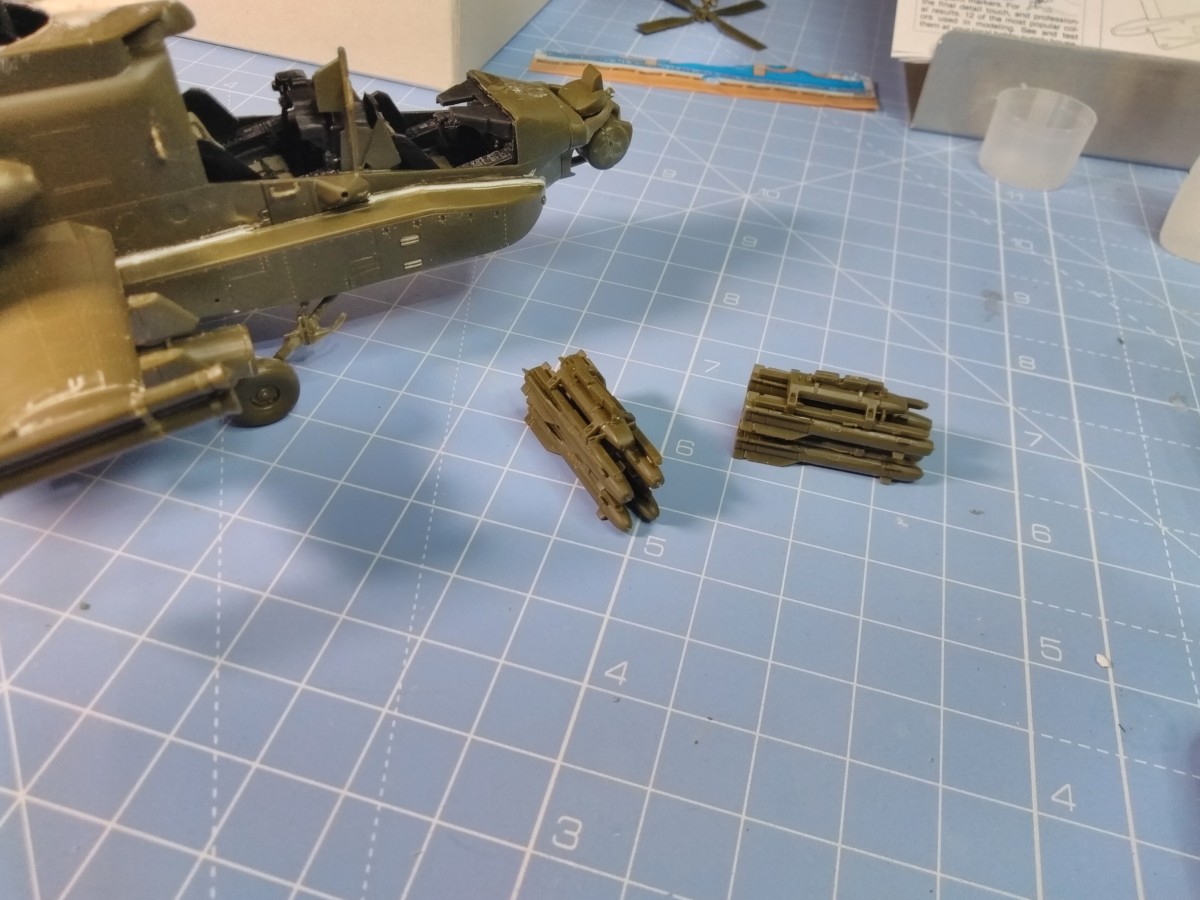
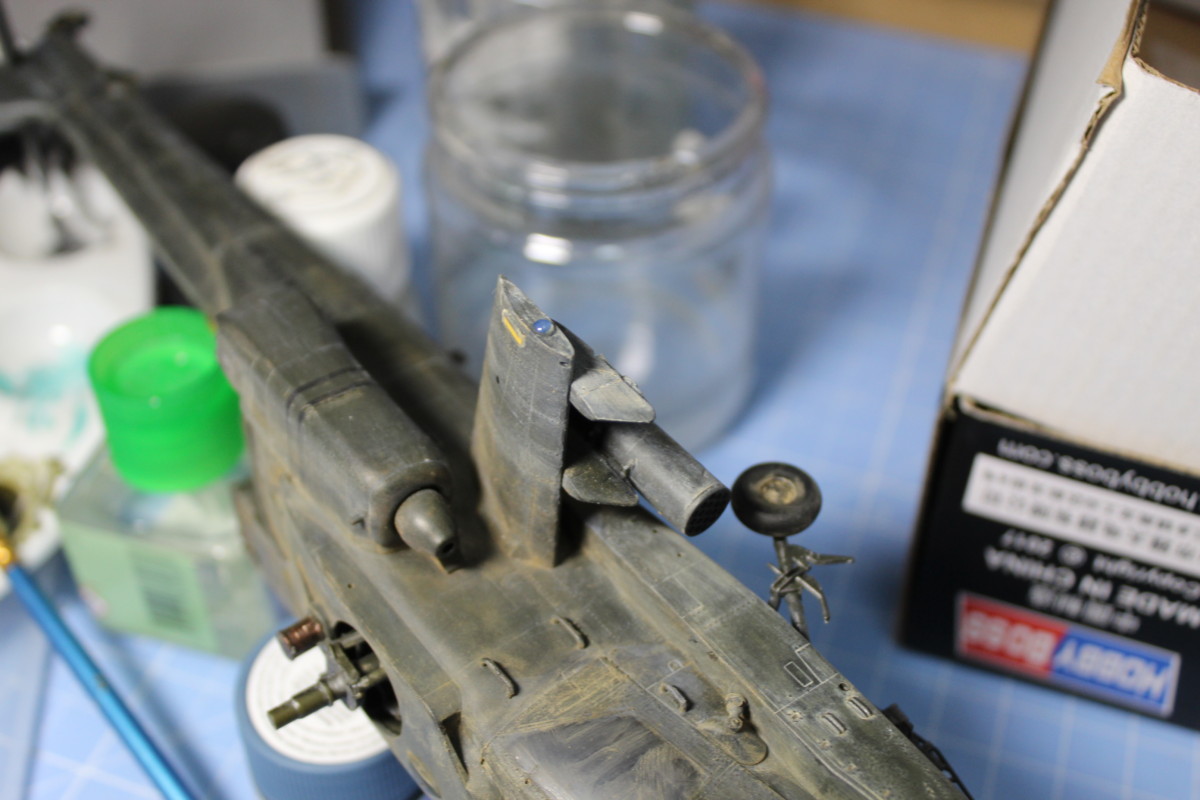
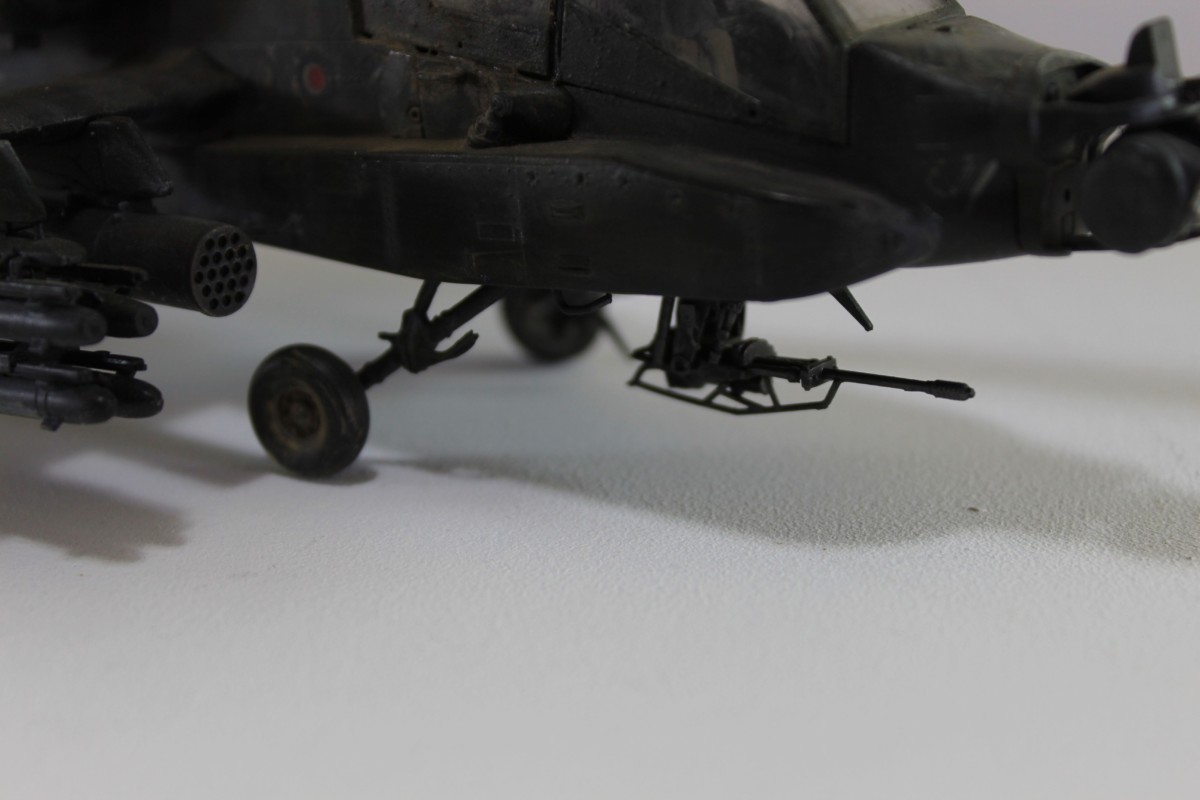
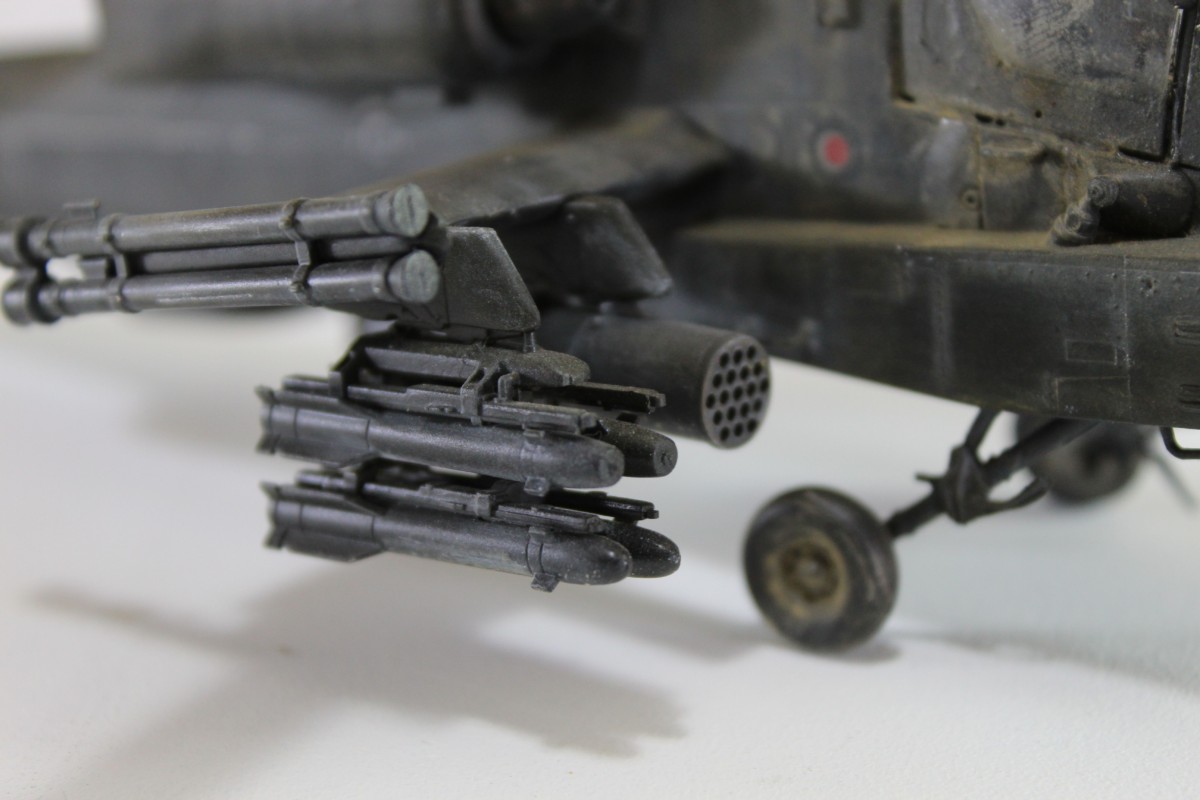
I have stuck most of the body together but it hasn’t fitted together that well. Back out with the filler and time to get all those little gaps plugged. I have also started to build the radar sensor,  some of the weapons and the main propellor as I will paint these separately.

Undernath The Apache Sale Model, Landing Gear Fitted As Well As Side Pods And Wings
On The Underneath You Can See A Couple Of Gaps That Need Filling And Some Glue That Will Need A Little Cleaning Up.
Filling All The Gaps On The Model Before Finishing The Body
There Are Quite A Few Gaps When Fitting This Model Together, So I Have Filled Them With Acrylic Filler And Will Sand Them Tomorrow.

I have some very fine sandpaper that is 2500 grit and up, it is just too fine for this filler so I have ordered a pack of 5 sheets ranging for 400 to 1500 grit. In the meantime, I will finish building all the weapons. Also ordered some extra thin cement from Tamiya. I have the quick setting one but for some of these parts it hasn’t been practical and I’ve used the Humbrol glue with the thicker brush. This though has meant I have had some glue runoff that will need to be cleaned up before priming.

Academy Apache Ah-64 1/48 scale model Main Body Completed
So Most Of The Body Work Is Now Done, Tapped Up The Side Pods While The Glue Is Drying Just To Hold Them In Place.
Apache Ah-64 Model Ready For Gap Filling
Now The Main Part Of The Body Work Is Done I Can Fill In All The Gaps, You Can Already See Some Gaps On The Side Pod And There Are A Lot Underneath.
Attached The Gunner's Sensor Turret To The Academy Apache Ah-64 Model
Gunner’s Sensor Turret Completed And Attached To The Nose, Just Need To Attach The Clear Parts Once Painted.
Longbow Apache Scale Model Test Fitting The Rotor Blades.
Test Fitting The Rotors And Some Of The Armaments Also Fitted.
Finished The Missiles On The Apache Scale Model
Building The Missile Has Been A Real Pain In The Ass. But Job Done Now, Just The Mini Gun Left To Finish The Armaments.
90% Of The Academy Longbow Apache Model Completed, A Couple More Parts And It Will Be Ready For Painting
Another Workbench Wednesday. The Model Has Come A Long Way. The Mini Gun And Armaments Are Completed.

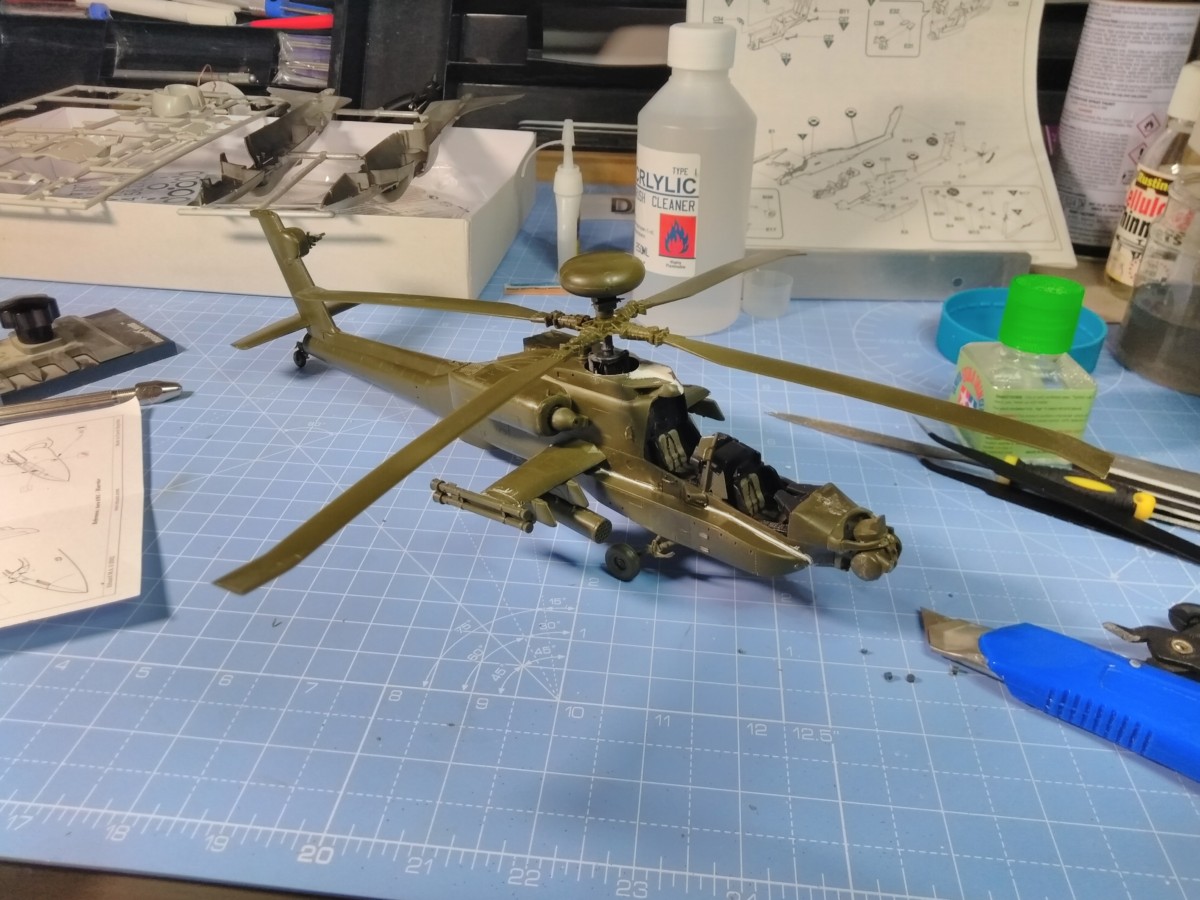
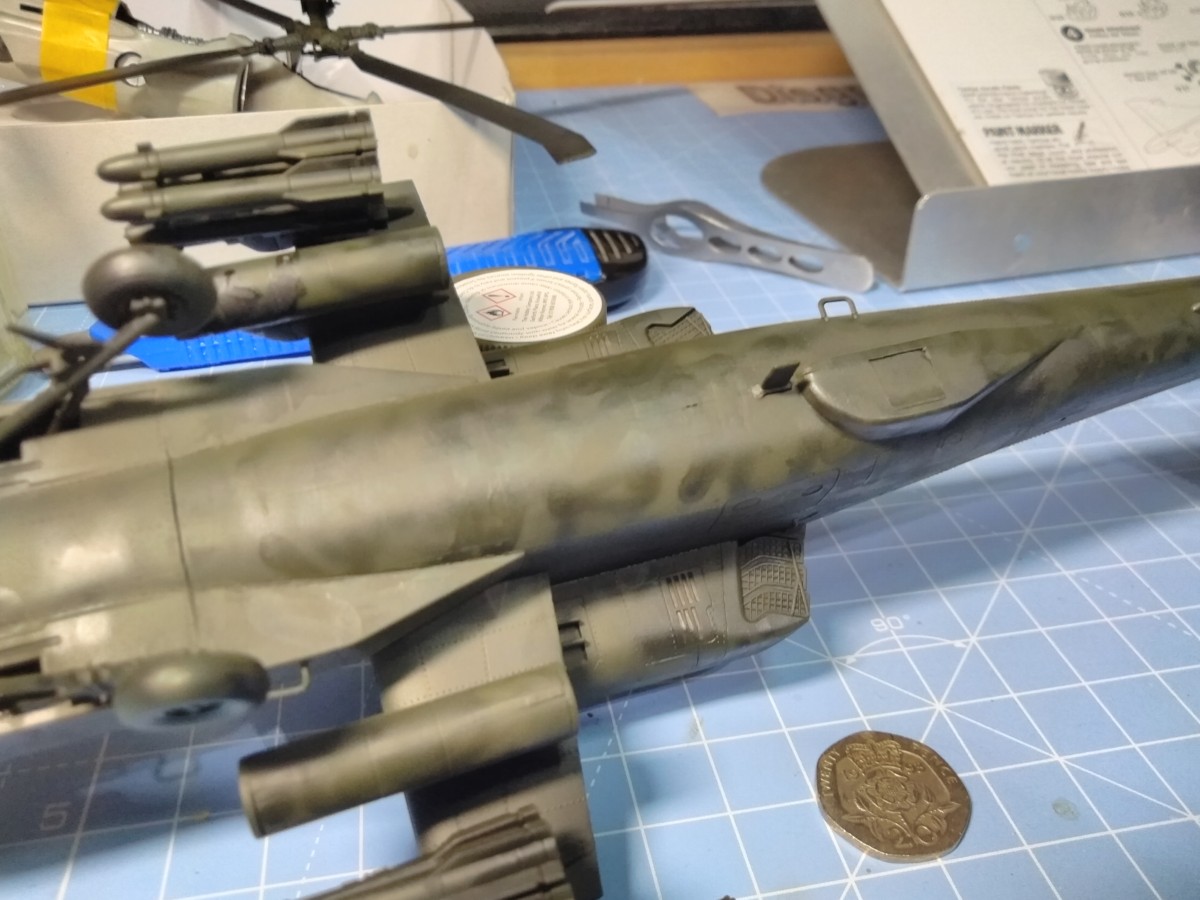
So now on to the fun parts. Undercoat done and then a quick coat of Tamiya Olive Drab. I have tried to mottle the paint a little to have a more natural finish. Take a look below and see what you think.

First Coat Of Colour On The Scale Model Academy Longbow Apache
Just Sprayed The Academy Longbow Apache with Tamiya Olive Drab XF74.

The mottling technique is going to need some practice but it is a little different.

Sprayed With Tamiya Olive Drab XF74 Did A Mottled Affect To See How It Turns Out.
Tried A Little Bit Of Mottling On The Underneath Of The Apache, Want To See How It Looks After Weathering.

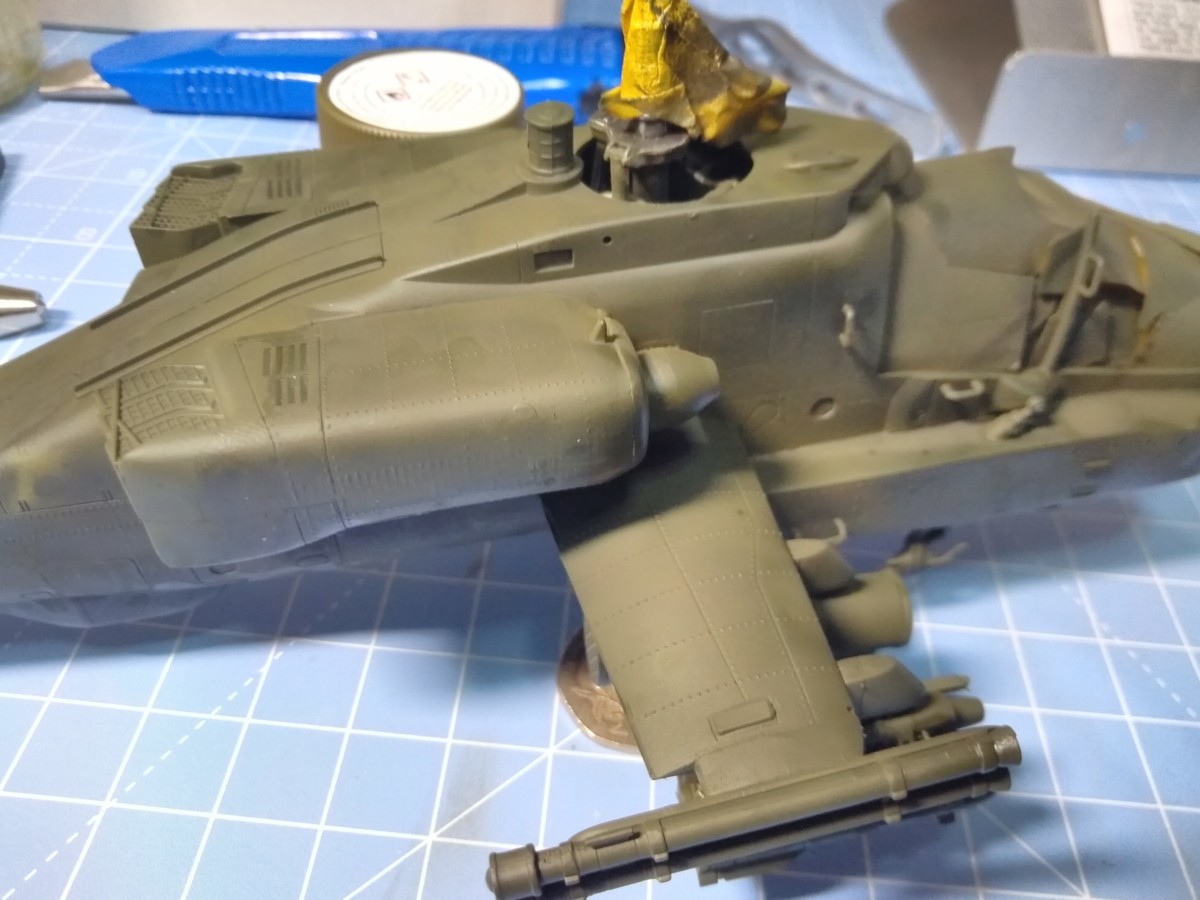
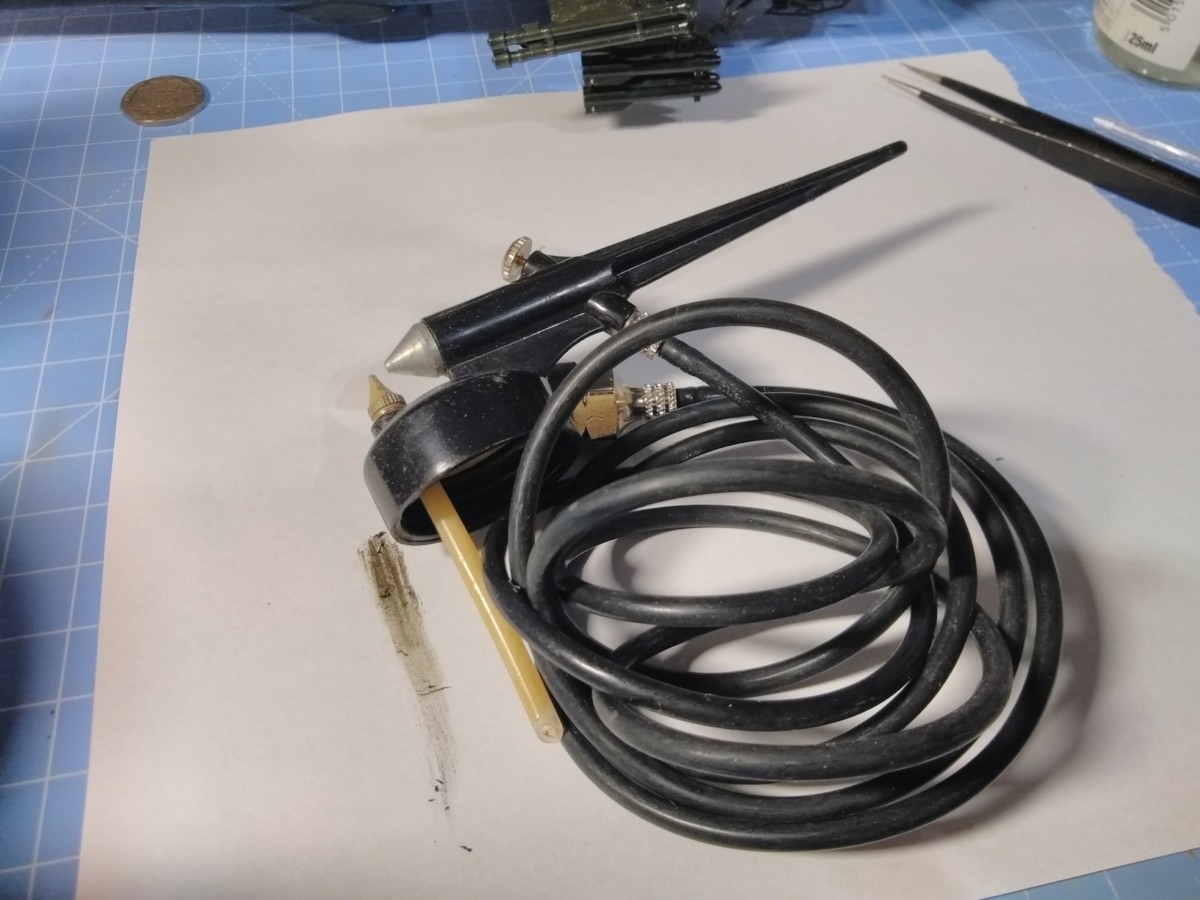
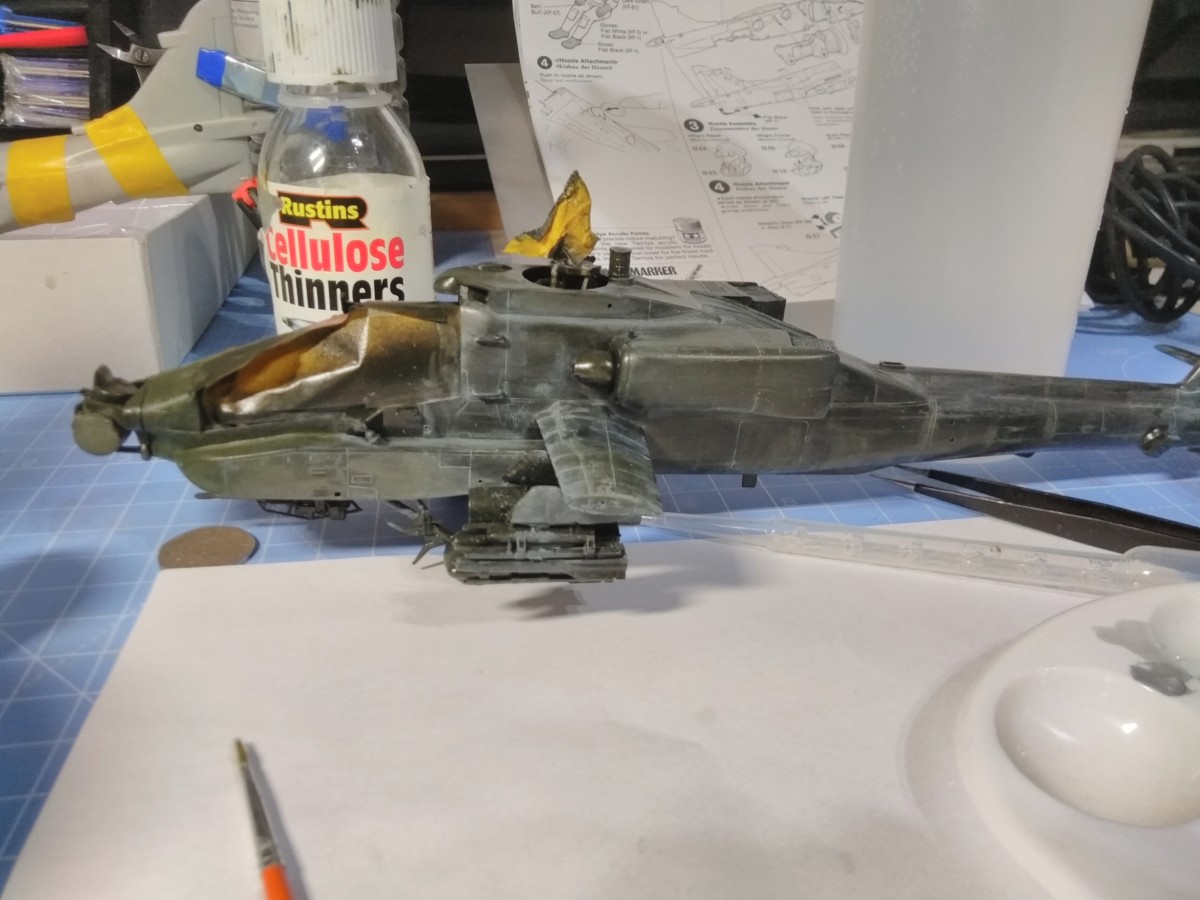
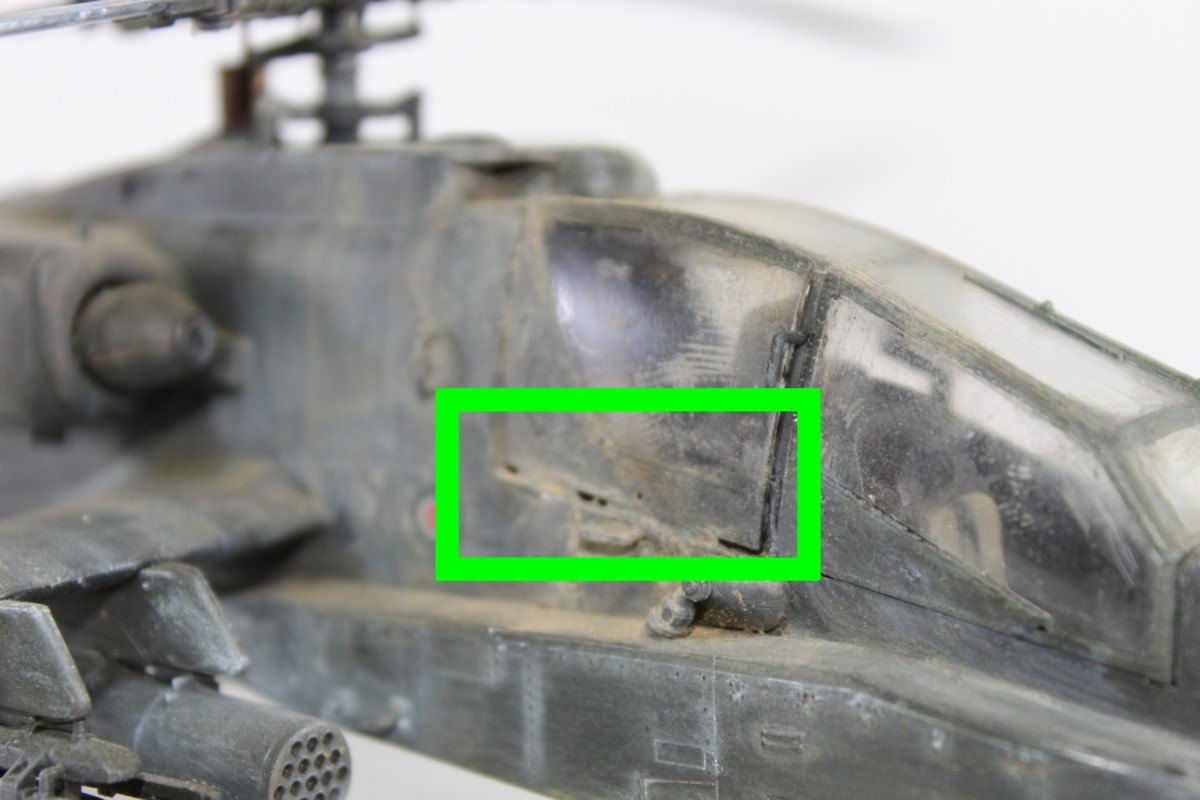
Now here is where disaster struck. I found an old airbrush that I thought would be great for varnishing. Oh, how wrong I was! It put so much varnish on the model. So much of the detail was compromised. I removed the pot of varnish and tried to blow some of the varnish off before it set. It has left an awful finish, as you can see below. All I could do was let the rest set and then go at it with some fine sanding sticks being careful not to destroy the rivets.

The Airbrush I Used That Really Messed Up The Model
This Is The Cheap Air Brush I Used That Really Messed Up The Varnish Coat On The Model Helicopter.
Nearly Ruined The Academy 1/48 Scale Apache Helicopter Model
An Absolute Nightmare Happened And I Applied Way Too Much Varnish Using A Cut Price Airbrush.

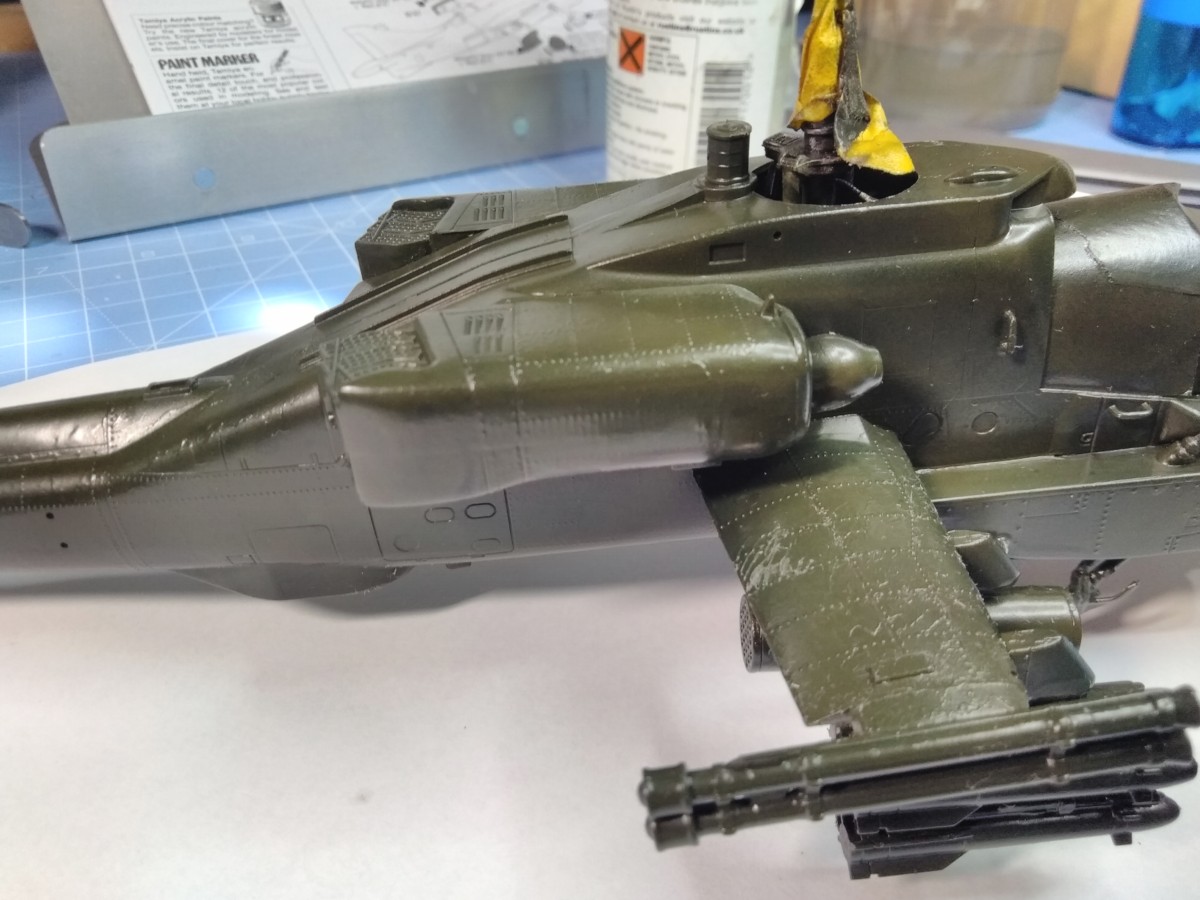
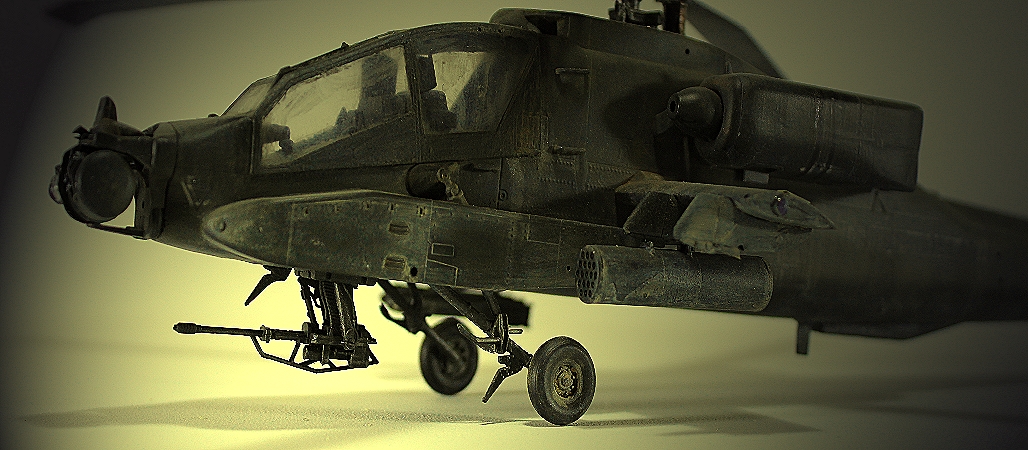
Started on the weathering stage now, trying to disguise the varnish cock up. I have seen in reference shots, bleaching and pale marks on the body and panel lines. So I am using some white oil paint and white spirit to try to recreate that look.

Starting The Weathering On The Academy 148 Longbow Apache
Starting The Weathering On The Longbow Apache, Building Up Some General Fading On The Panels.

Without thinking I have done most of the weathering before applying the decals, so now another coat of satin varnish and then stick on the decal and really hope for the best at the moment.

Masked Off the canopy for the 1/48th scale Apache Helicopter Model
Masked Off The Scale Model Apache Cockpit Canopy Parts And Painted Them.
Fitting the cockpit roof to the 1/48th scale Apache helicopter
Fitted The Cockpit Roof Using Glue ‘N’ Glaze, Using A Tooth Pick To Hold It In Place While It Sets.

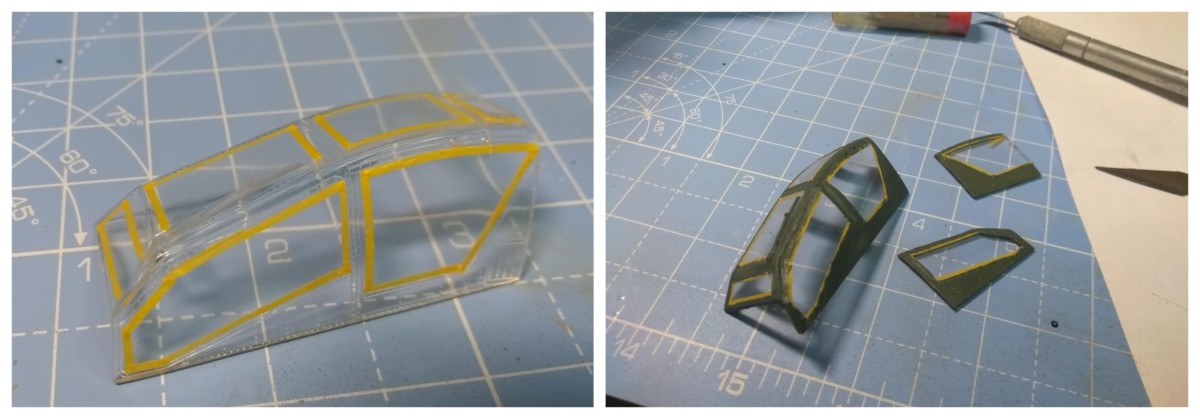
Nearly finished and fitting the final clear parts, so I’m trying glue ‘n’ glaze to make a small clear part. I’m going to leave it overnight and see how it turns out in the morning, so fingers crossed.

Using glue and glaze to make a small clear part
Tried To Use Glue And Glaze To Make A Small Clear Part On The Side Of One Of The Wings.
used Glue N Glaze To create a clear part on the wing
The Glue ‘N’ Glaze Has Dried Nicely And Created The Perfect Little Light On The Wing

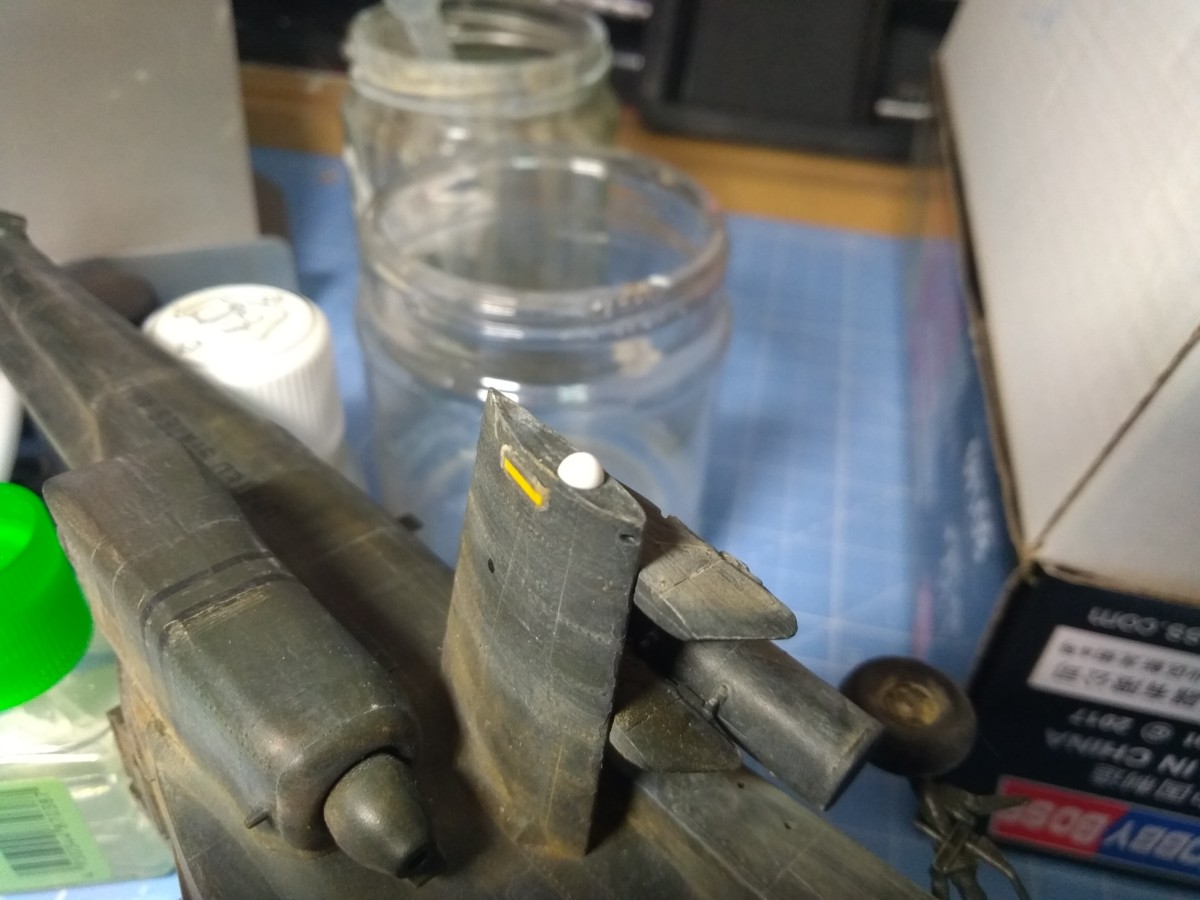
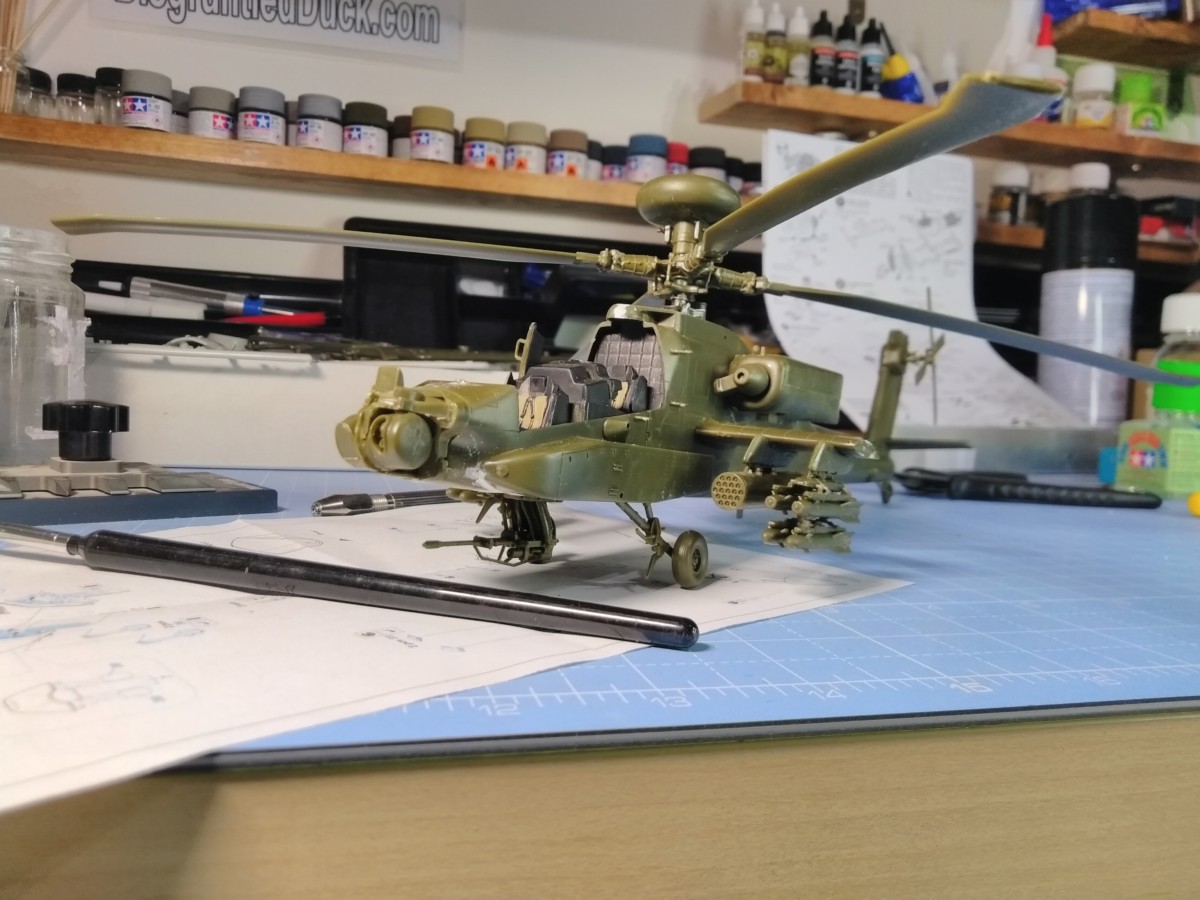
Now that the light has been made all that is left for me is a little bit more weathering and then step away and call it completed.

Weathering The apache longbow scale model.
A Final Bit Of Weathering On The AH-64A All It Should Be About Ready.
The finished Apache helicopter
The Completed Academy Apache Helicopter.
Close Up Of the Apache helicopter model from Academy
Close Up On The Front Of The Helicopter.
Academy 1/48 Apache Helicopter Propeller And Air Vents.
Apache Helicopter Propeller And Vents. Could Have Done A Better Job On The Join Lines Here.
Close Up Detail Work On The Main Propeller. Of The 1/48 academy Apache longbow
Some Of The Detail Work On The Main Propeller.
The Apache helicopter model missiles
The Armaments On The Apache Helicopter.
Apache Helicopter Some Of The Decals and body work.
Apache Helicopter Close Up Of Vents And Some Of The Decals.
Apache Helicopter Model Rear Wheel
The Rear Wheel On The Apache
Apache Helicopter Rear Propeller.
The Front Machine Gun And Wheels On The Apache Helicopter Scale Model.
Close Up Of The Apache Helicopter Armaments. On The Academy Scale Model
Close Up Of The Apache Helicopter Armaments.
Apache Helicopter Air Intakes And Armaments.
The Air Intakes On The Apache Helicopter Model.
The Apache Longbow 1/48th Scale Model By Academy In All Its Glory.
Gaps On The Cockpit Canopy On The scale model helicopter
So Here Is Where There Are Some Small Gaps In The Cockpit Canopy, Next Time Will I Need To Fit It Earlier In The Build And Fill It.
Academy Scale Model Apache Helicopter Viewed From Above.

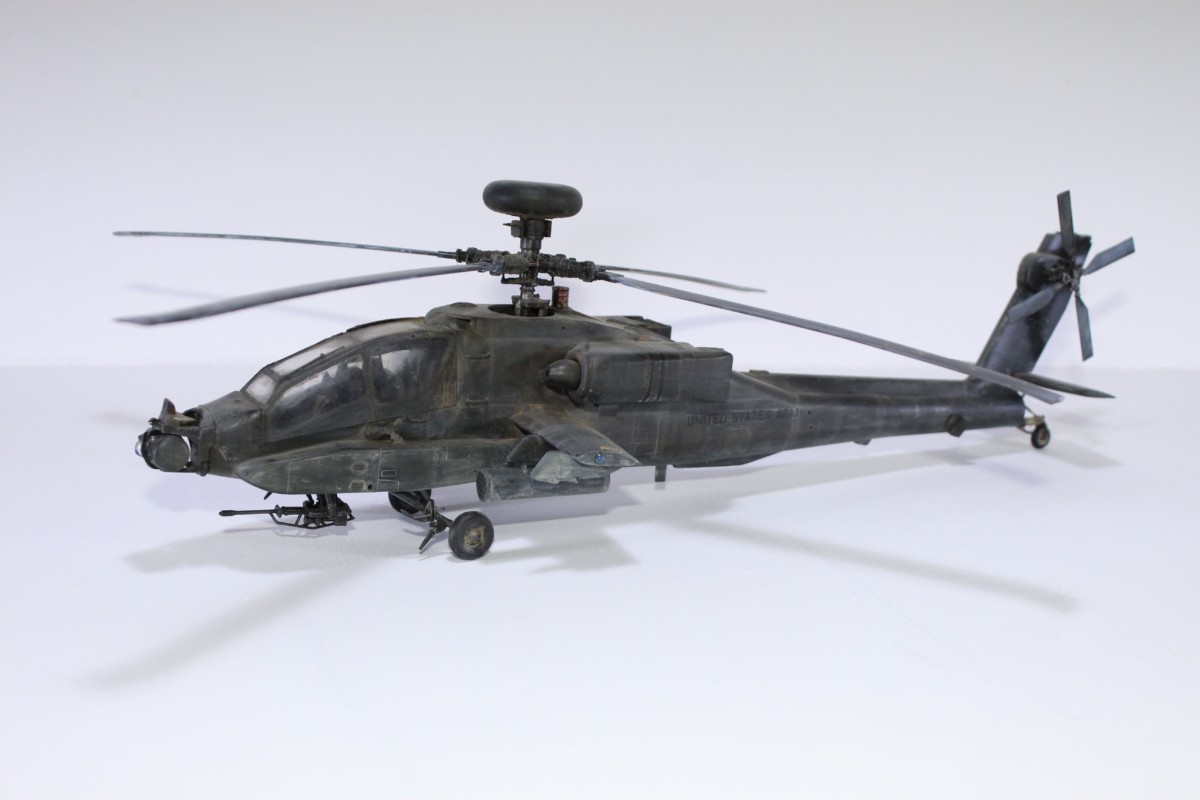
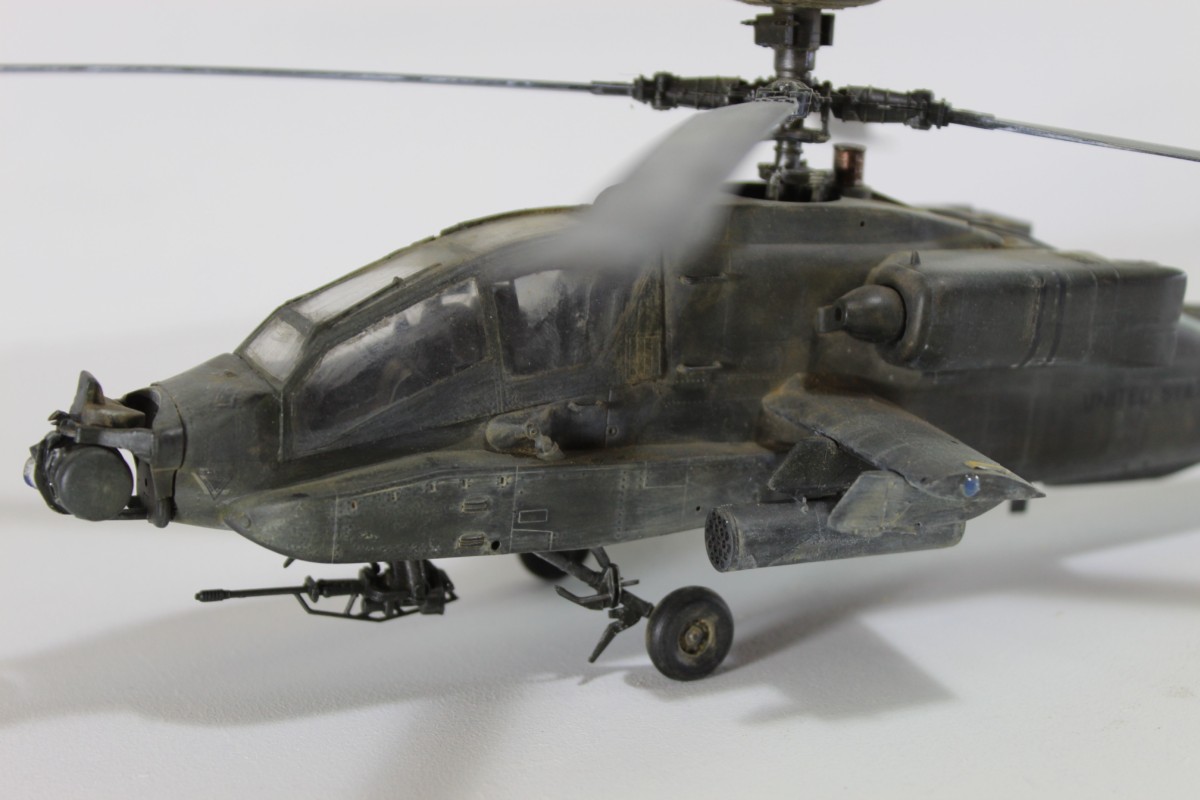
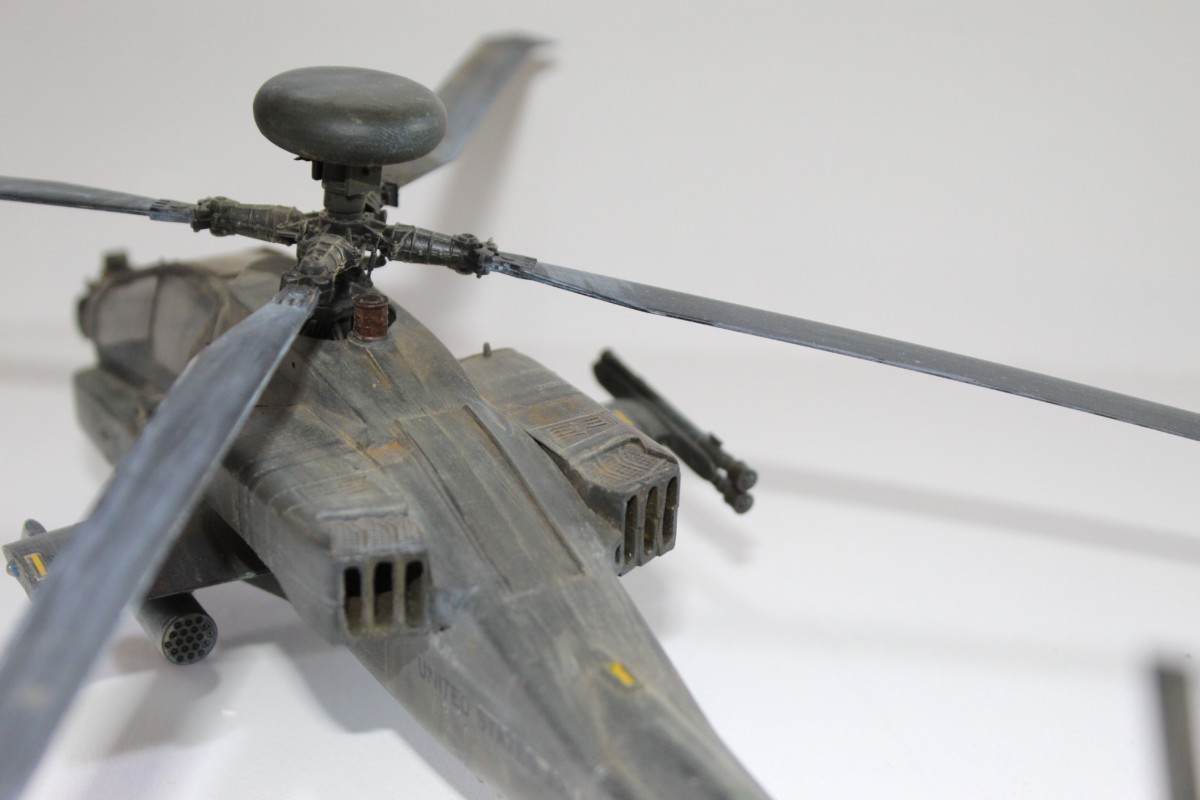
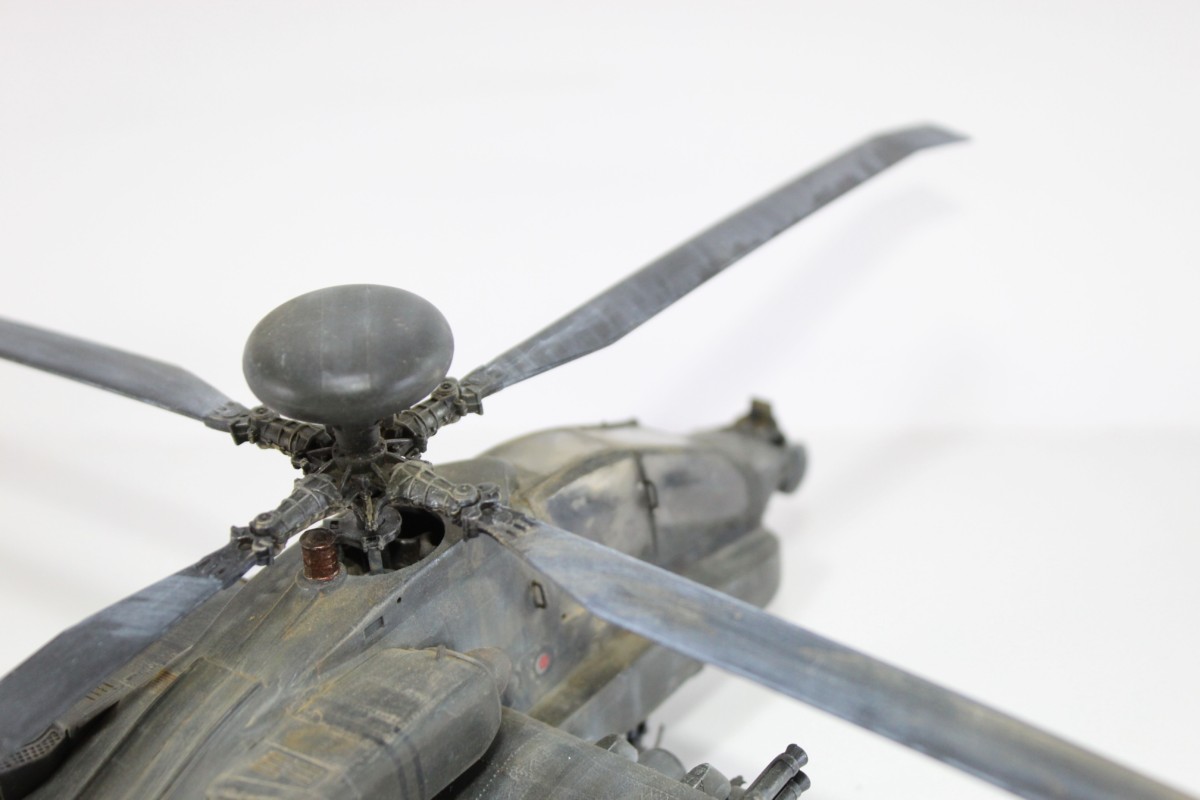
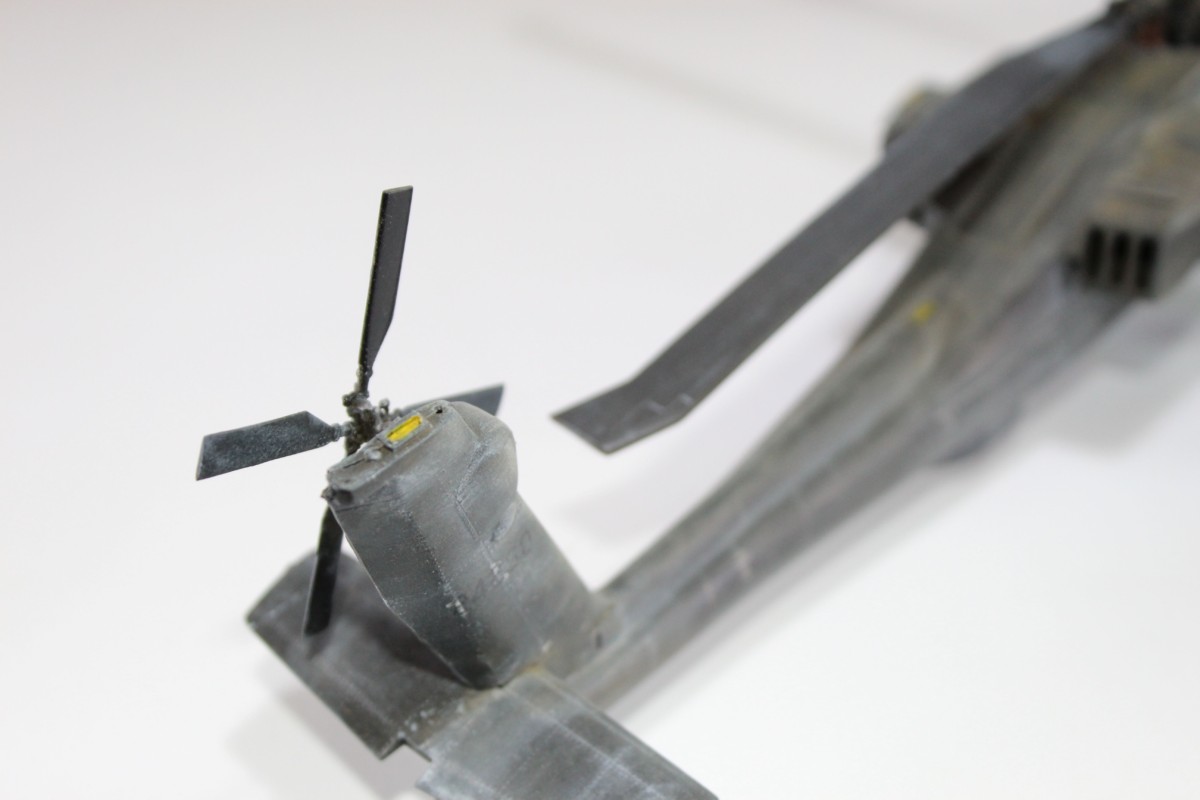
What did we learn? Well, I need to lighten the base paint a lot as it darkens so much with the washes. The join line needs to be taken care of a lot better. The canopy needs to be fitted earlier and I made a real mess of the tail rotor, finally, the armament needs to be painted before being fitted to the model. Considering this is my first aircraft after getting back into the hobby I am pretty happy. Now to learn from those mistakes!

CLICK HERE TO BUY THE ACADEMY APACHE AH-64A

Facebook Comments

Comments are closed.