A £5 Light Box for Foodies, Ebayers or Crafters
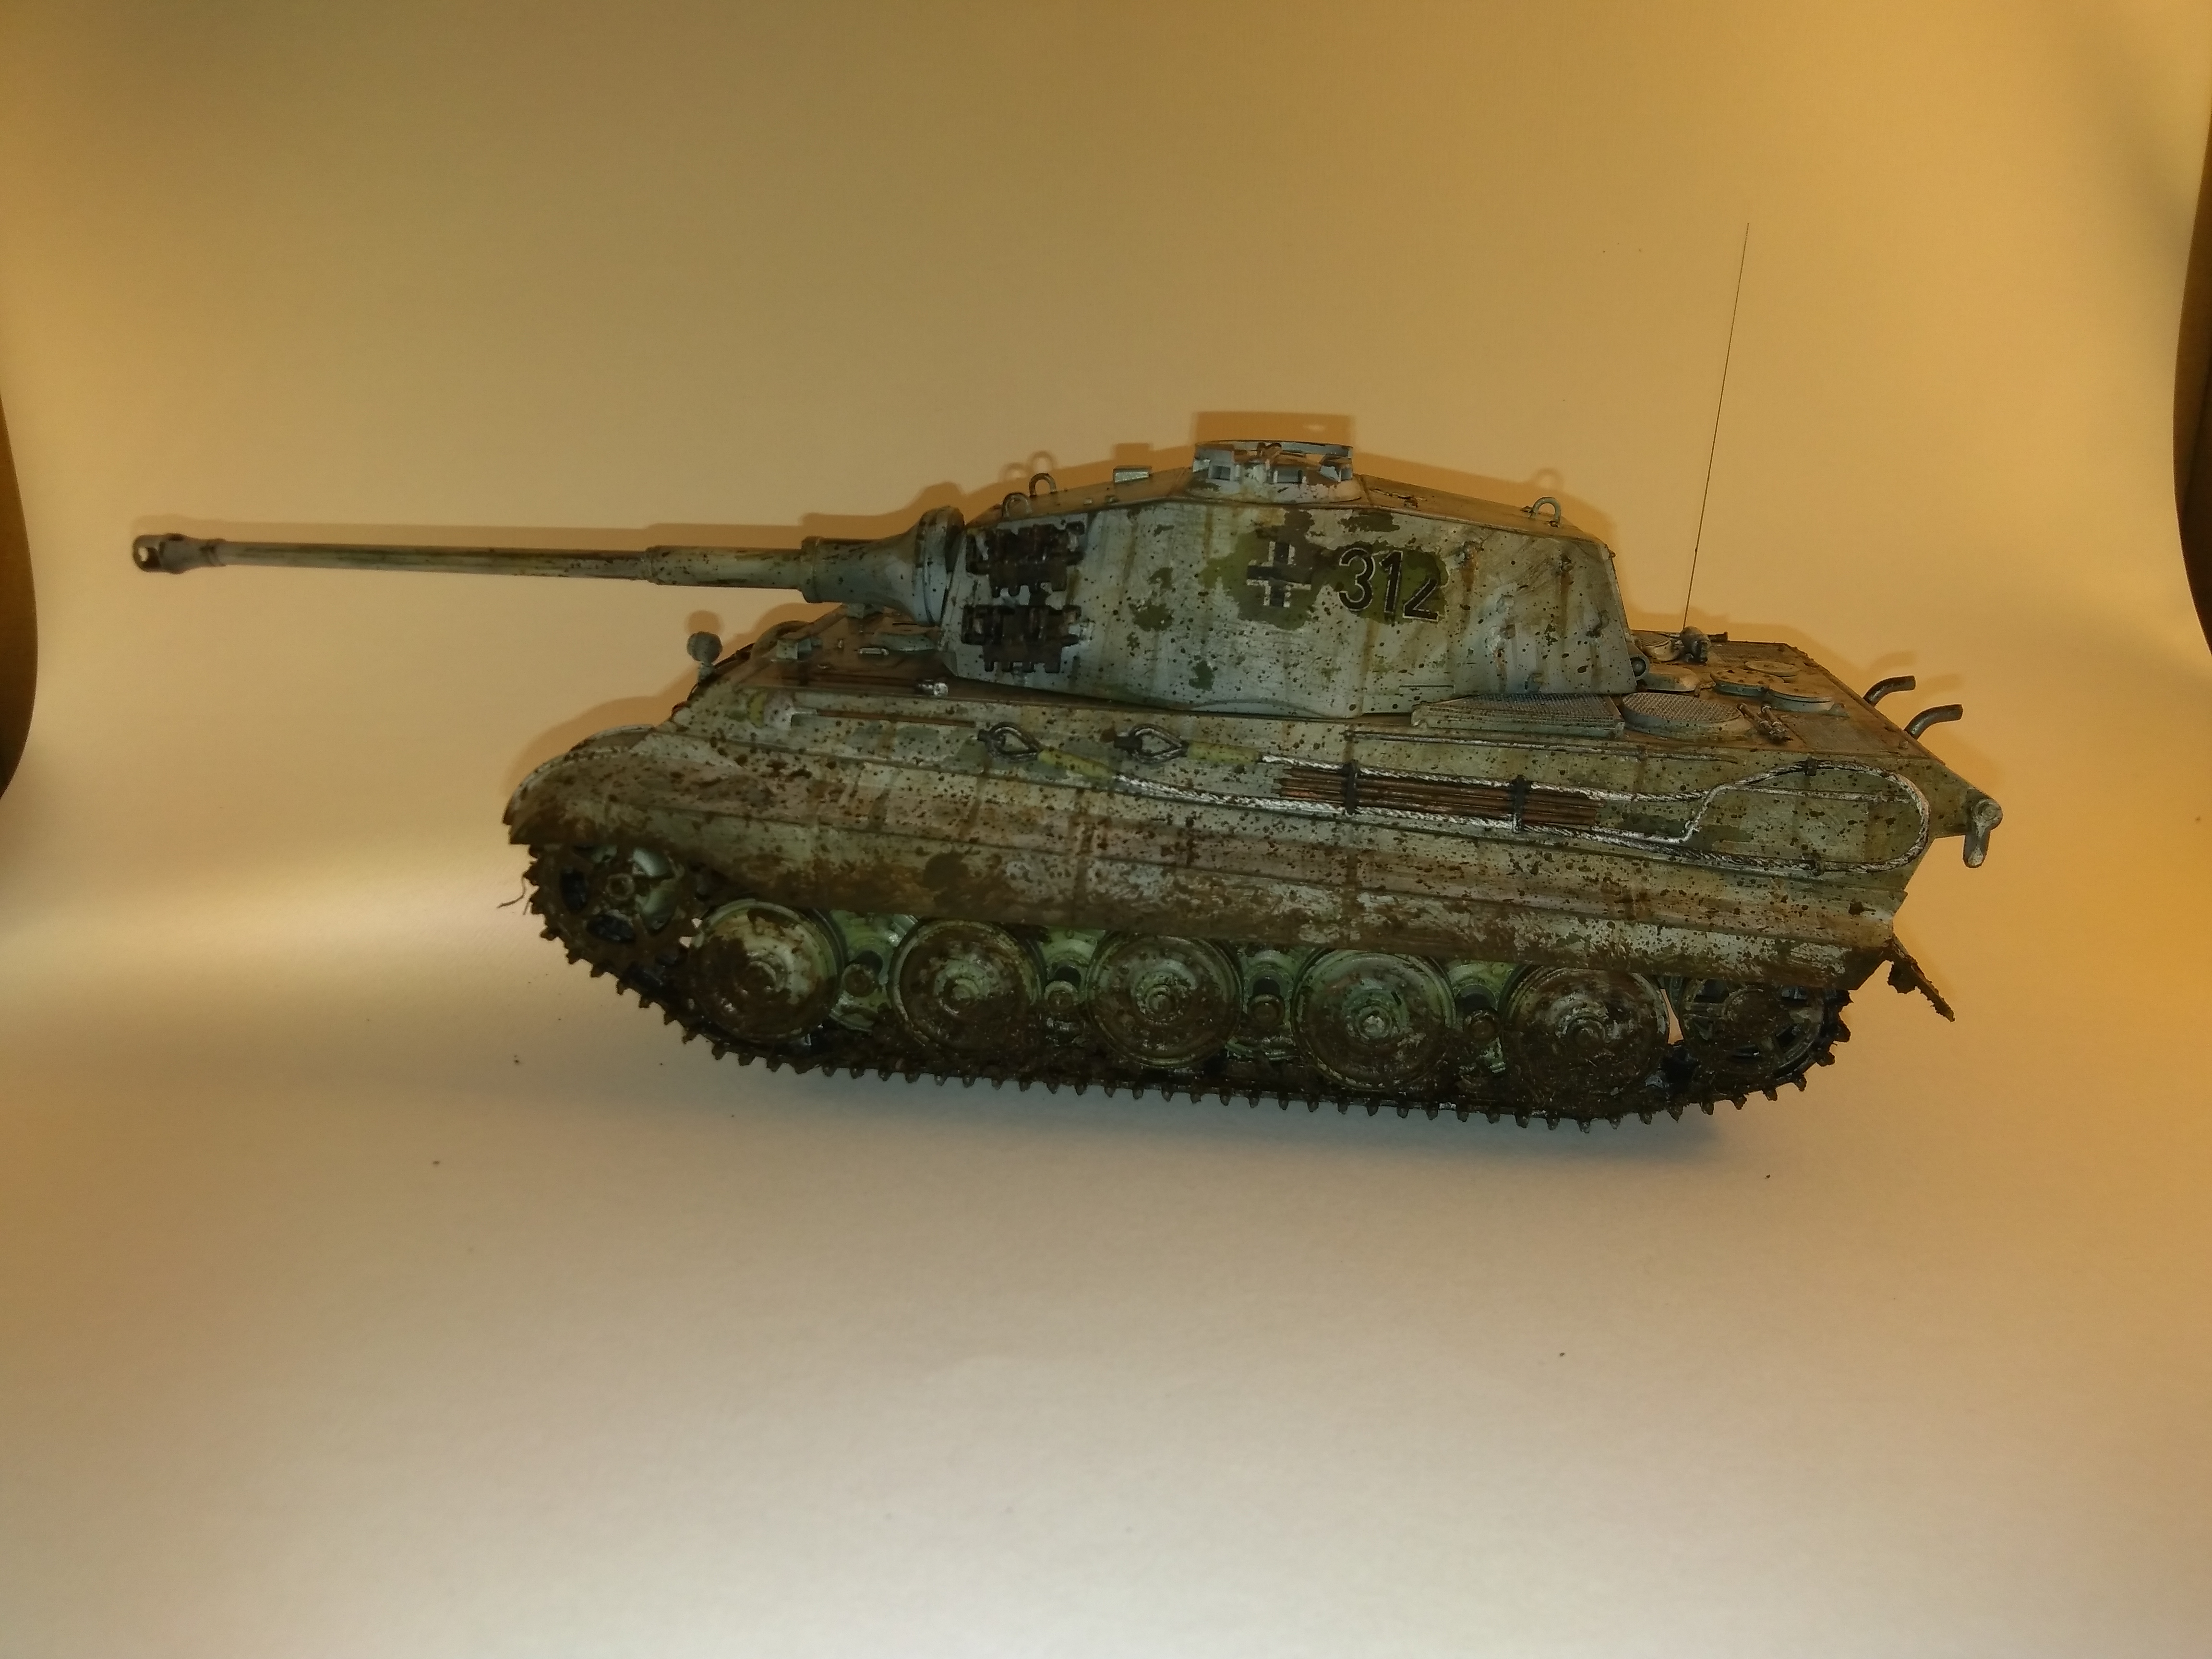
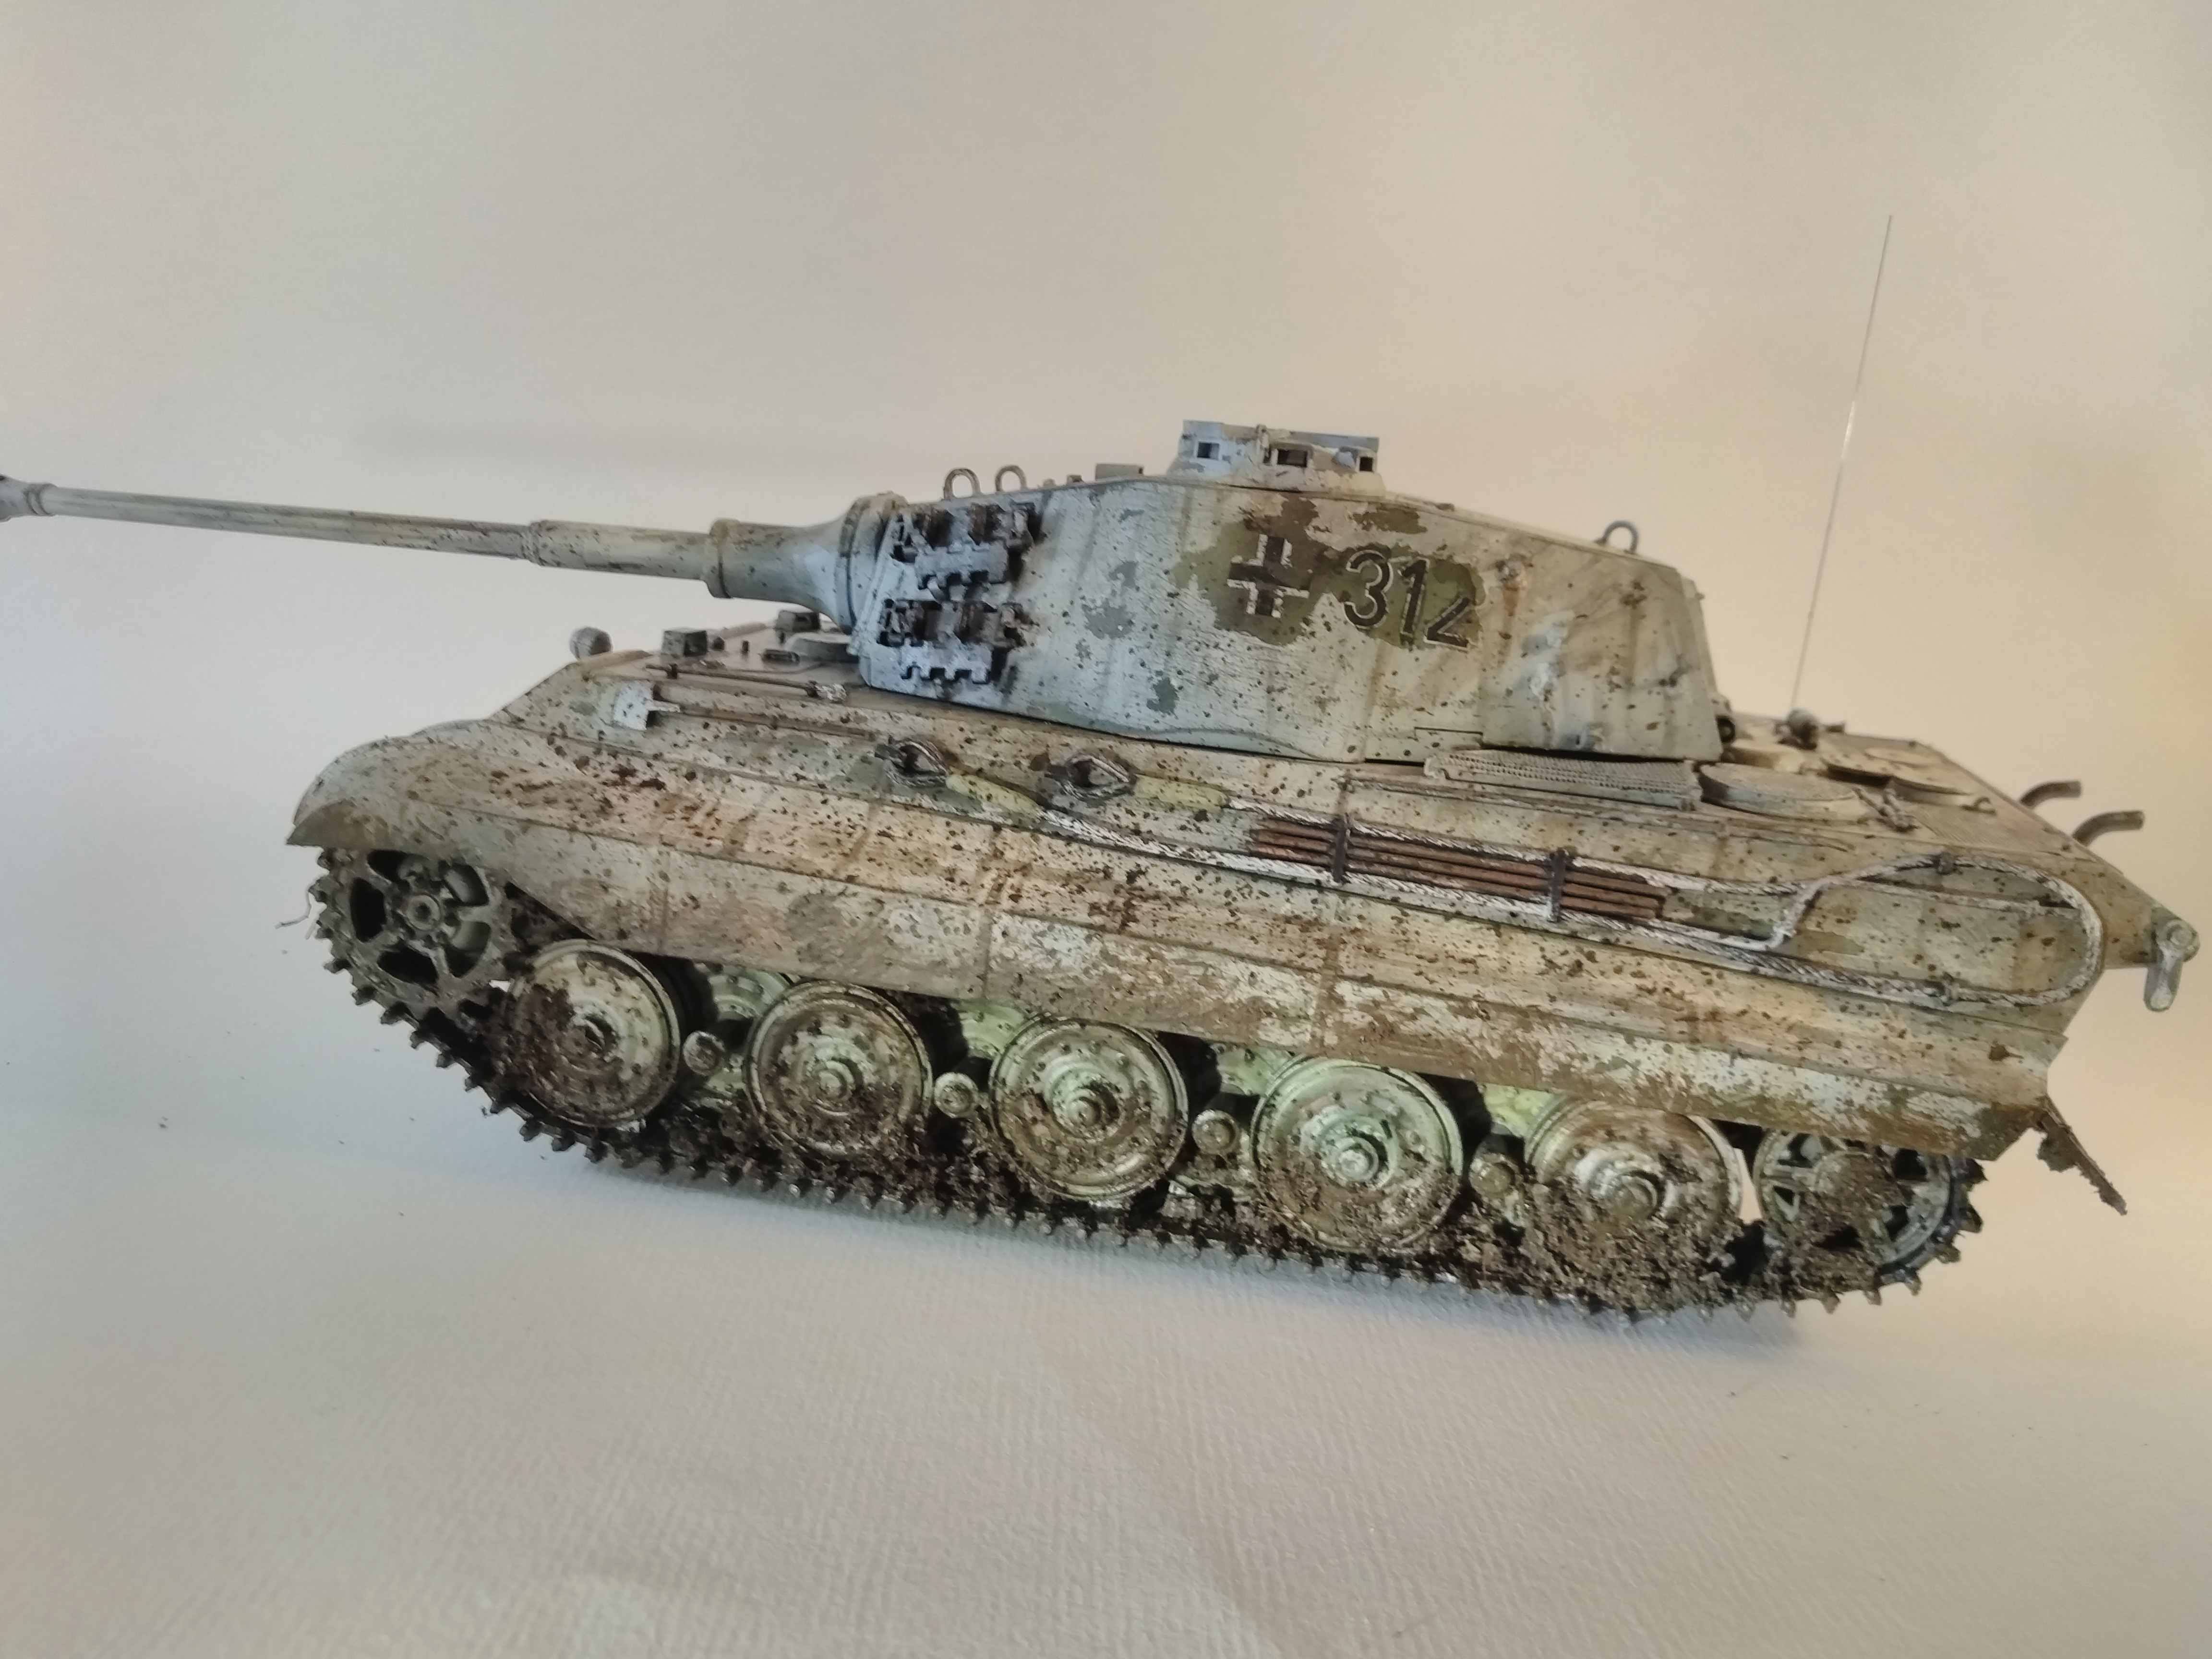
So this one is a project of necessity. So I took a few pictures of the King Tiger but I just wasn’t impressed with the result. Partly down to the camera on my phone and party down to the surroundings. So the way to go is a light box. I don’t have the money to buy one and I don’t have the time for a serious build so here is a cheap, cheap! Lightbox to get these pictures done.
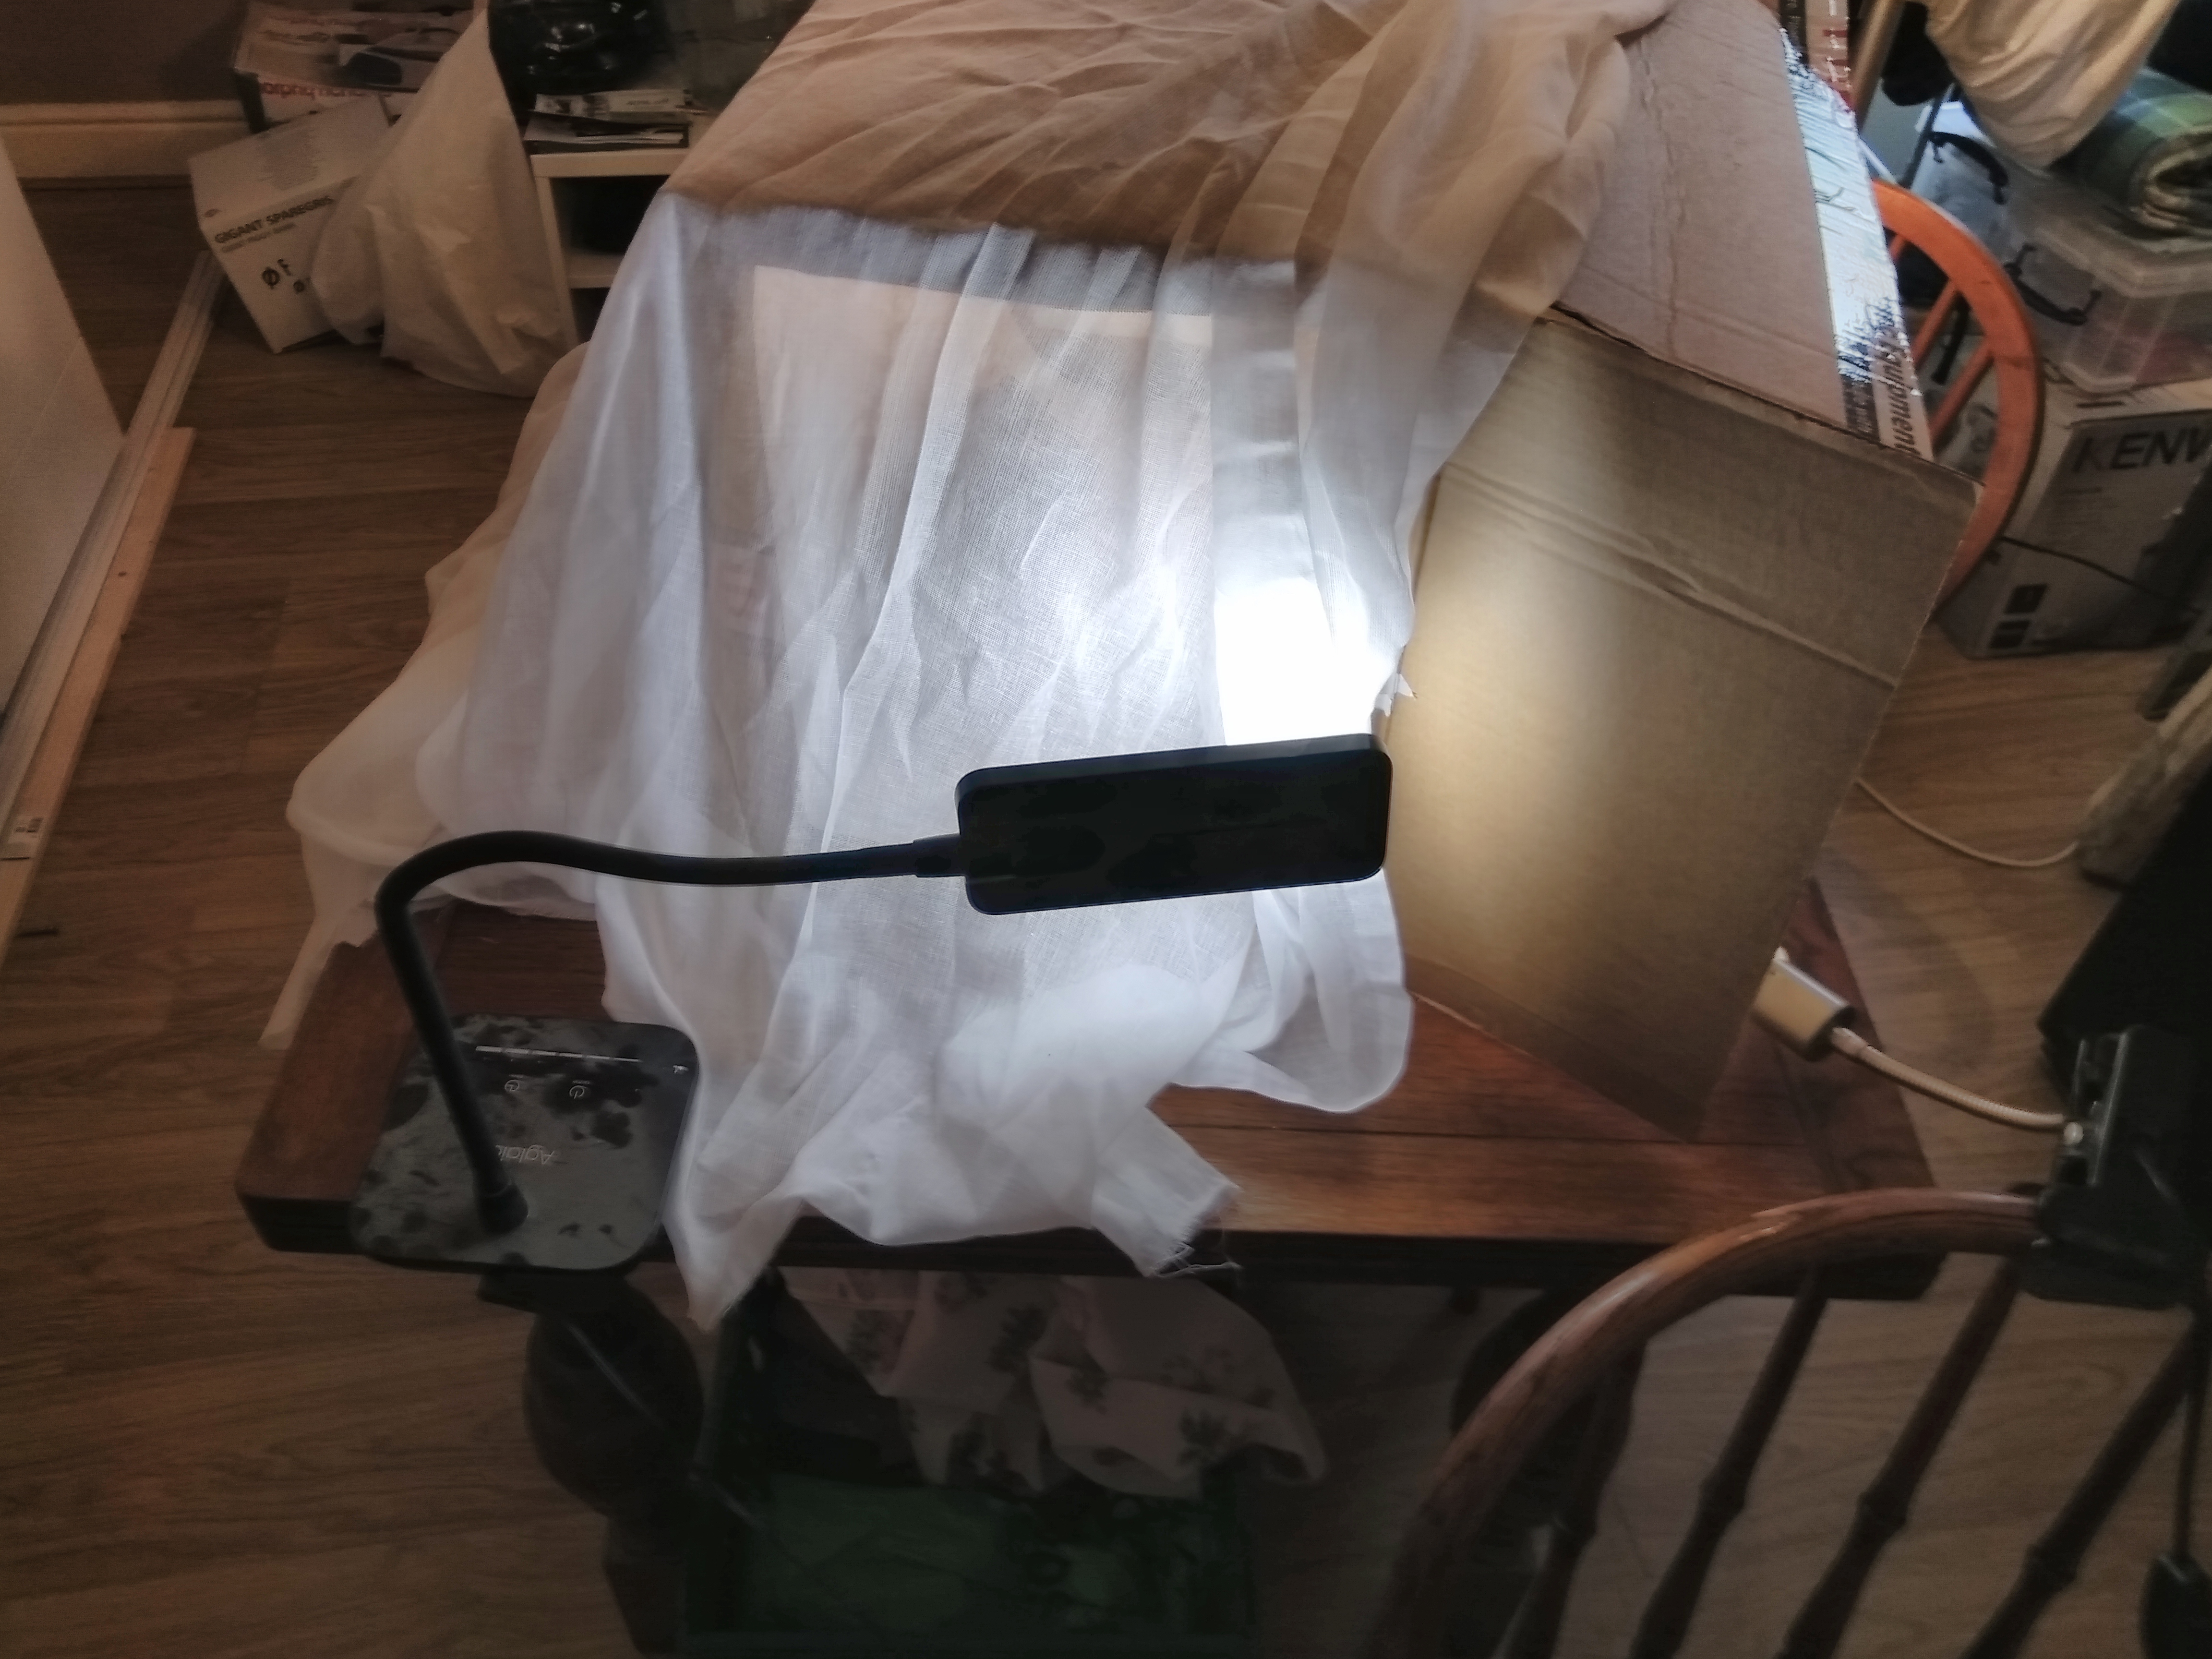
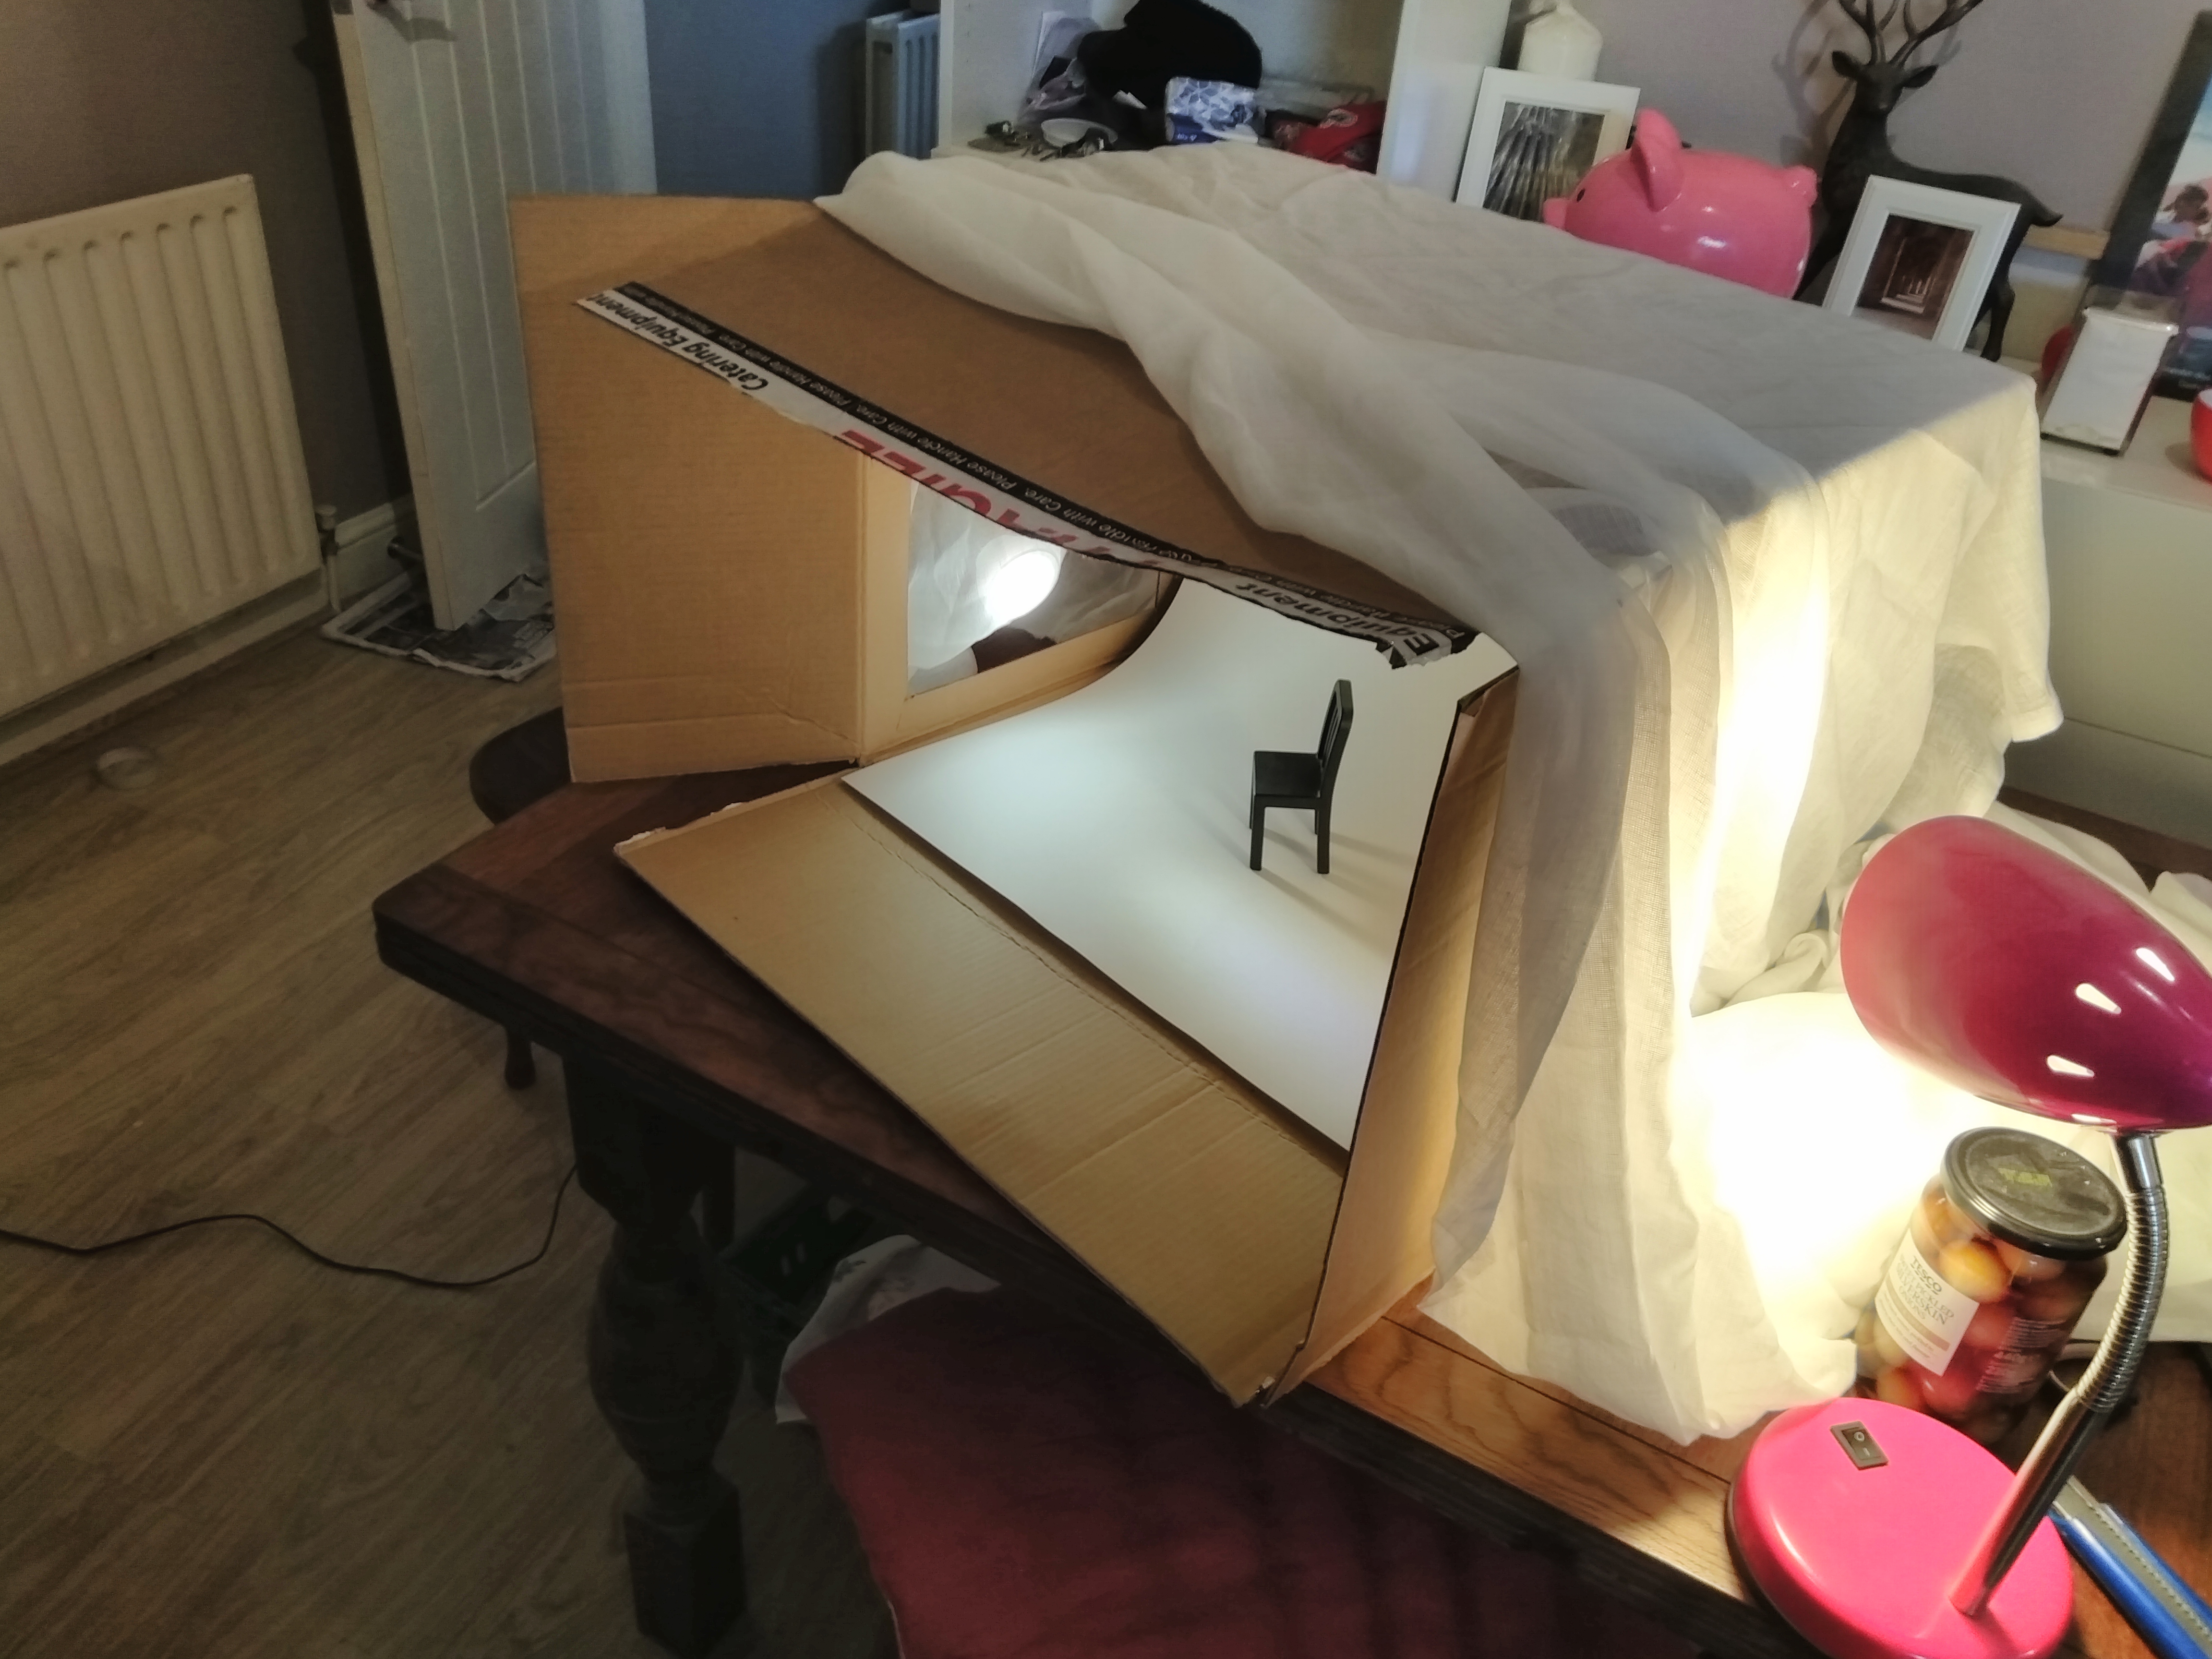
Just using stuff from around the house or other freebies. I already have a couple of desk lamps. LED and regular bulb, I will be using one on each side so hope that the different lights will blend. Some sheer fabric, I got hold of some muslin from work. You should be able to pick some up for about £1 a meter. Probably an old white bedsheet should do. We will also need a cardboard box, the size depends on what we are doing to be taking pictures of. I just happened to have one of these at work which is perfect. The last thing is a large piece of white card that is larger than the back of the box. To put it all together we need a craft knife and some tape possibly scissors depending on how much fabric we have.
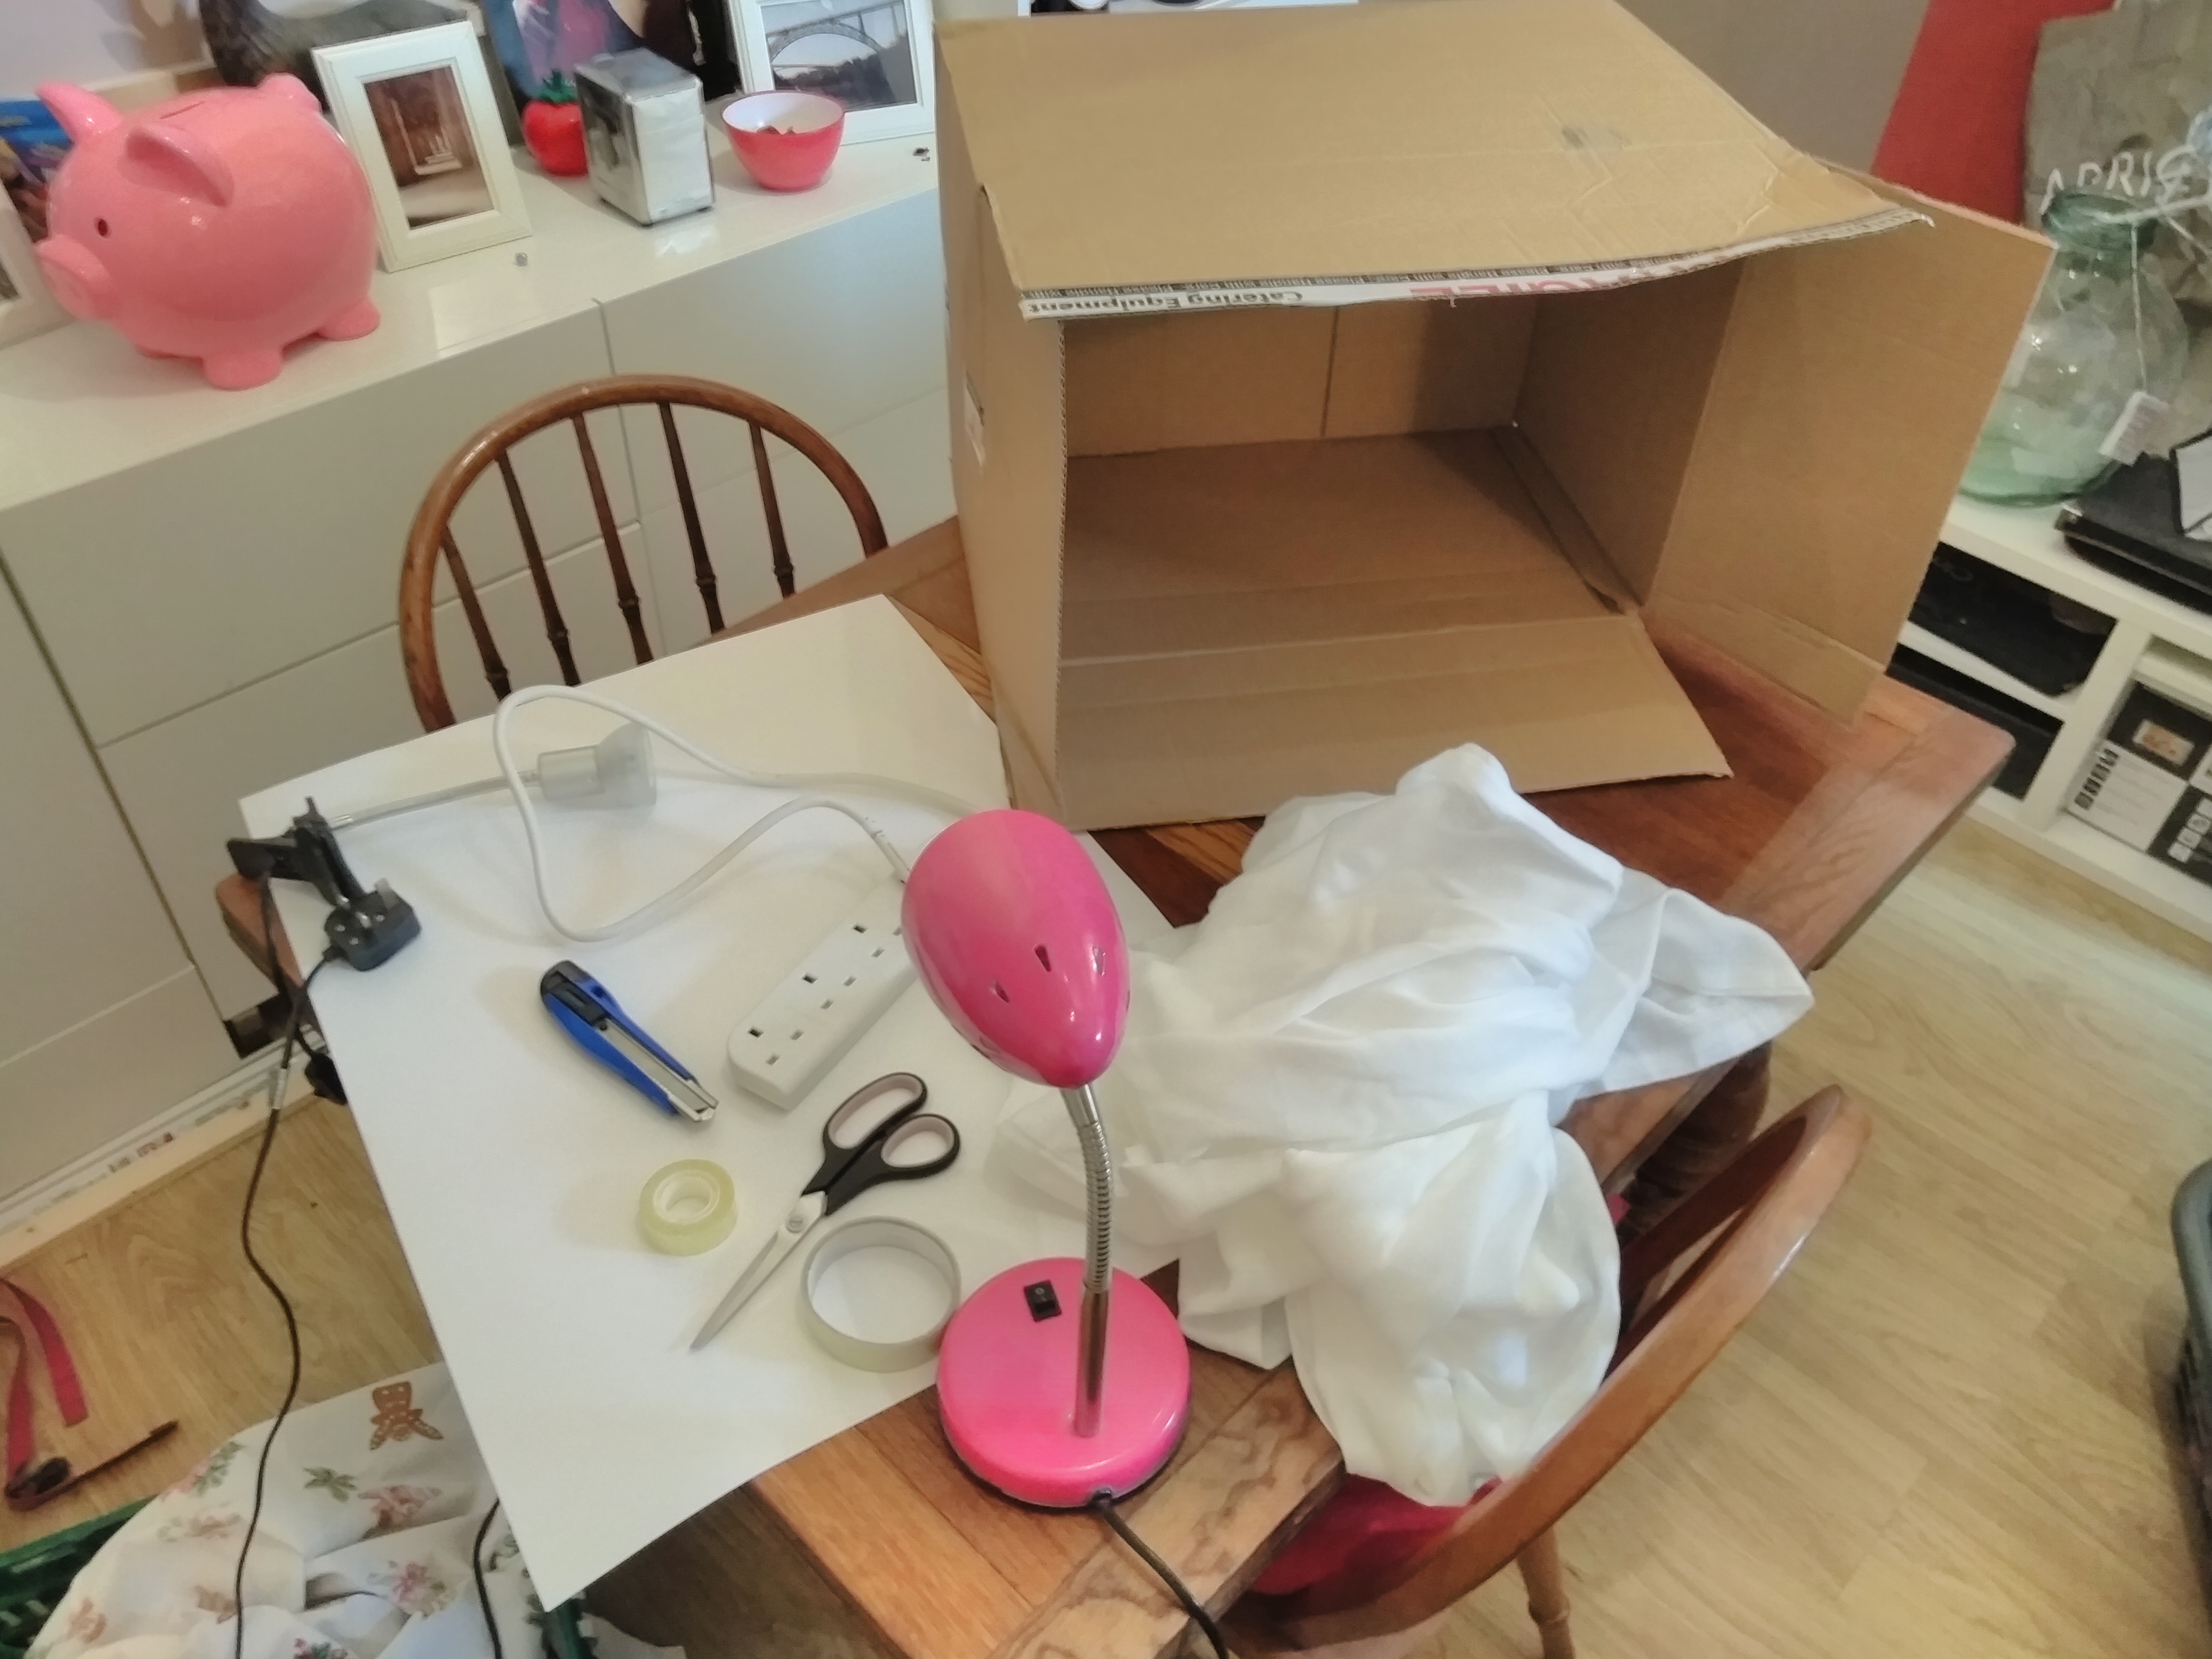
The first thing to do is cut out the sides of the box like so, make sure your fabric is wider than the holes you make.
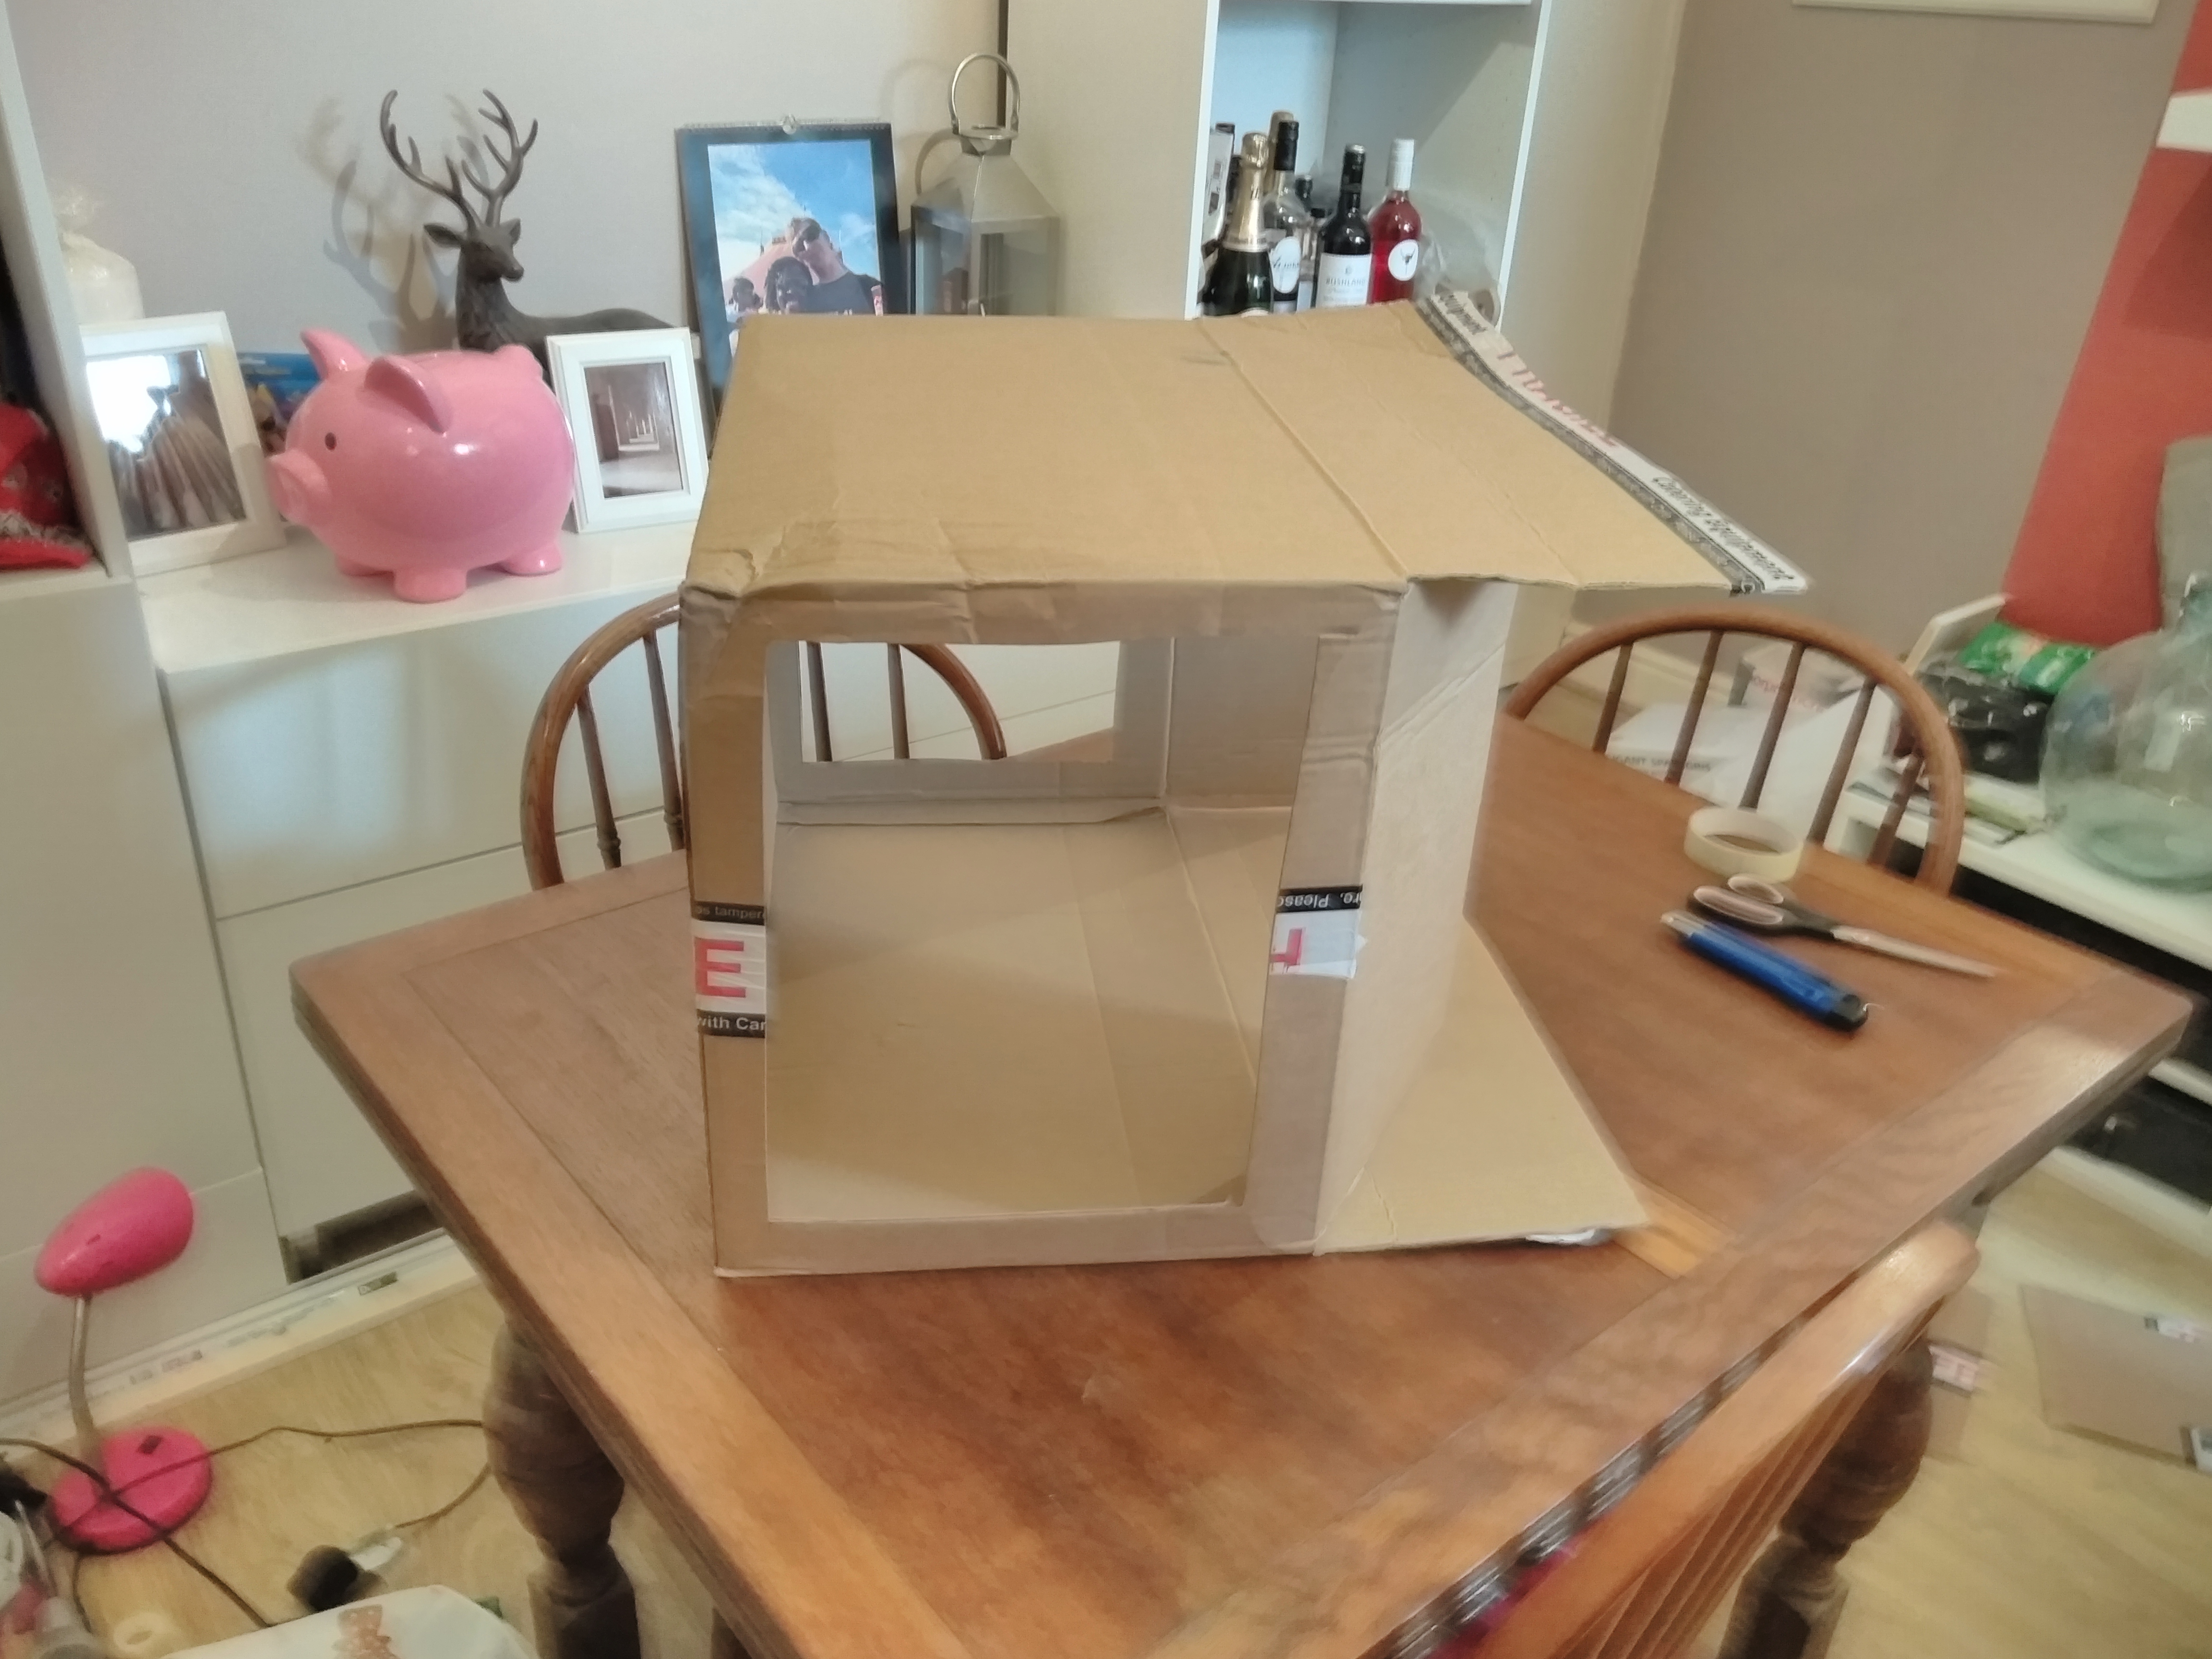
Once we have the hole on each side we can either drape the fabric over if we have enough or tape squares on each side.
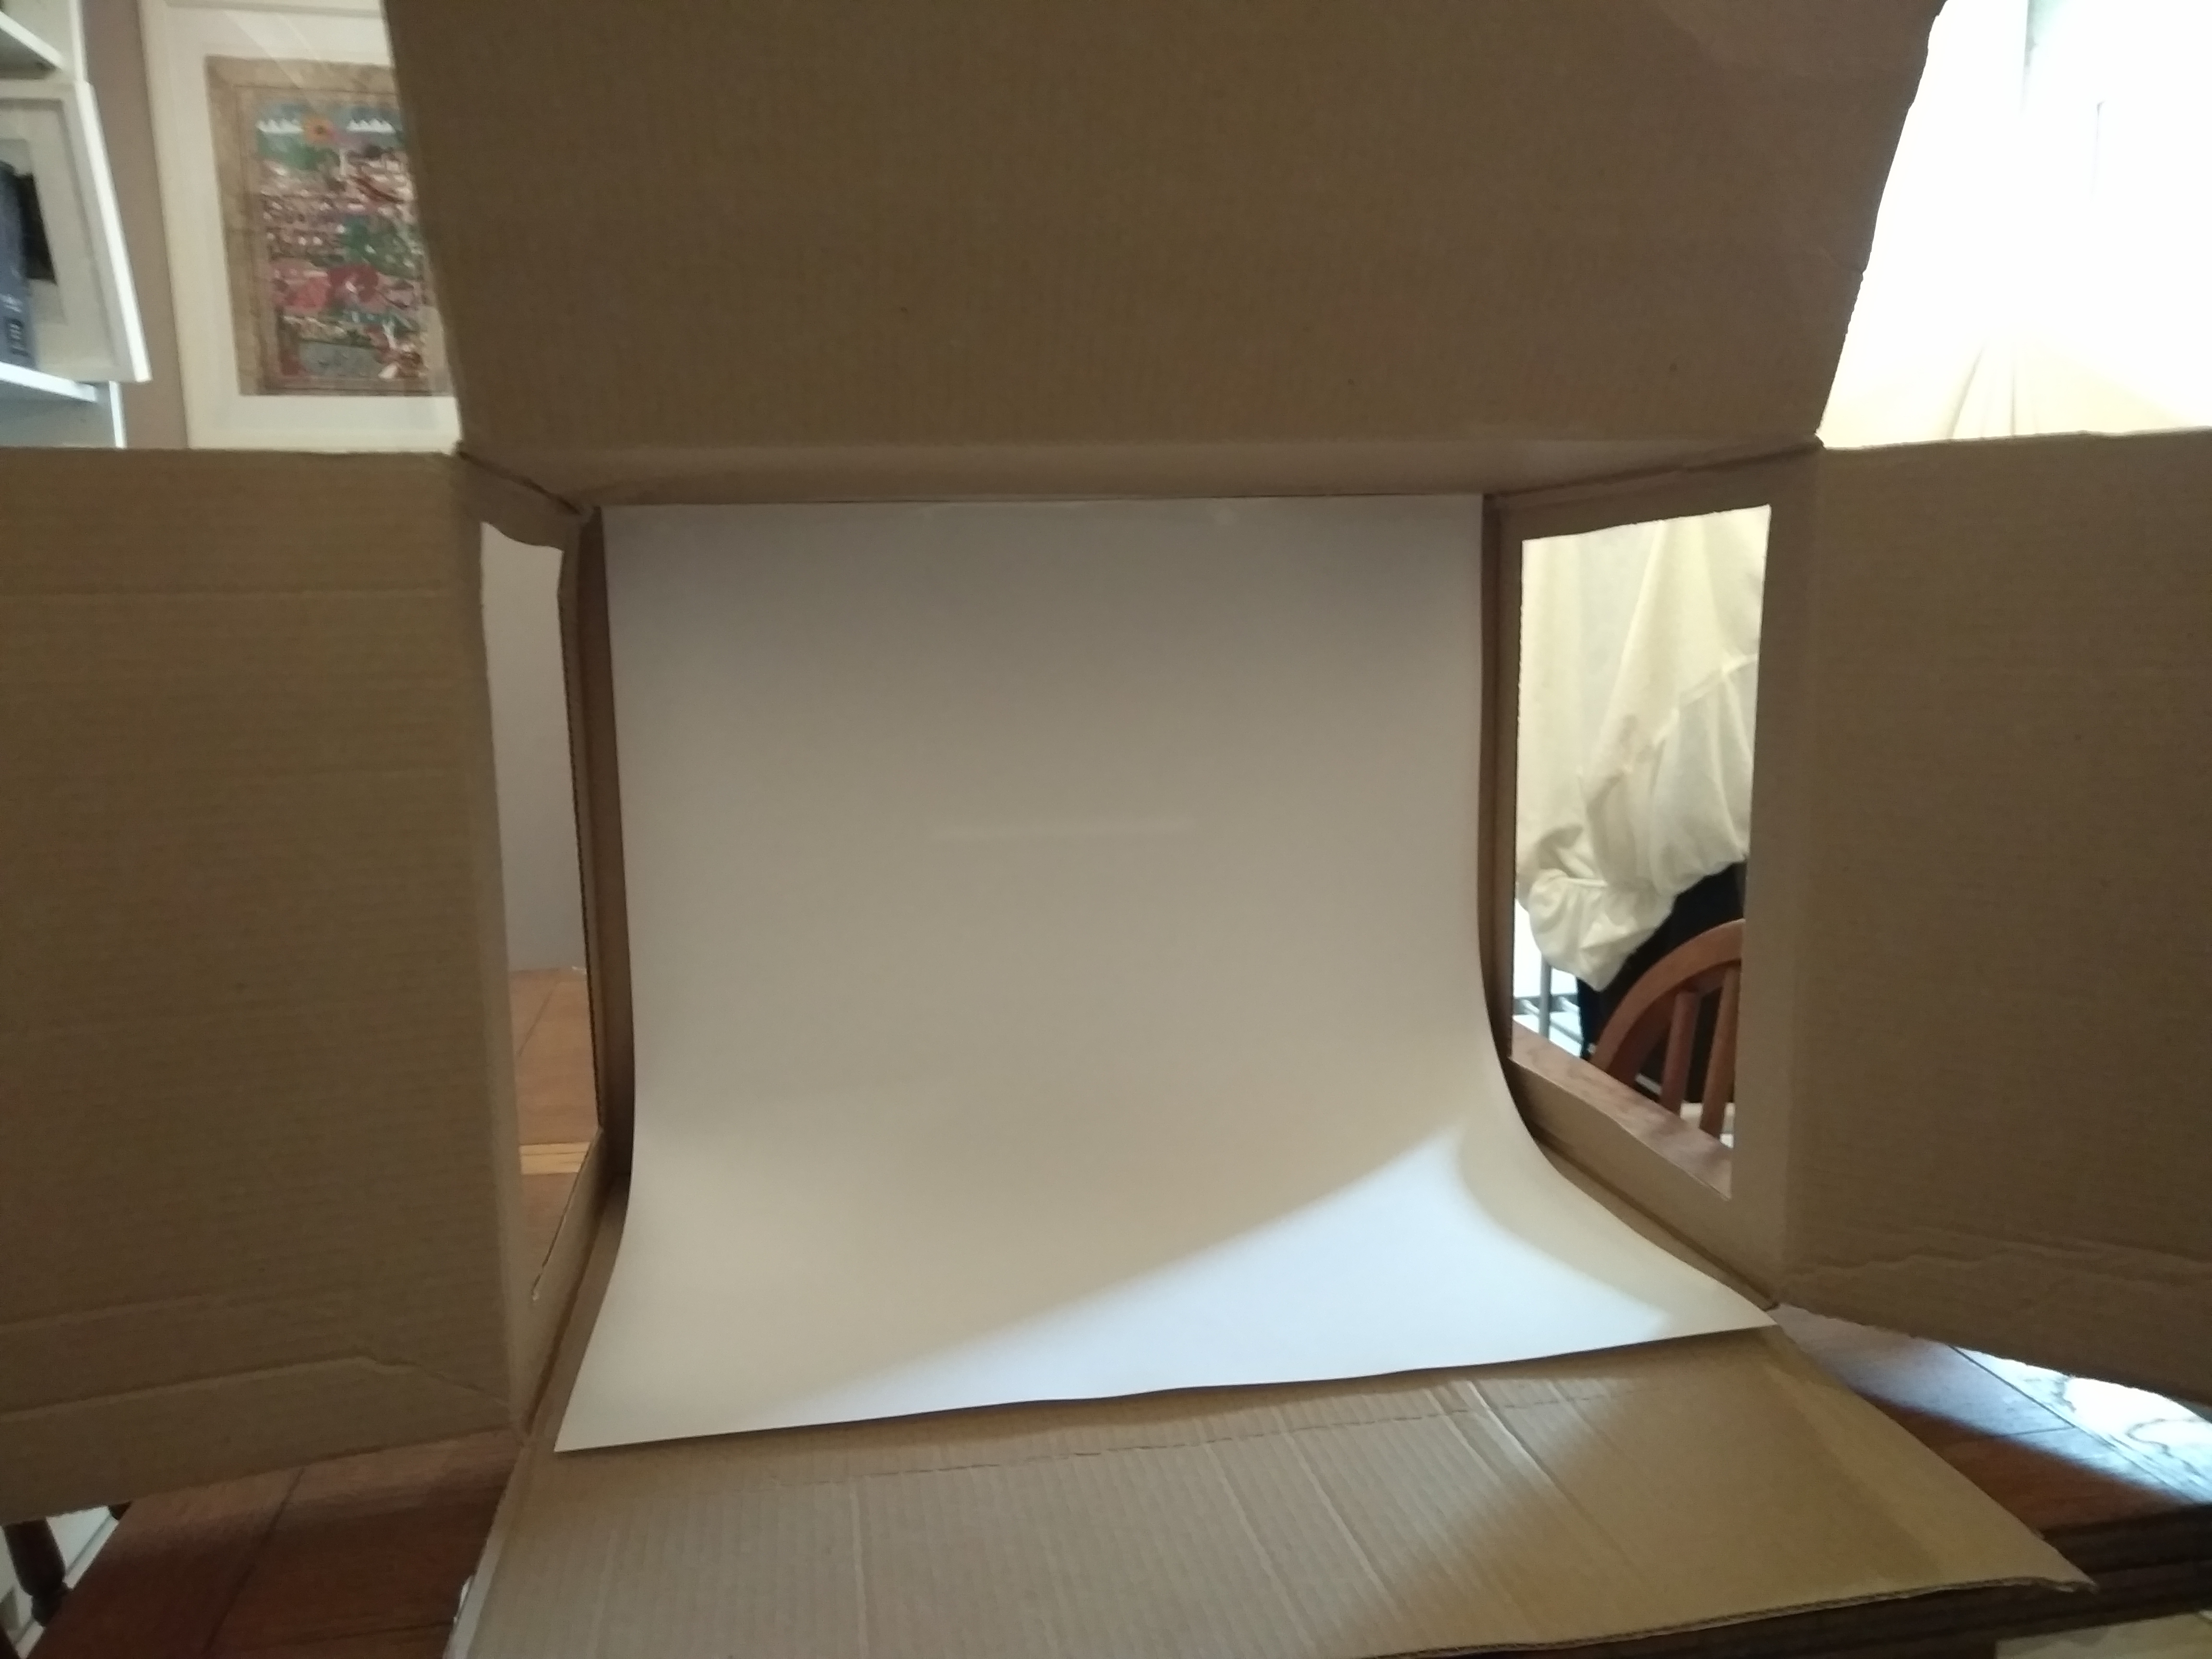
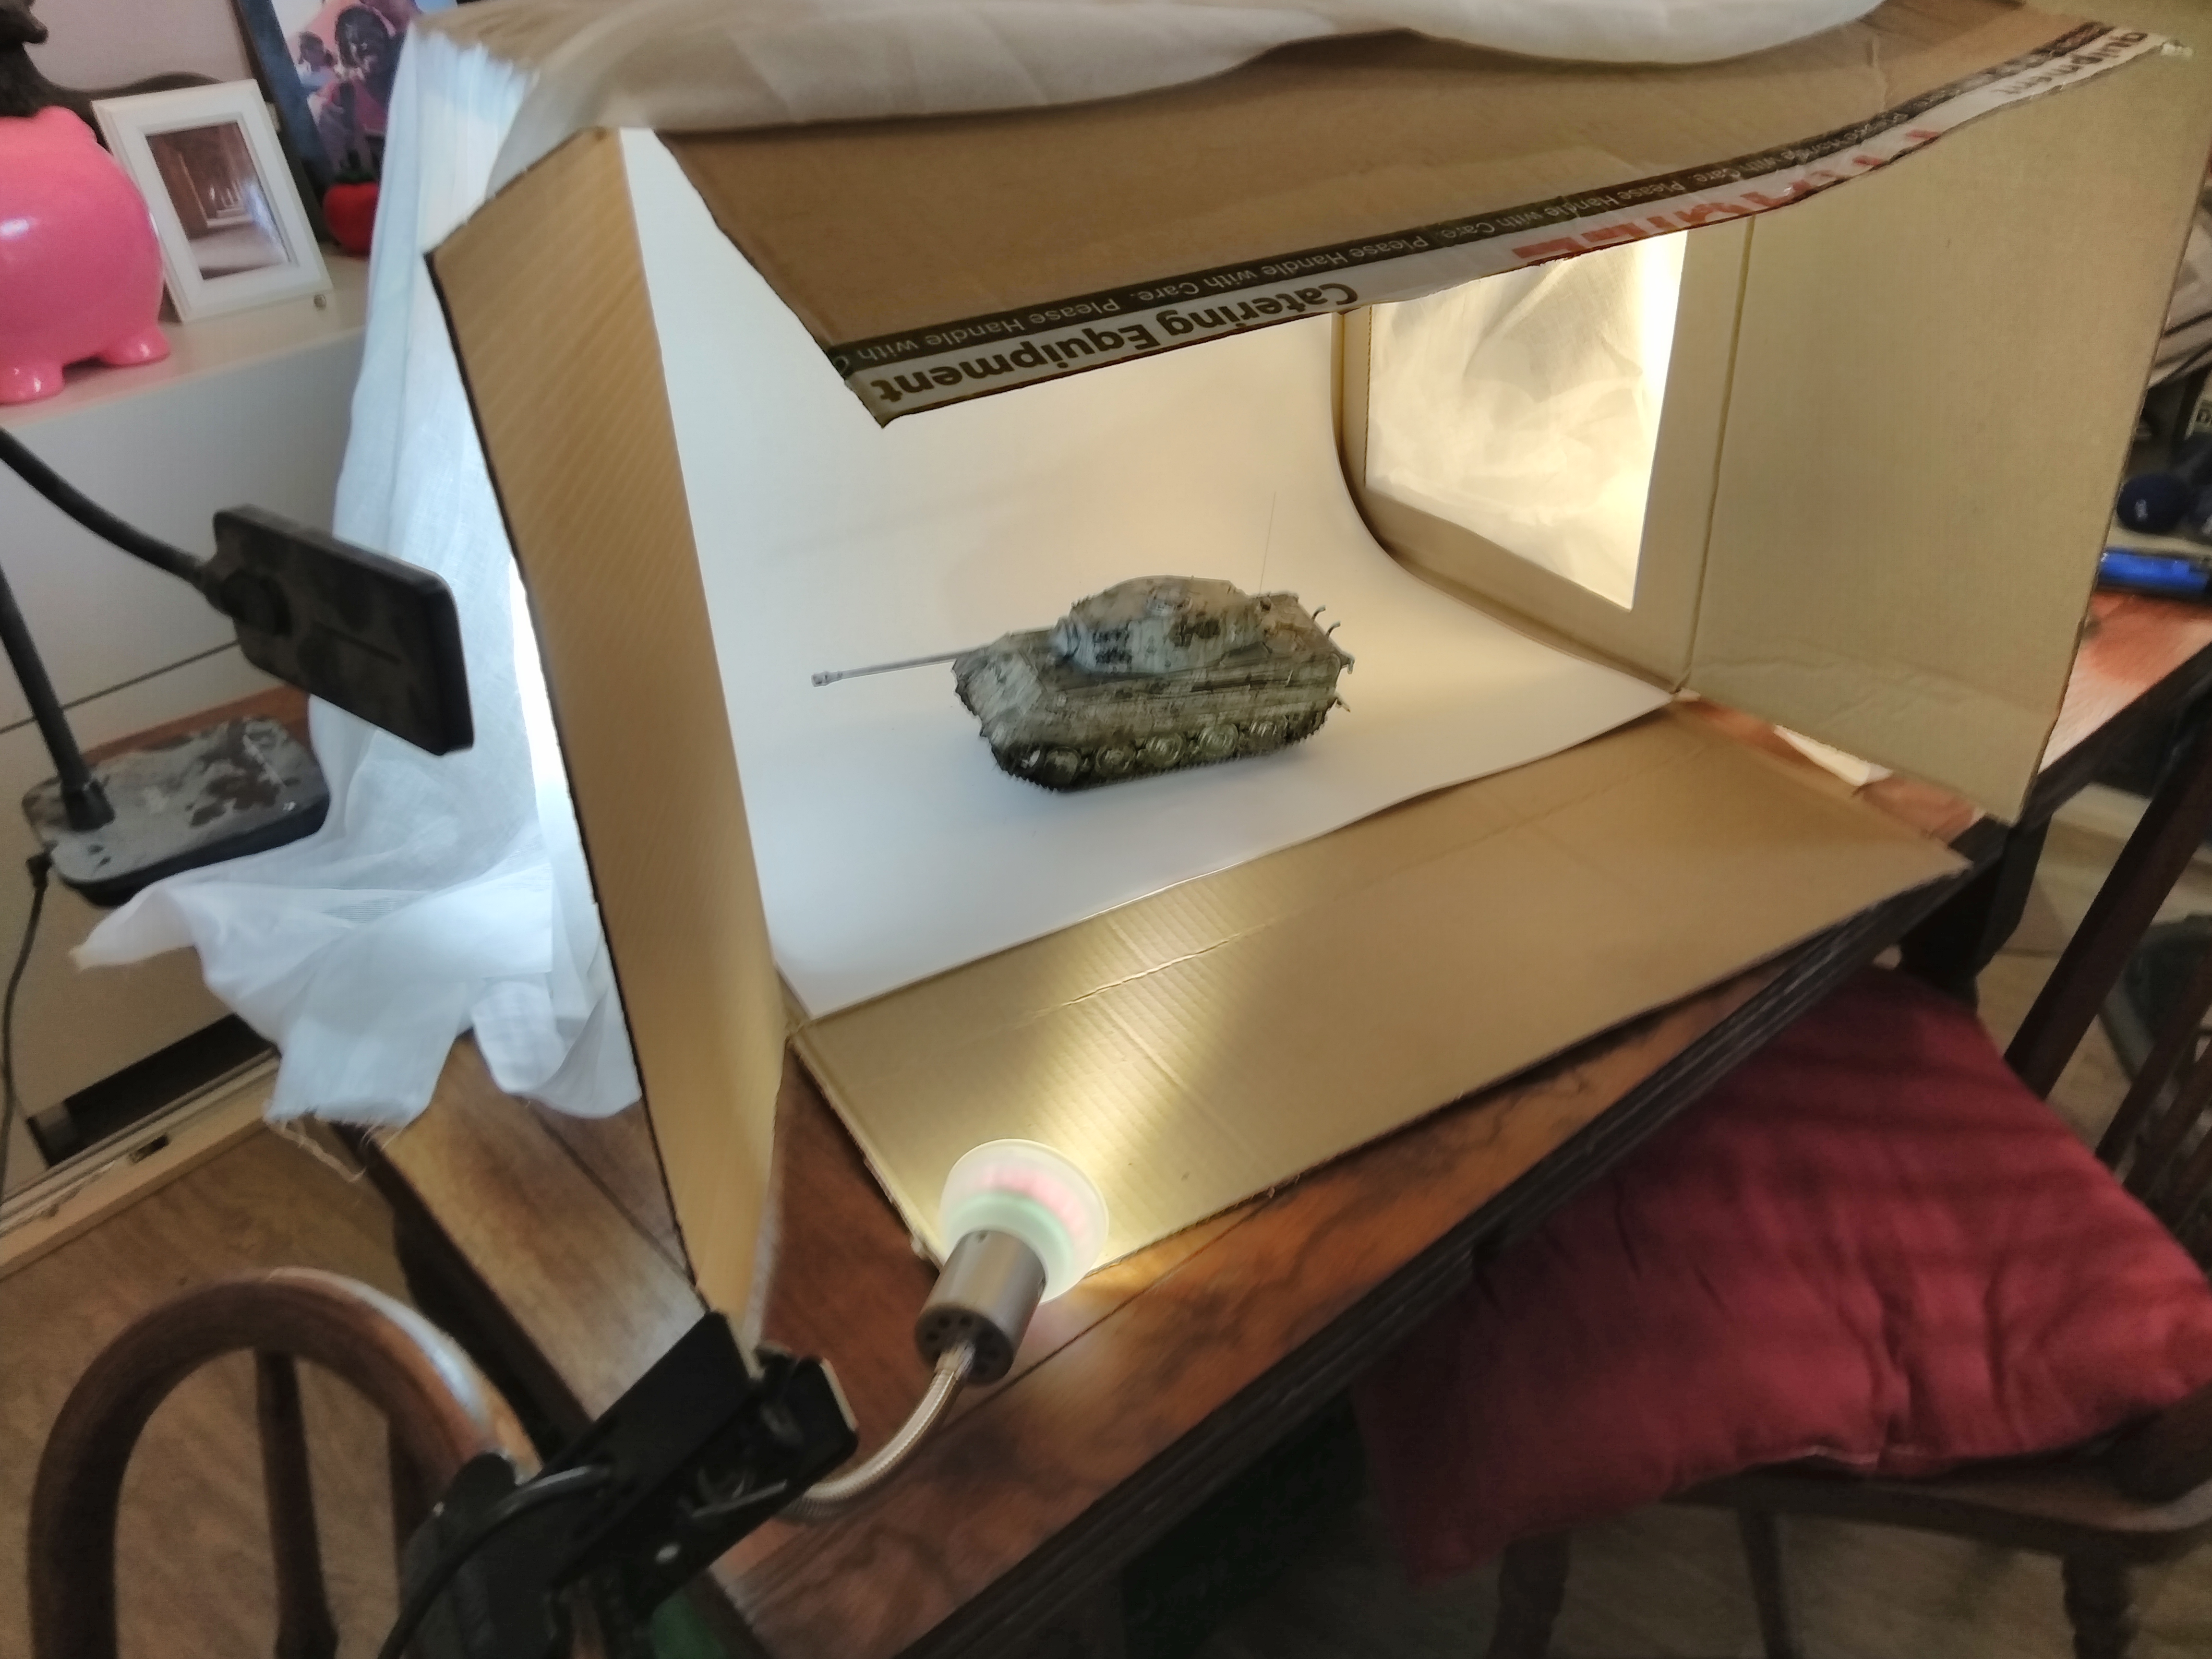
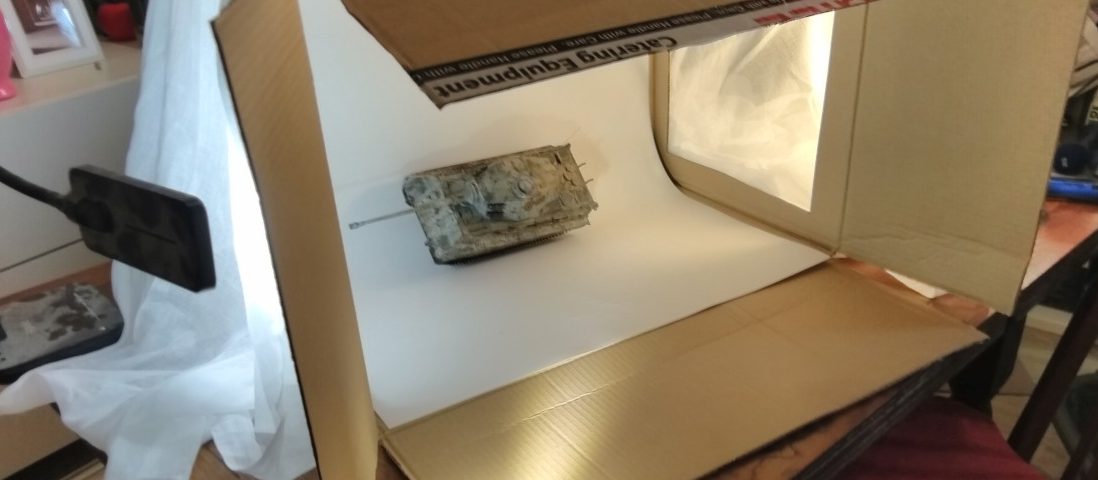
The last thing is our piece of white card, we cut that to the correct width and tape it to the back of the inside of the box, letting it curve onto the base.
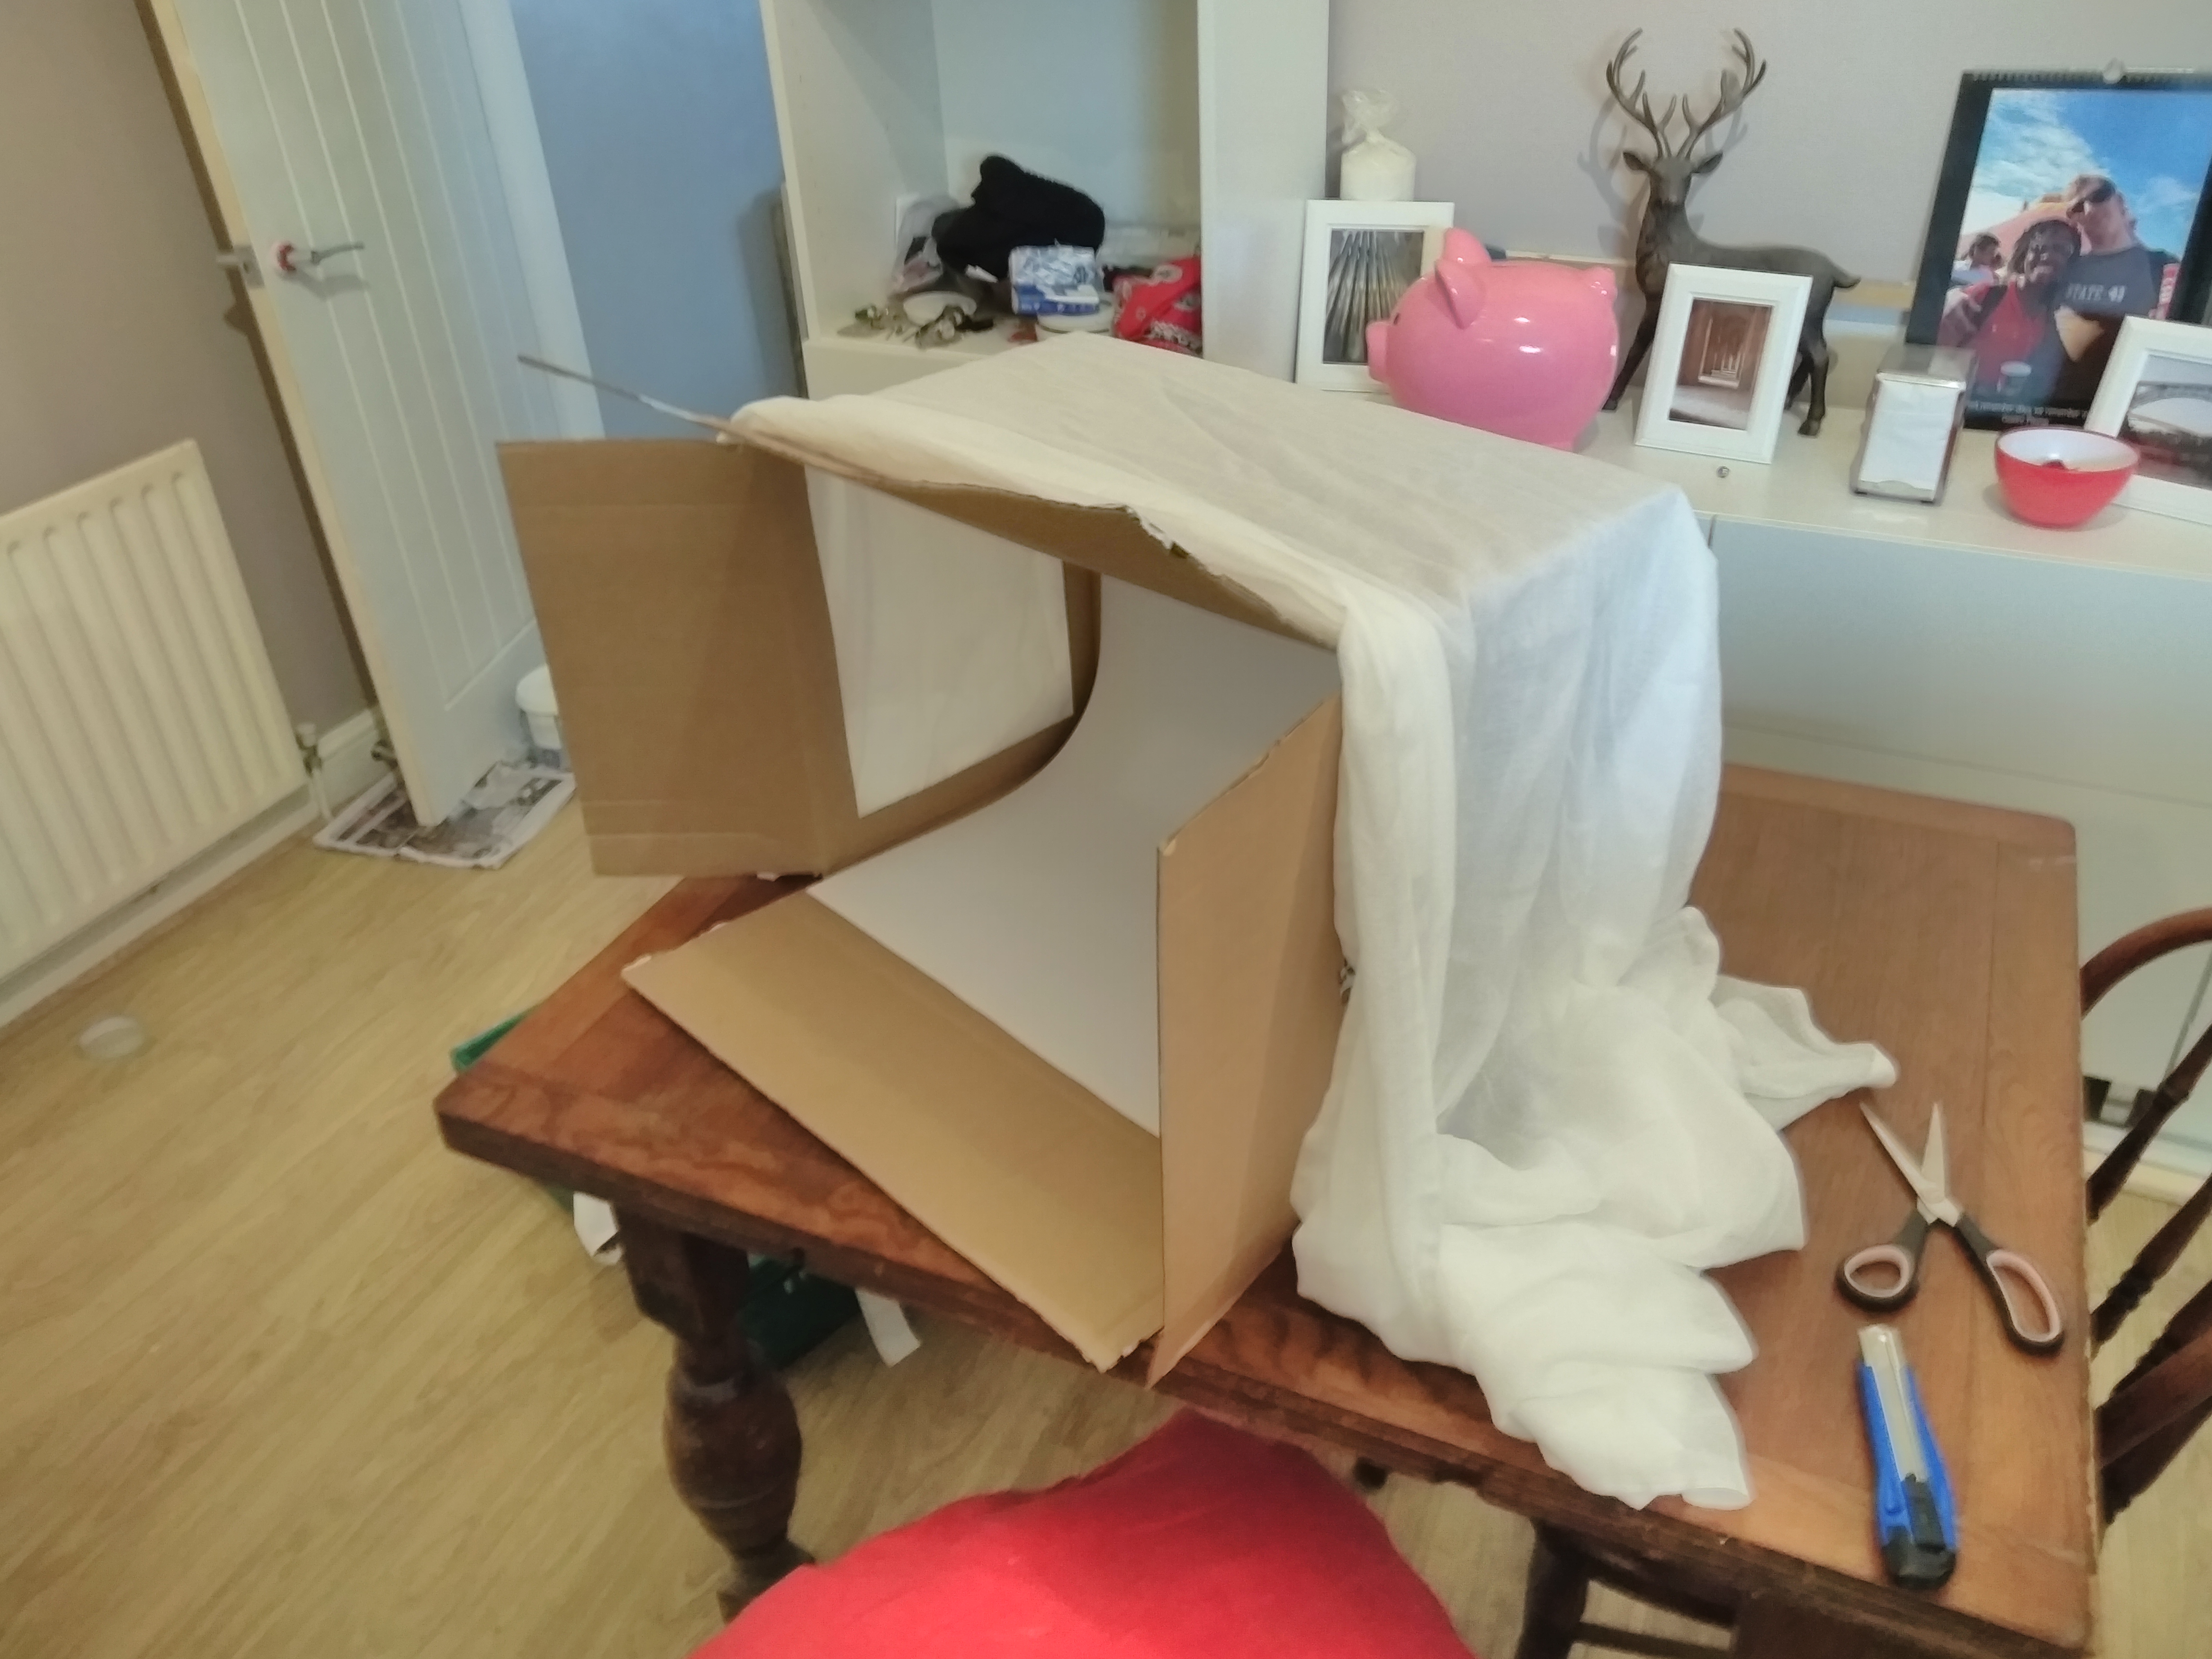
Next, we put a light source on each side and pow our light box is made. All this has cost me £1.50 the price of the white pastel paper. The rest I managed to get for free or already had. I want to have a look and see how an LED strip would perform as a light source.
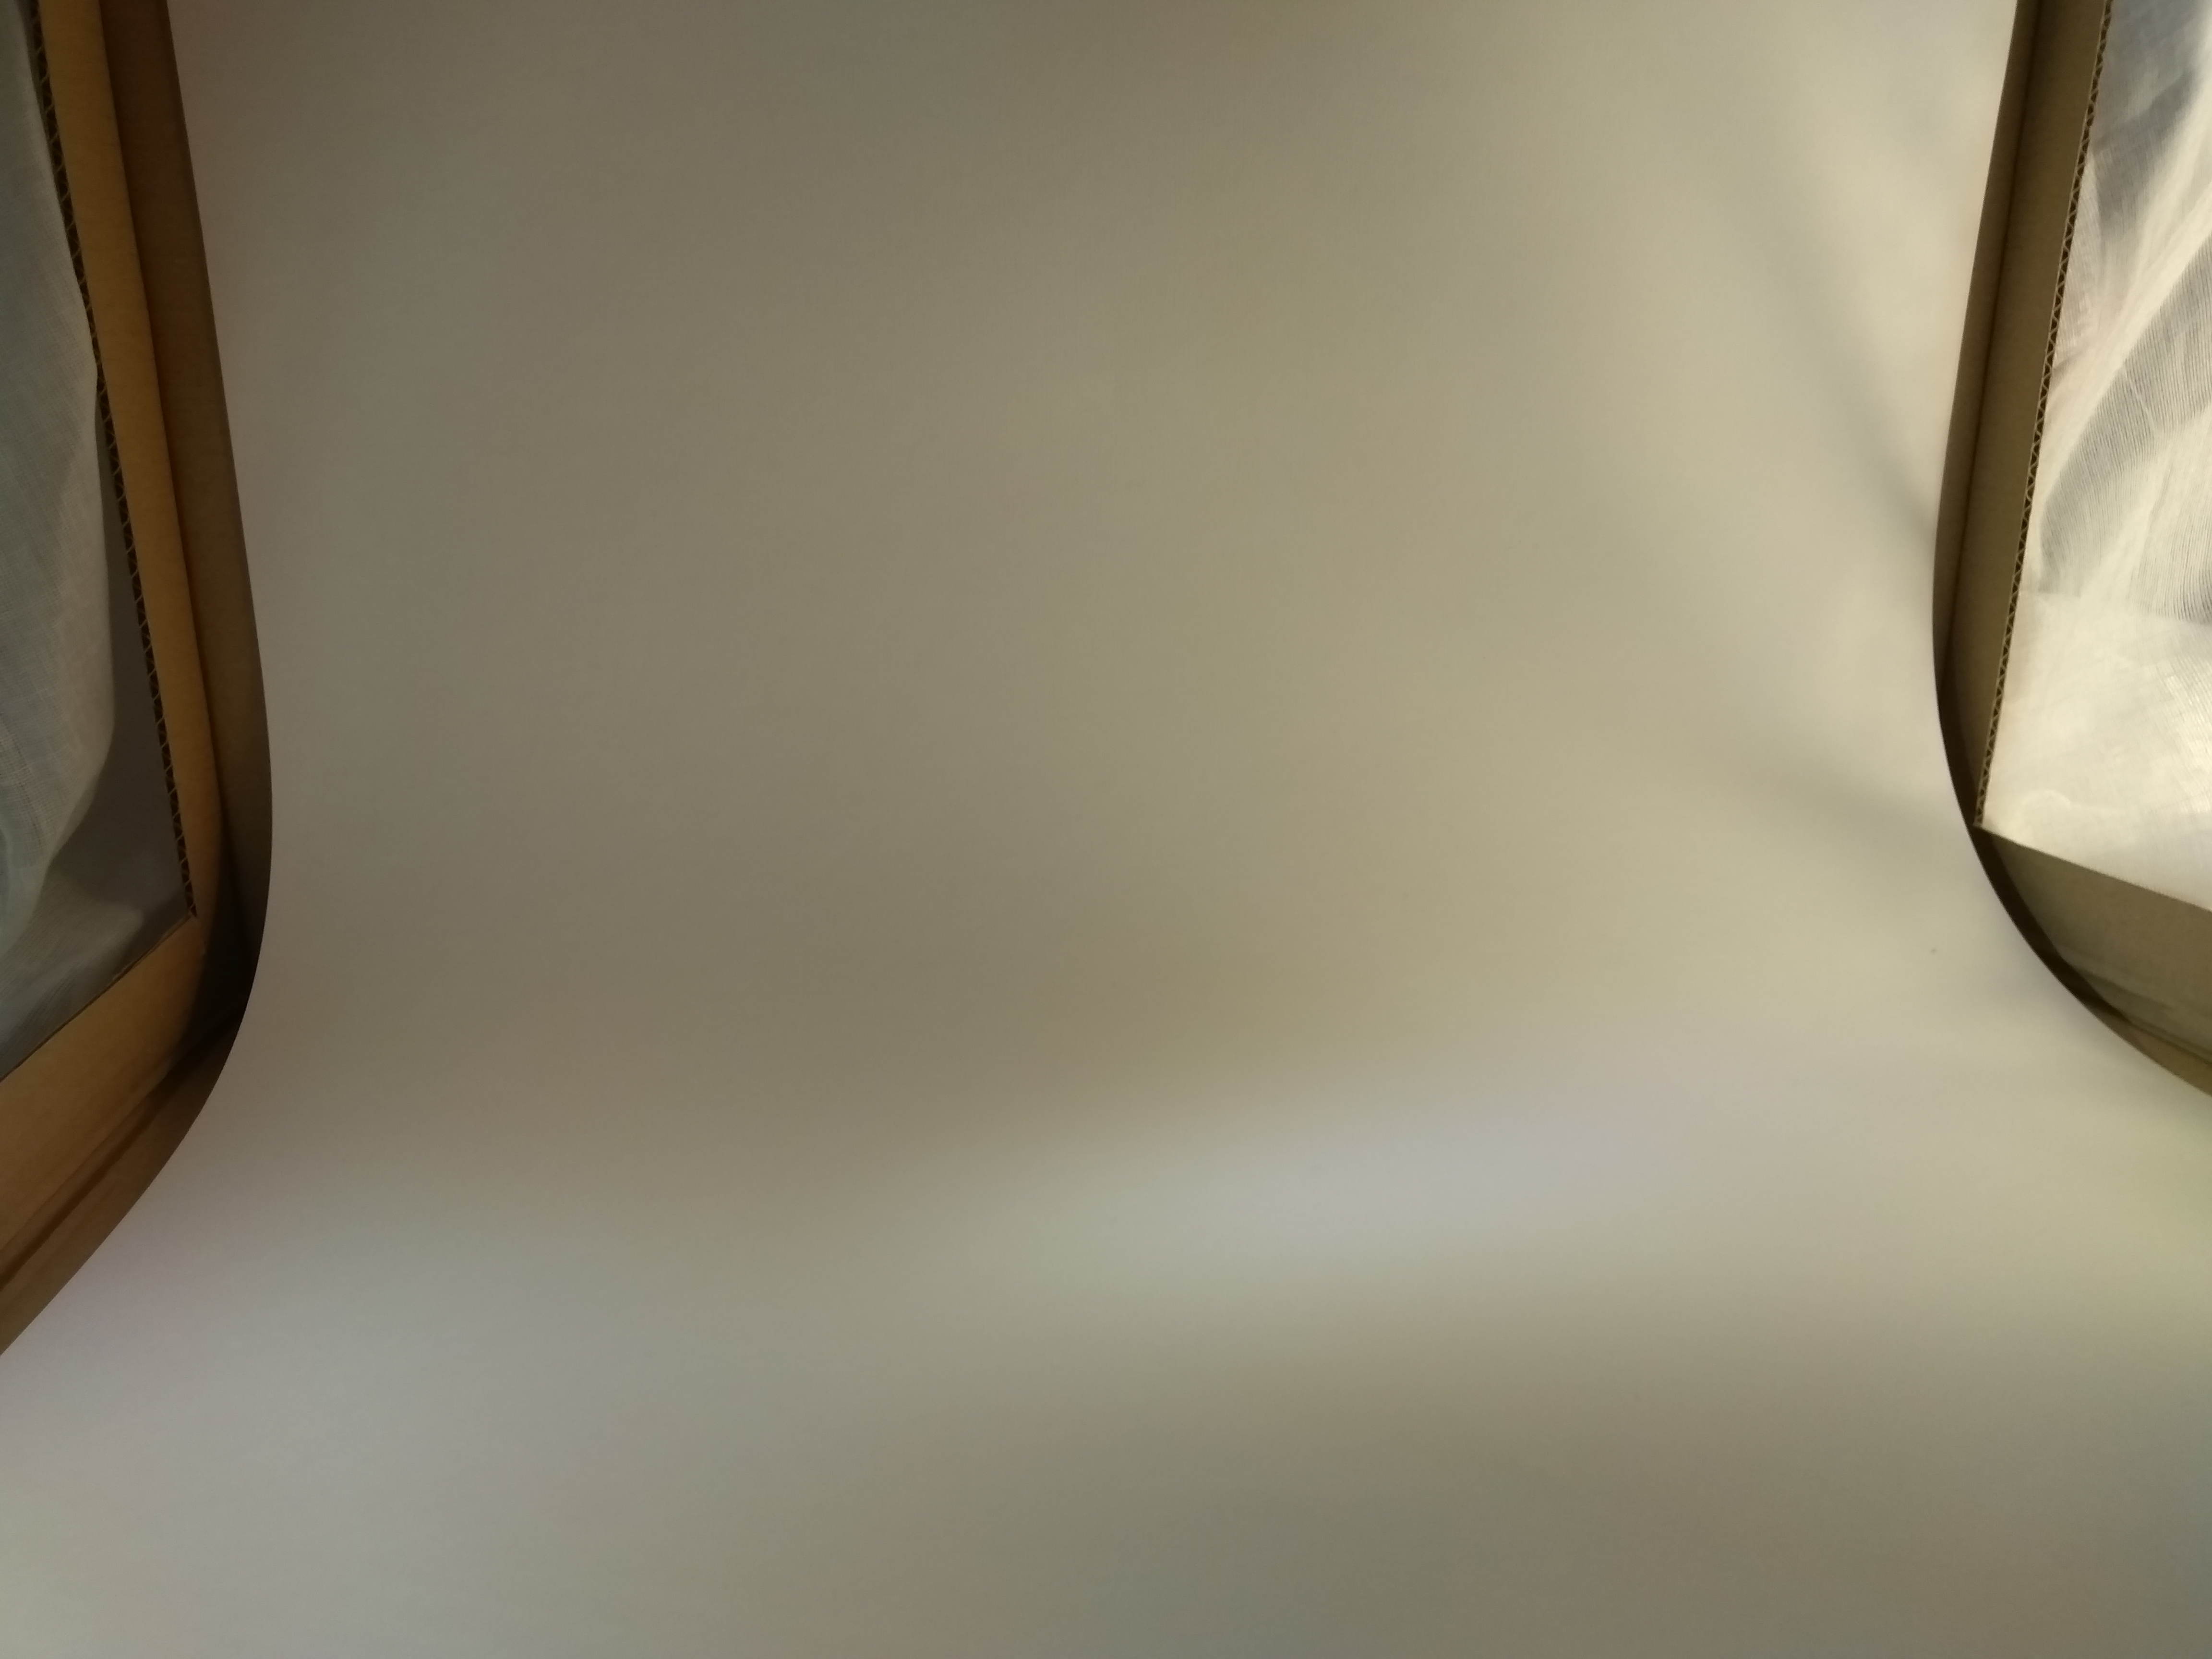
So here is the lightbox and here is one of the photos.
All in all, it has only cost me £1.50 for the piece of white pastel paper from a craft shop, I could have probably used a piece of wallpaper or lining paper will try that in future. The thing I have noticed is that on some of the pictures you can see some of the lines on the paper, this is my fault for being cheap and buying pastel paper and not spending the extra 50p to buy the white card. The end of the day it has cost next to nothing and took me under 10mins to put together. It is totally reusable and will do the job I need for the time being.
So here’s a test picture, straight away it looks good enough for my purposes.
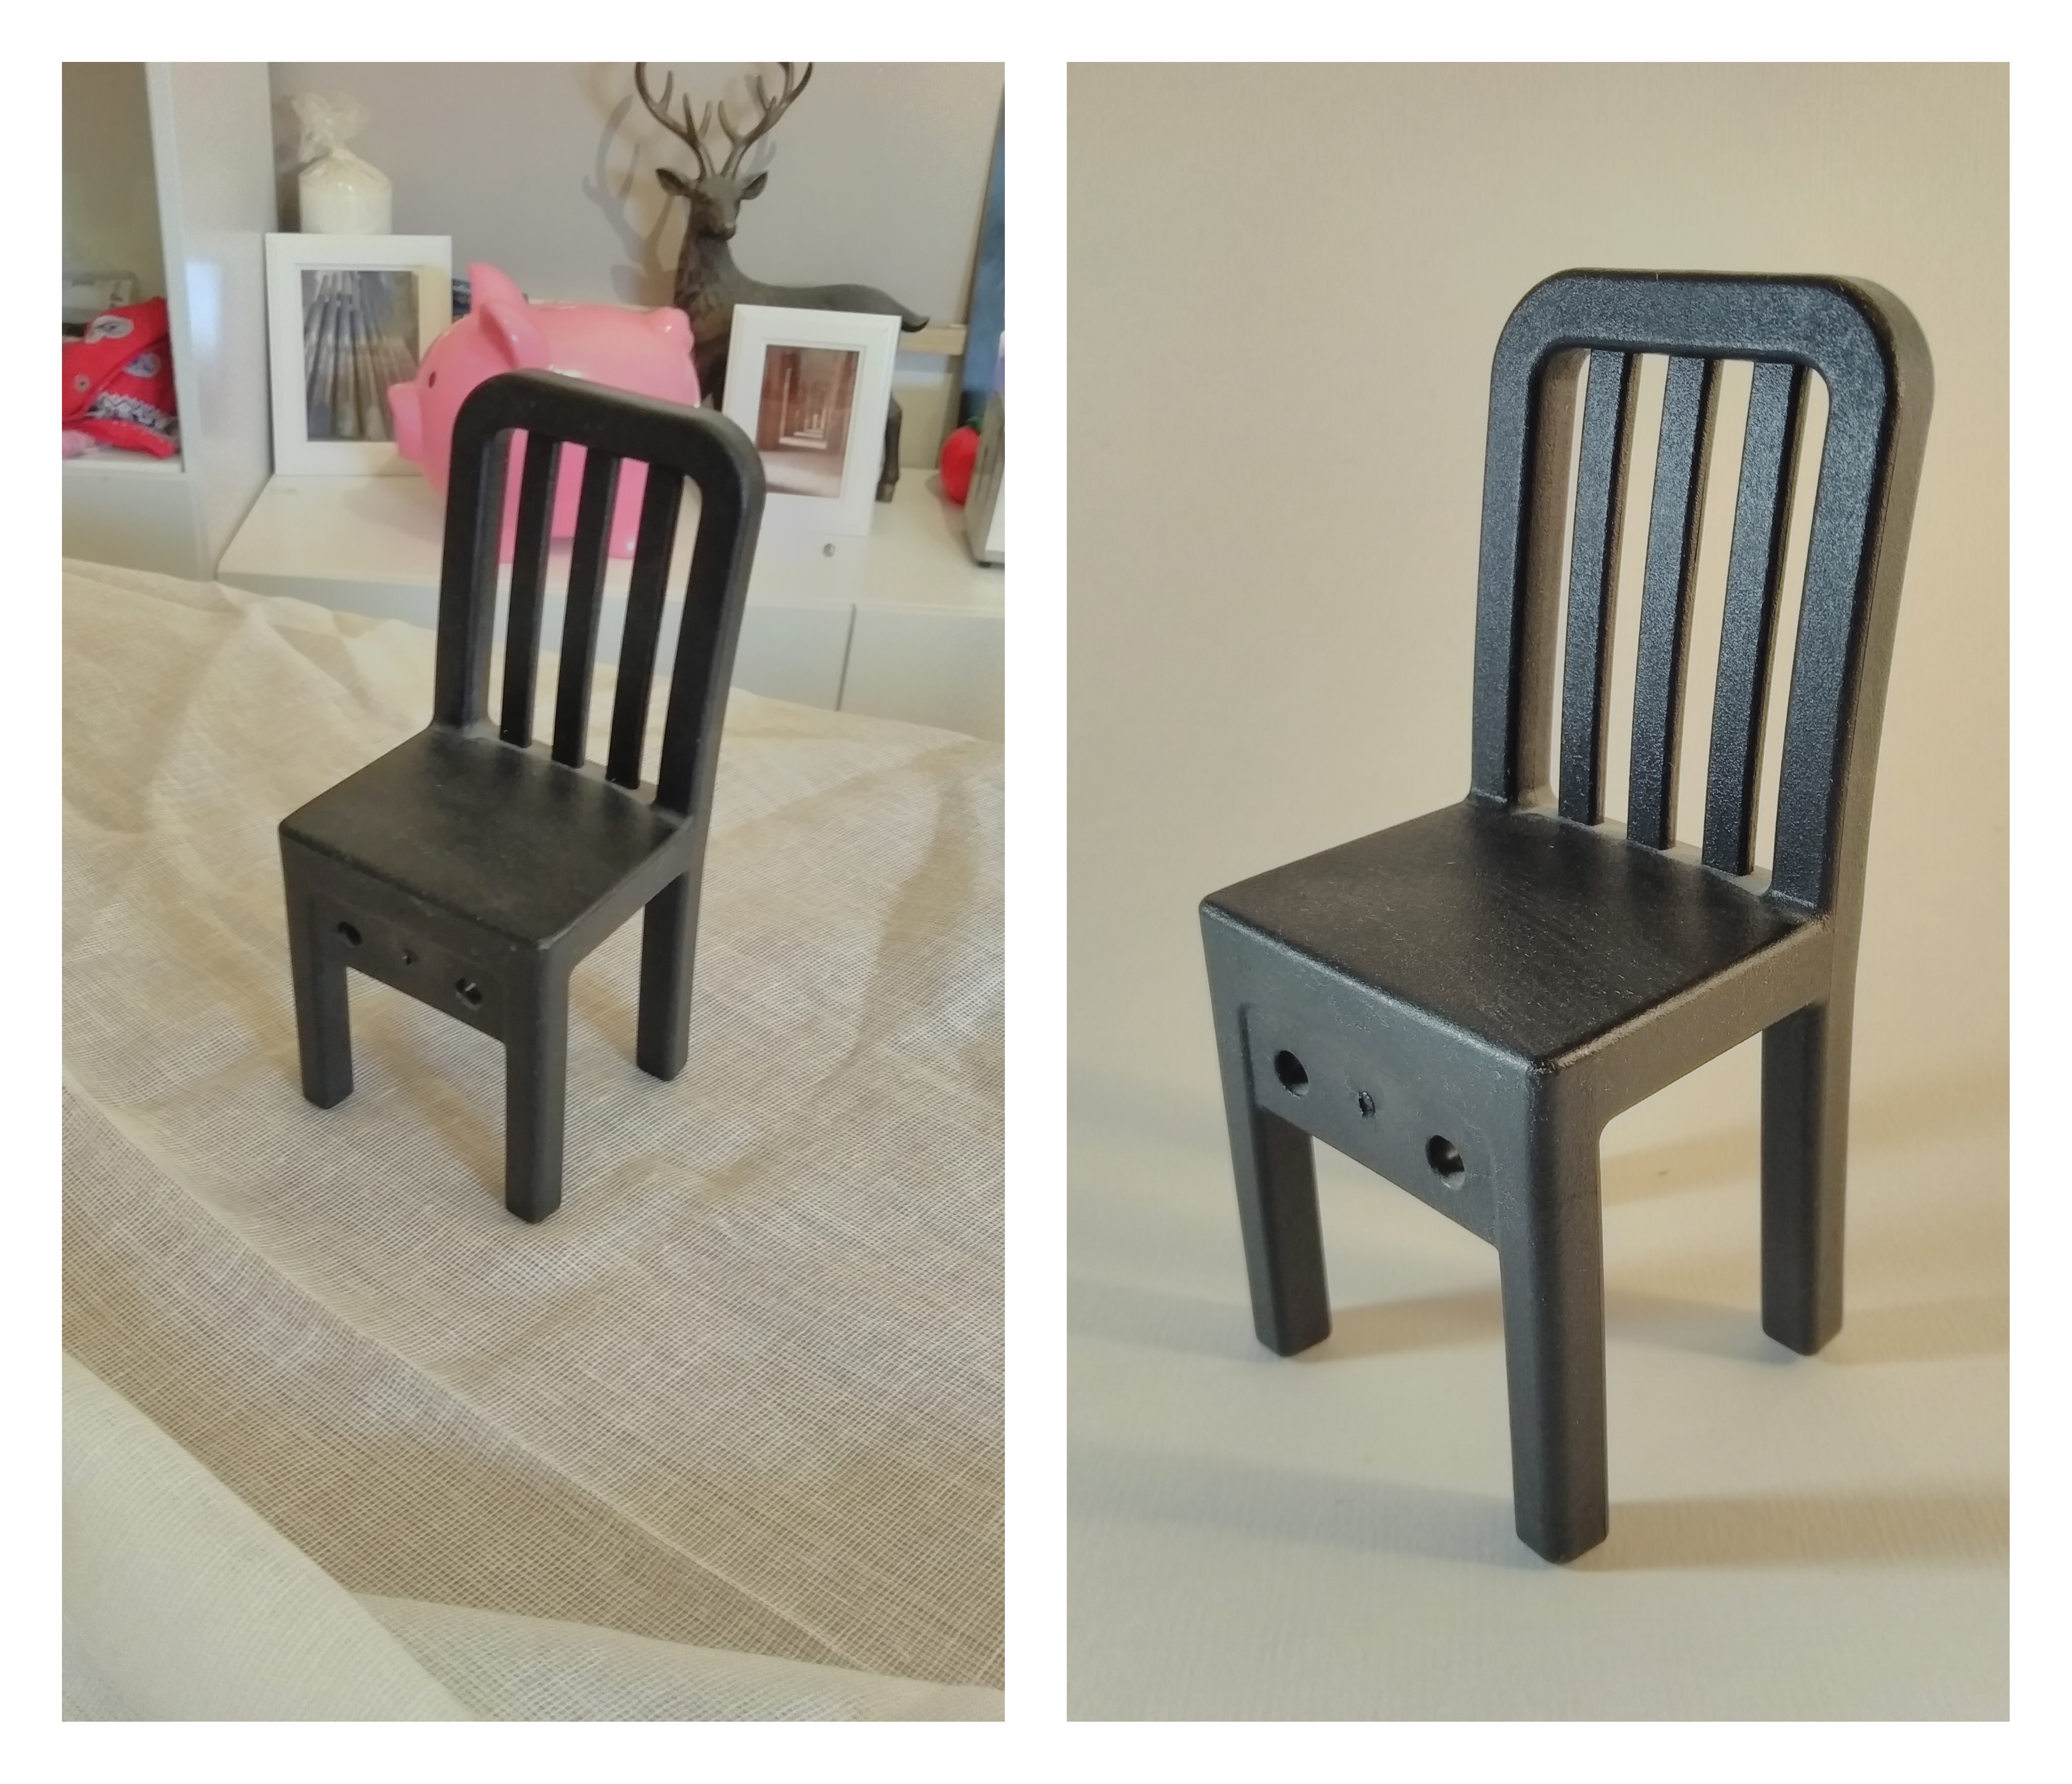
Here are a few of the King Tiger Tank. The first as is, the second with the flash on and finally with another light source added.

So with a little bit of testing, it seems like I have a setup that works. The great thing is it pulls apart and puts together in under 5 mins. So it really is a £5 5 min Light Box.